This layer works similar to Hotspots and allows you to add multiple CTAs within a single timestamp—each linked to specific product details..
You can add Product Hotspots at different coordinates within a single layer and drag them to any other coordinates of your choice, and customize them by adding icons and colour instead of using the default configuration to better match your brand or campaign.
Similar to the Hotspots layer, here as well you could customize the CTA by toggling, if you want to pause the video when the user hovers over any Product hotspot or not.
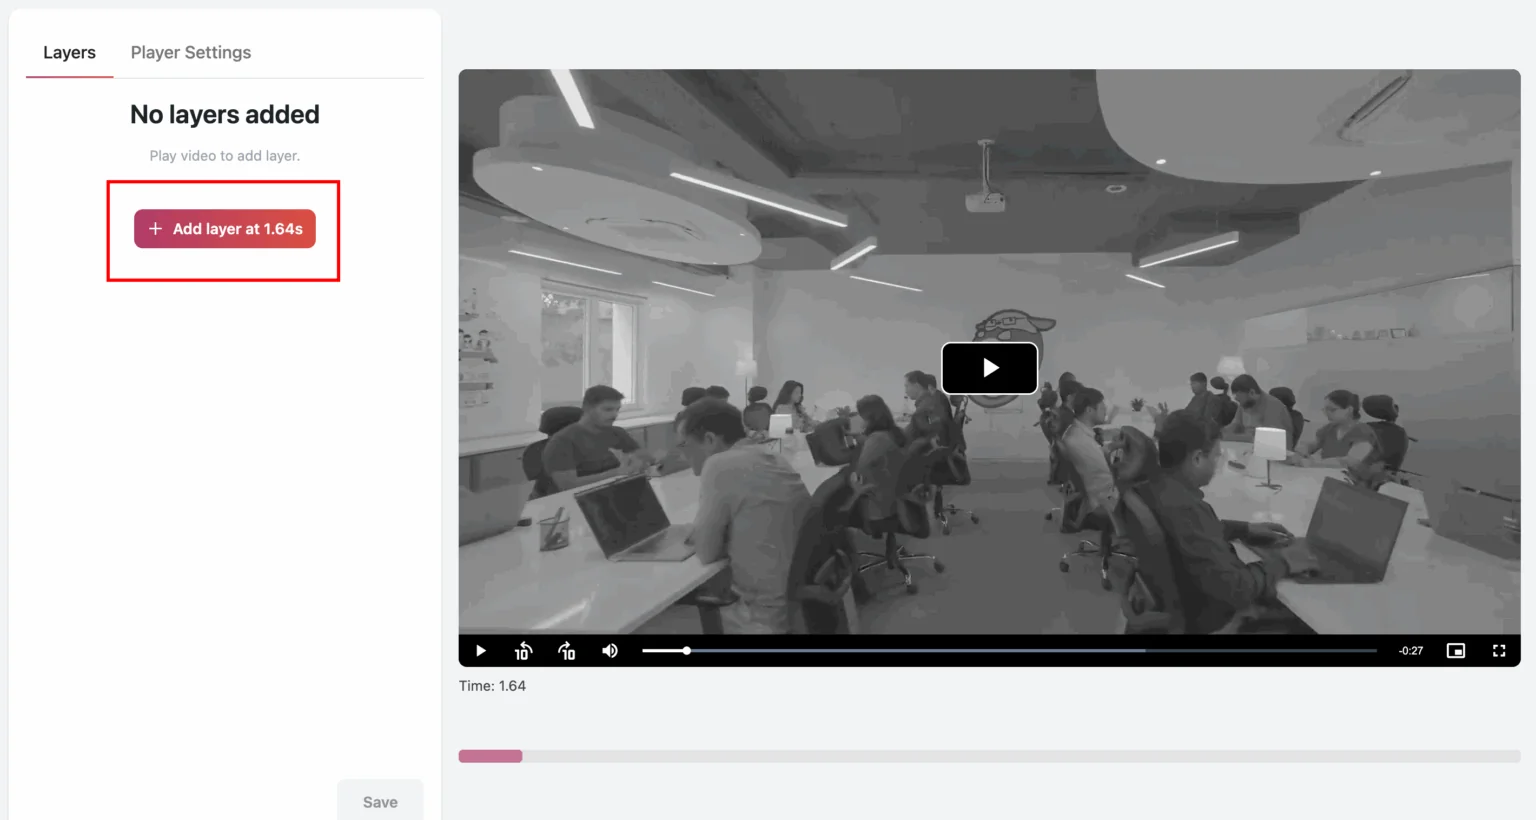
STEPS:
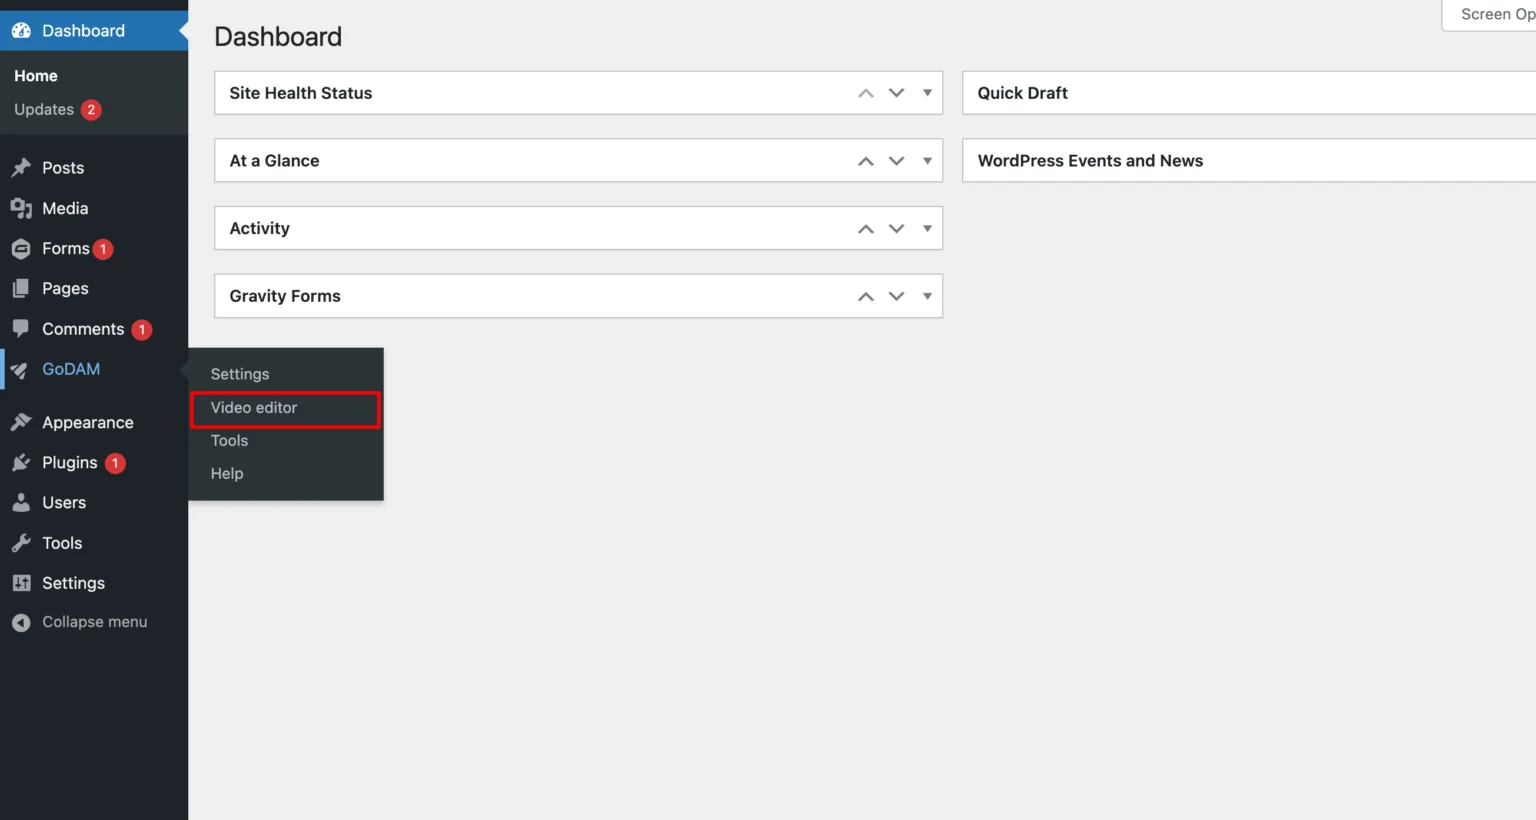
Step 1: Go to Video Editor under GoDAM menu
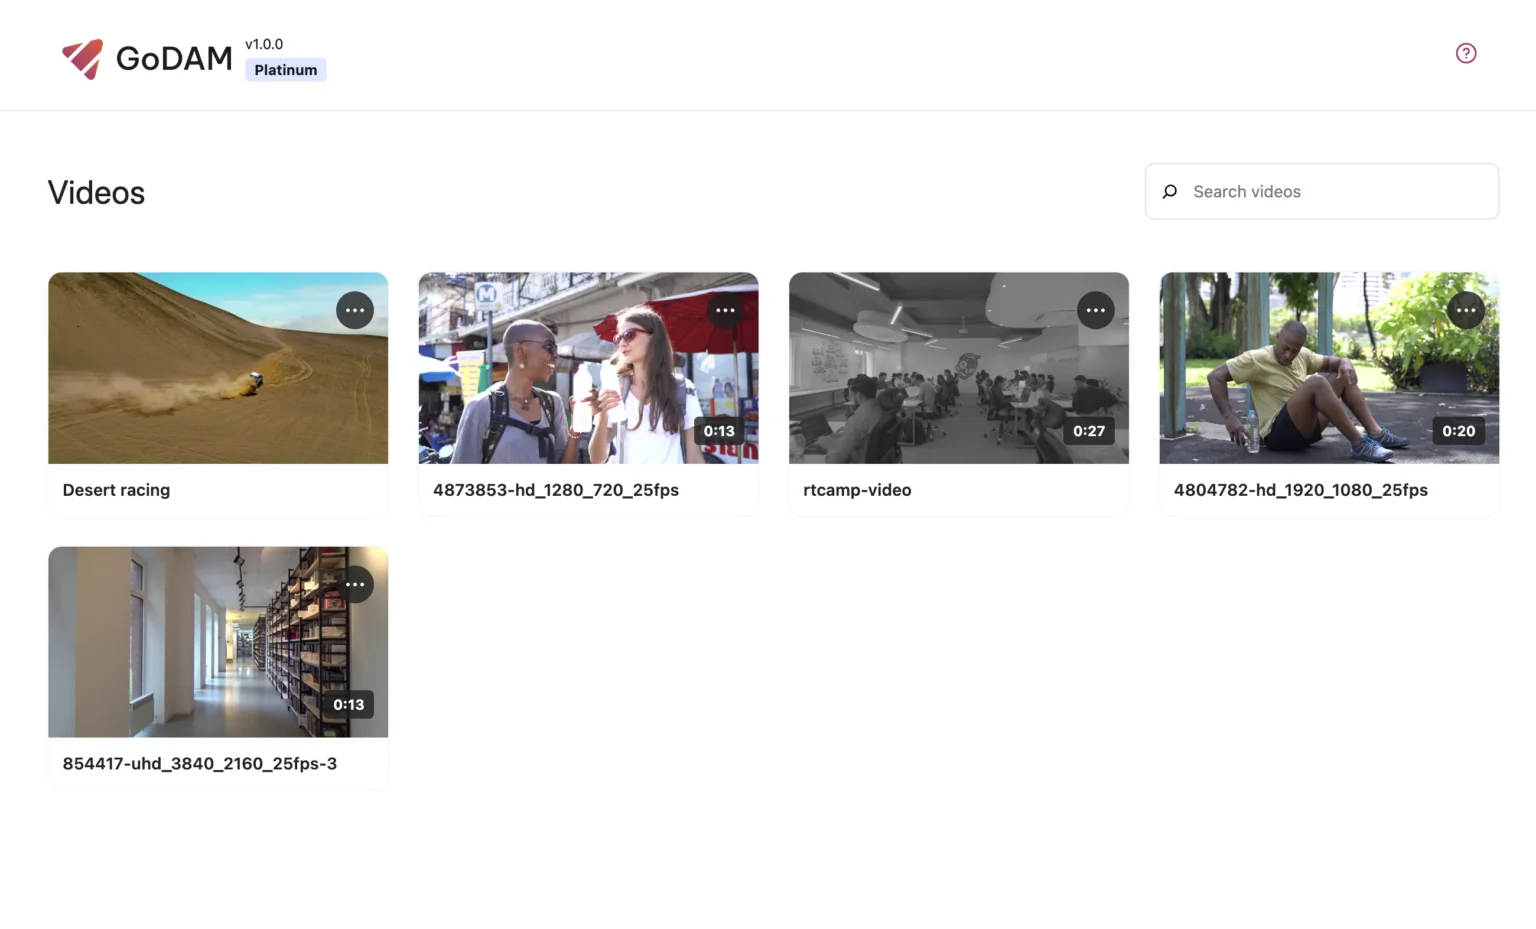
Step 2: Choose a video
Step 3: Go to the timestamp where you want to add the layer
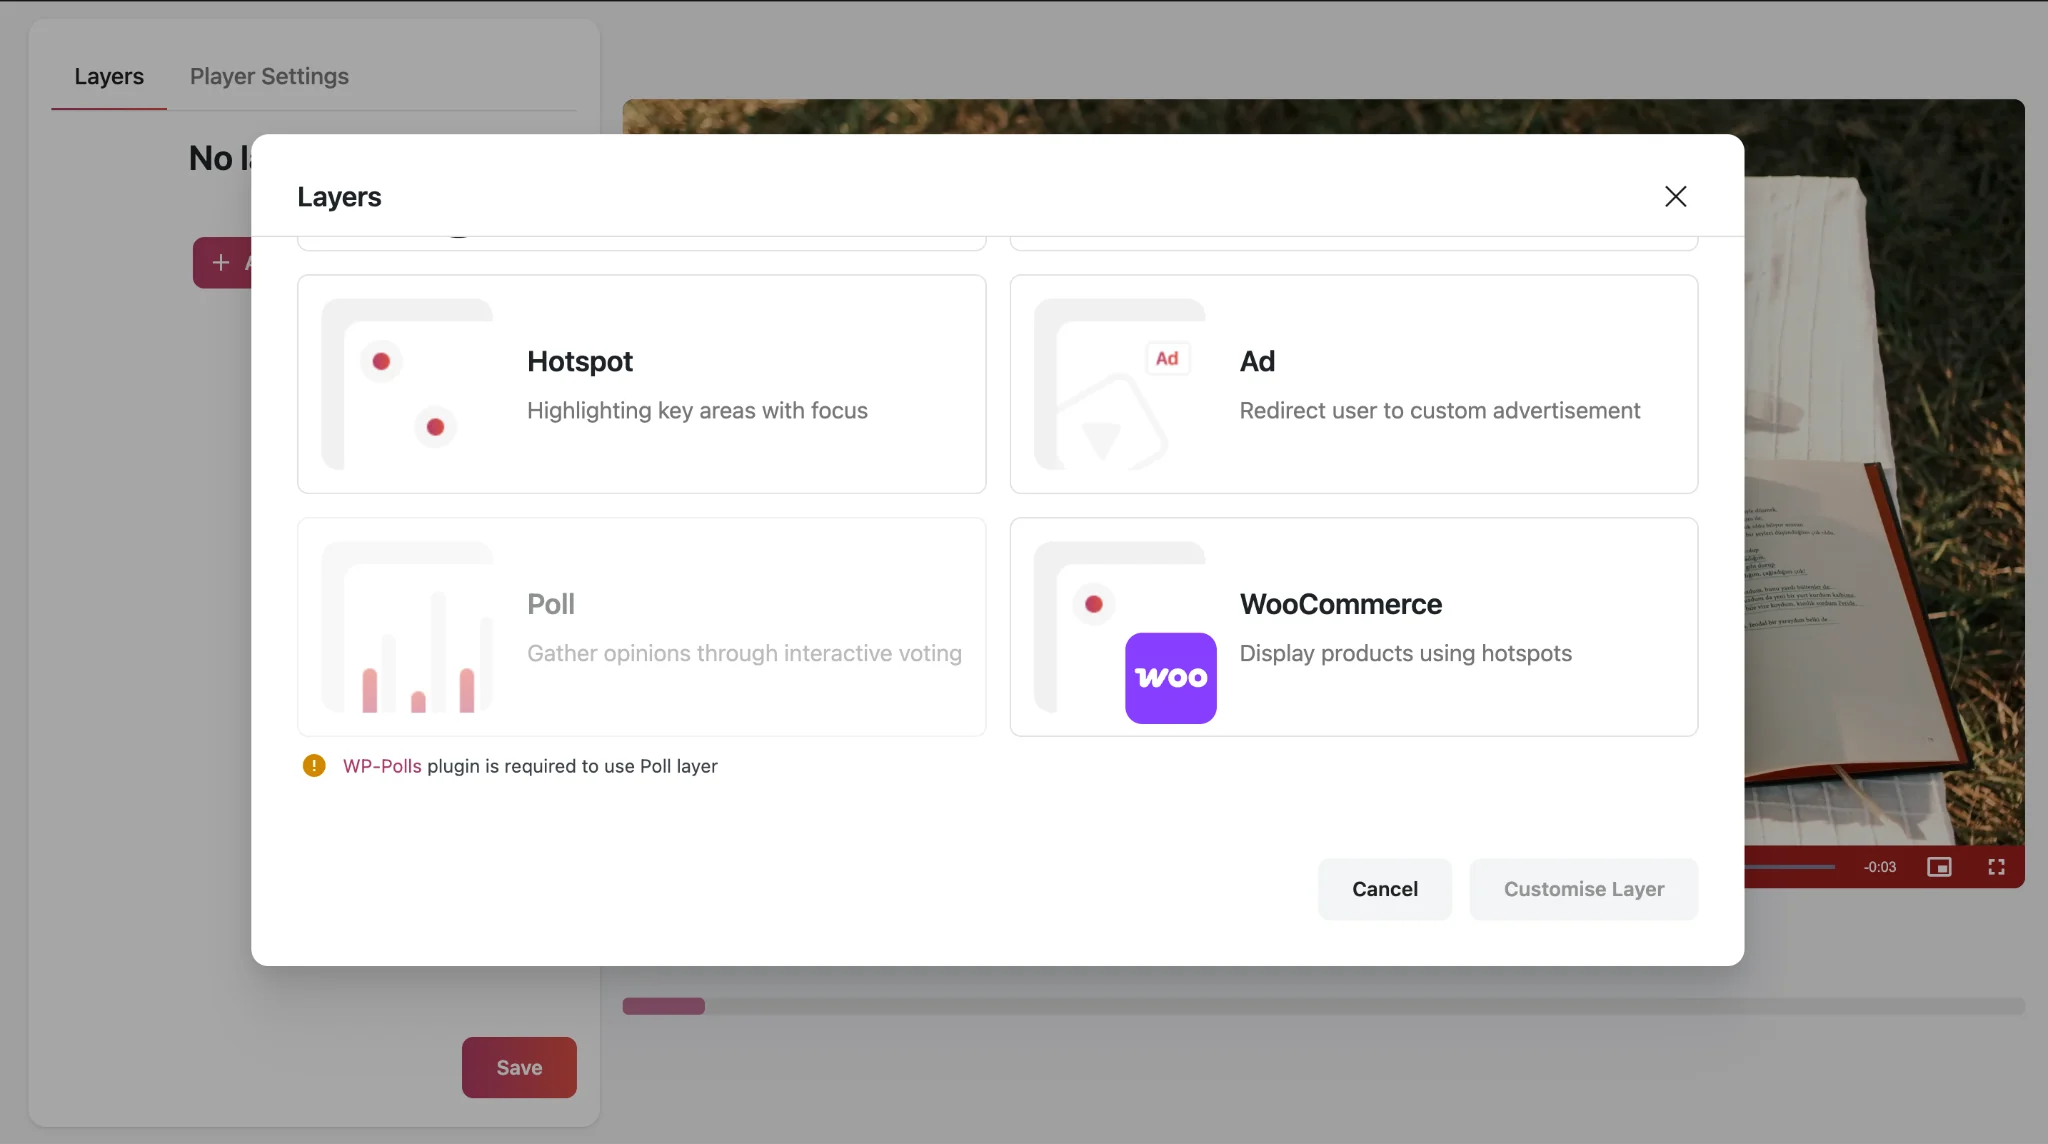
Step 4: Select WooCommerce from the popup
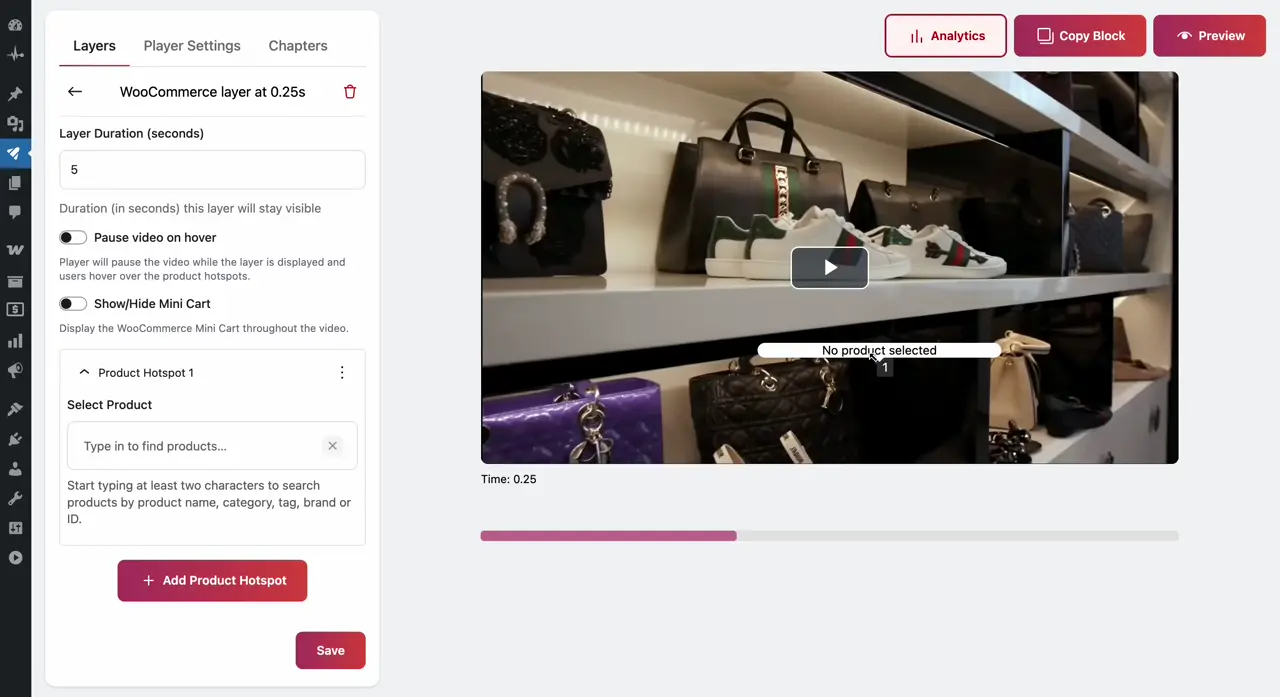
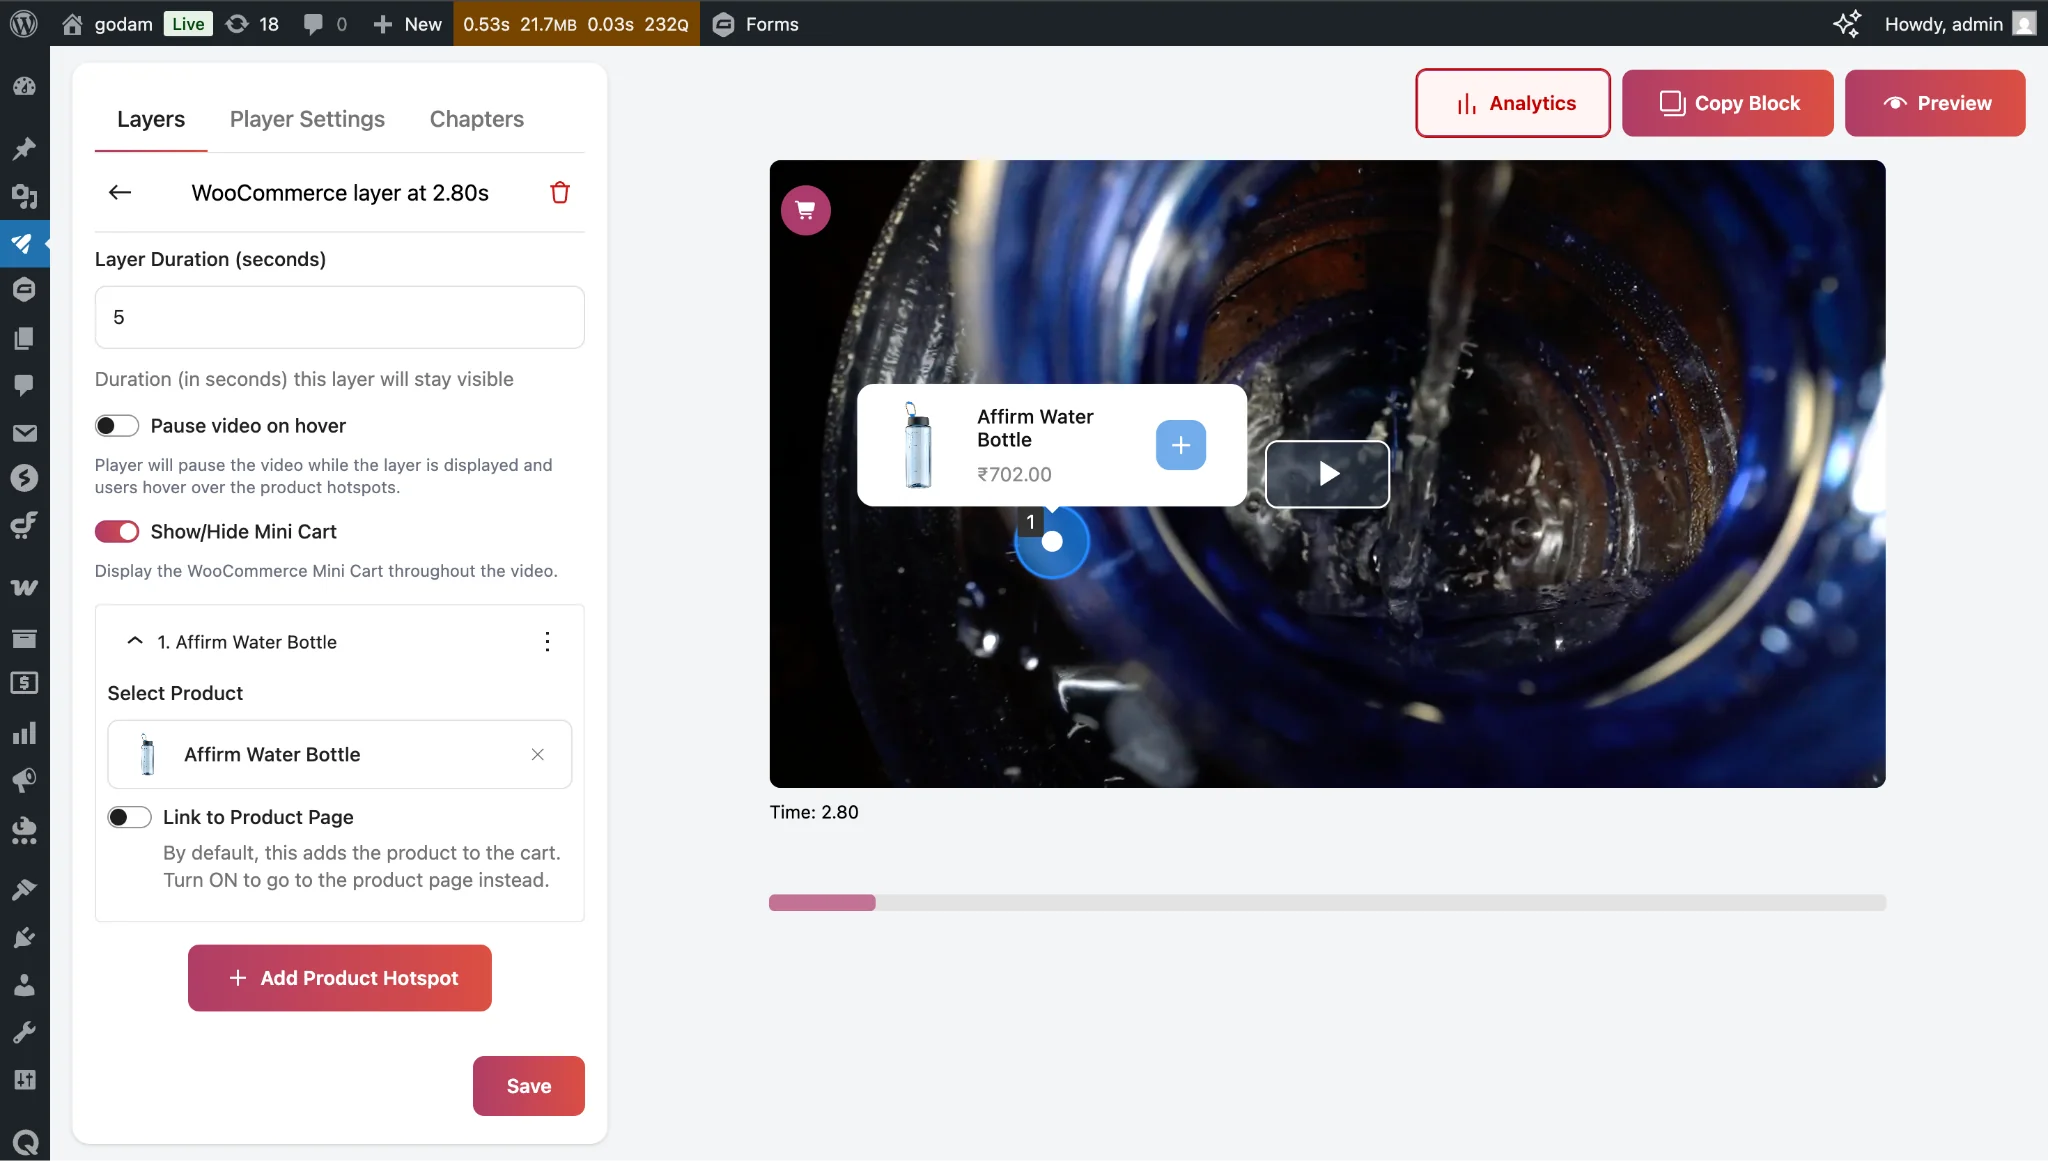
Step 5: Select the duration you want to display the product hotspots for, by default the value is 5 seconds.
Step 6: If you want the video to pause when the user hovers over the product hotspot, you can toggle the “Pause Video on hover” on.
Step 7: Open the Product Hotspot Drop down menu.
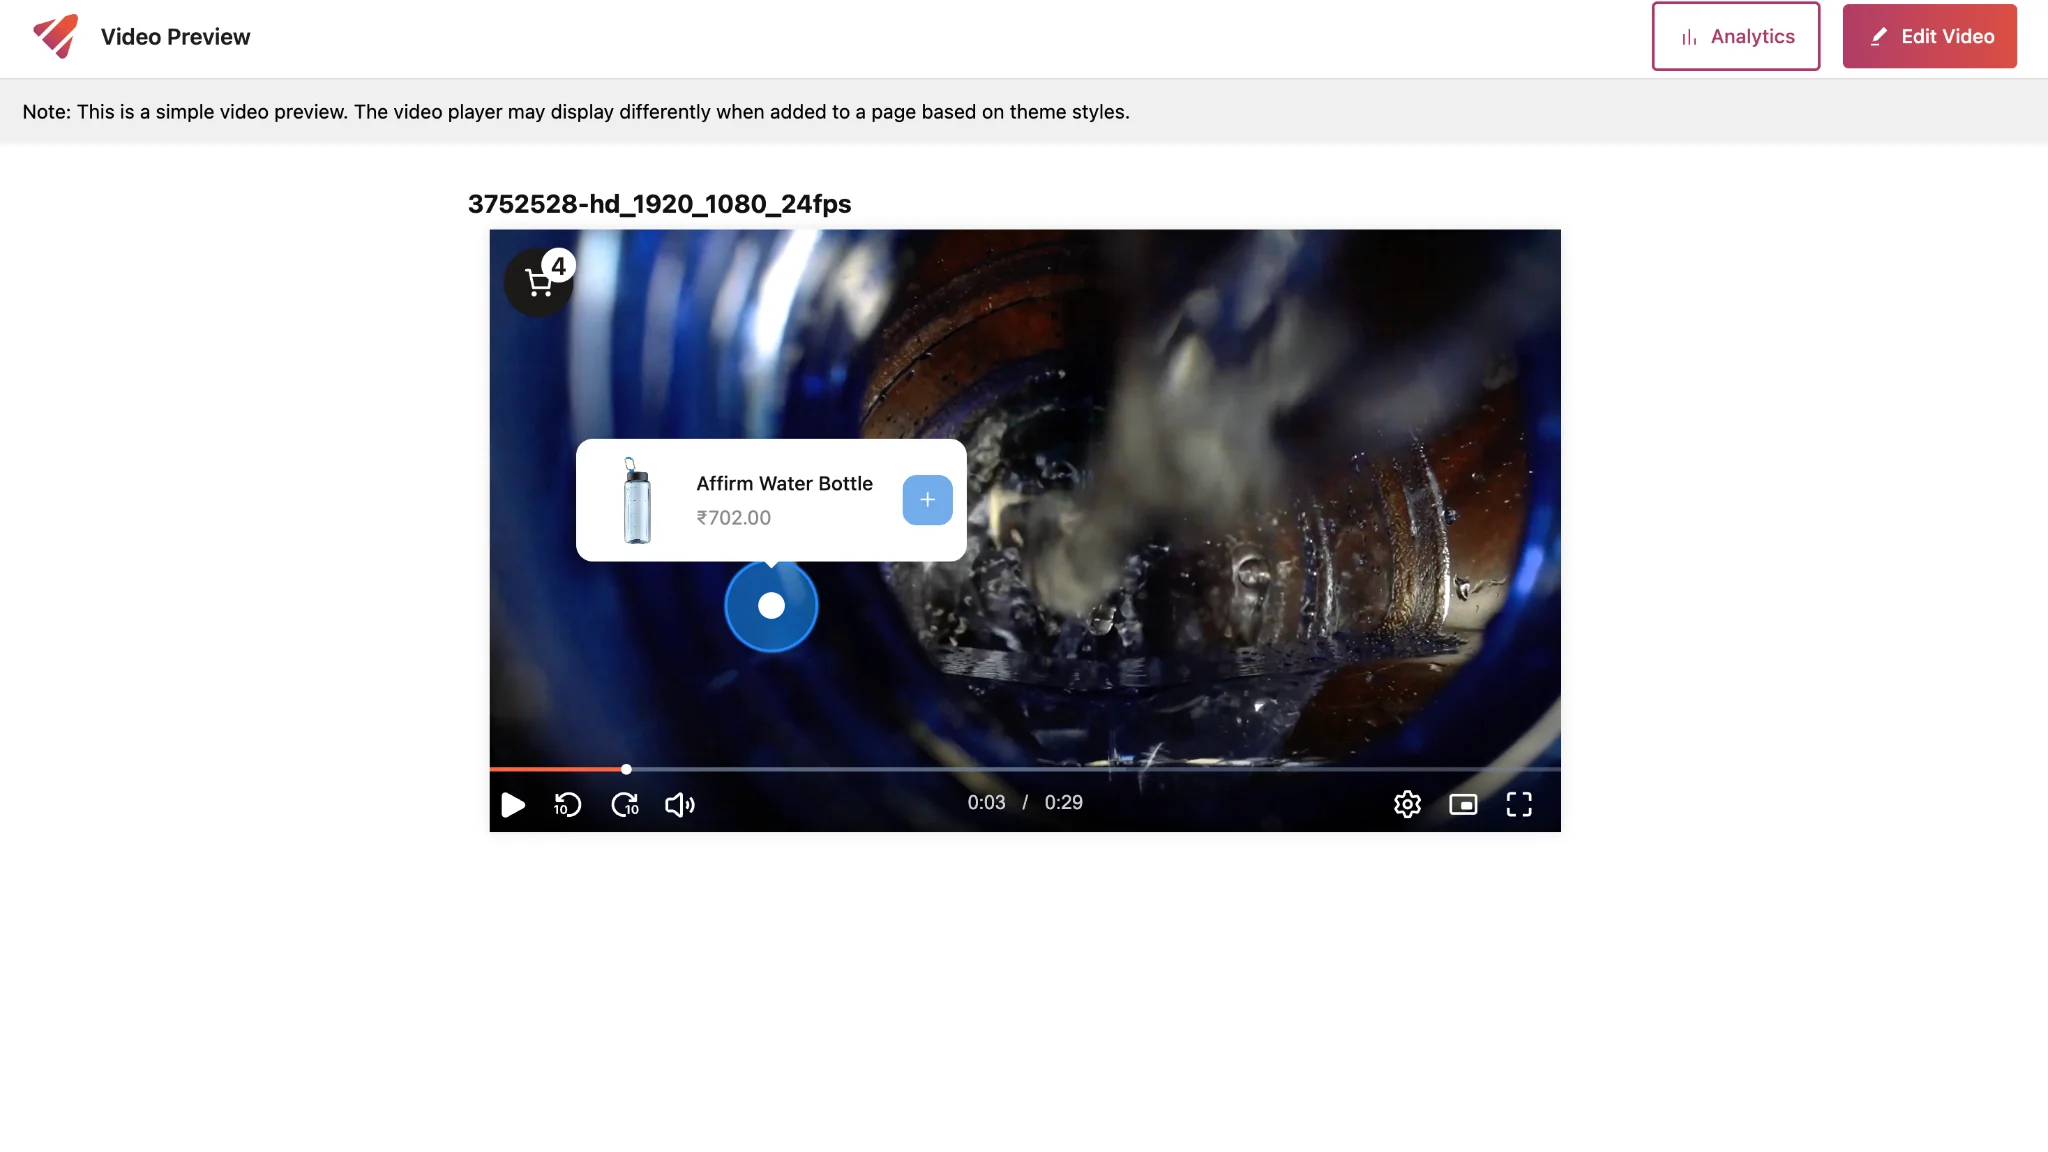
You can choose which product to display using the Select Product field within the Product Hotspot’s product details box.
The button on the Product Hotspot’s product details box has `+` icon if it can be added to cart directly else it has `↗` icon which redirects the user to the product page.
When the Link to Product Page toggle is enabled, clicking the button will redirect users to the product’s page on the frontend. By default, the button action adds the selected product directly to the cart.
Additionally, once a product is selected, the dropdown menu label automatically updates to show the product name—making it easier to recognize at a glance.
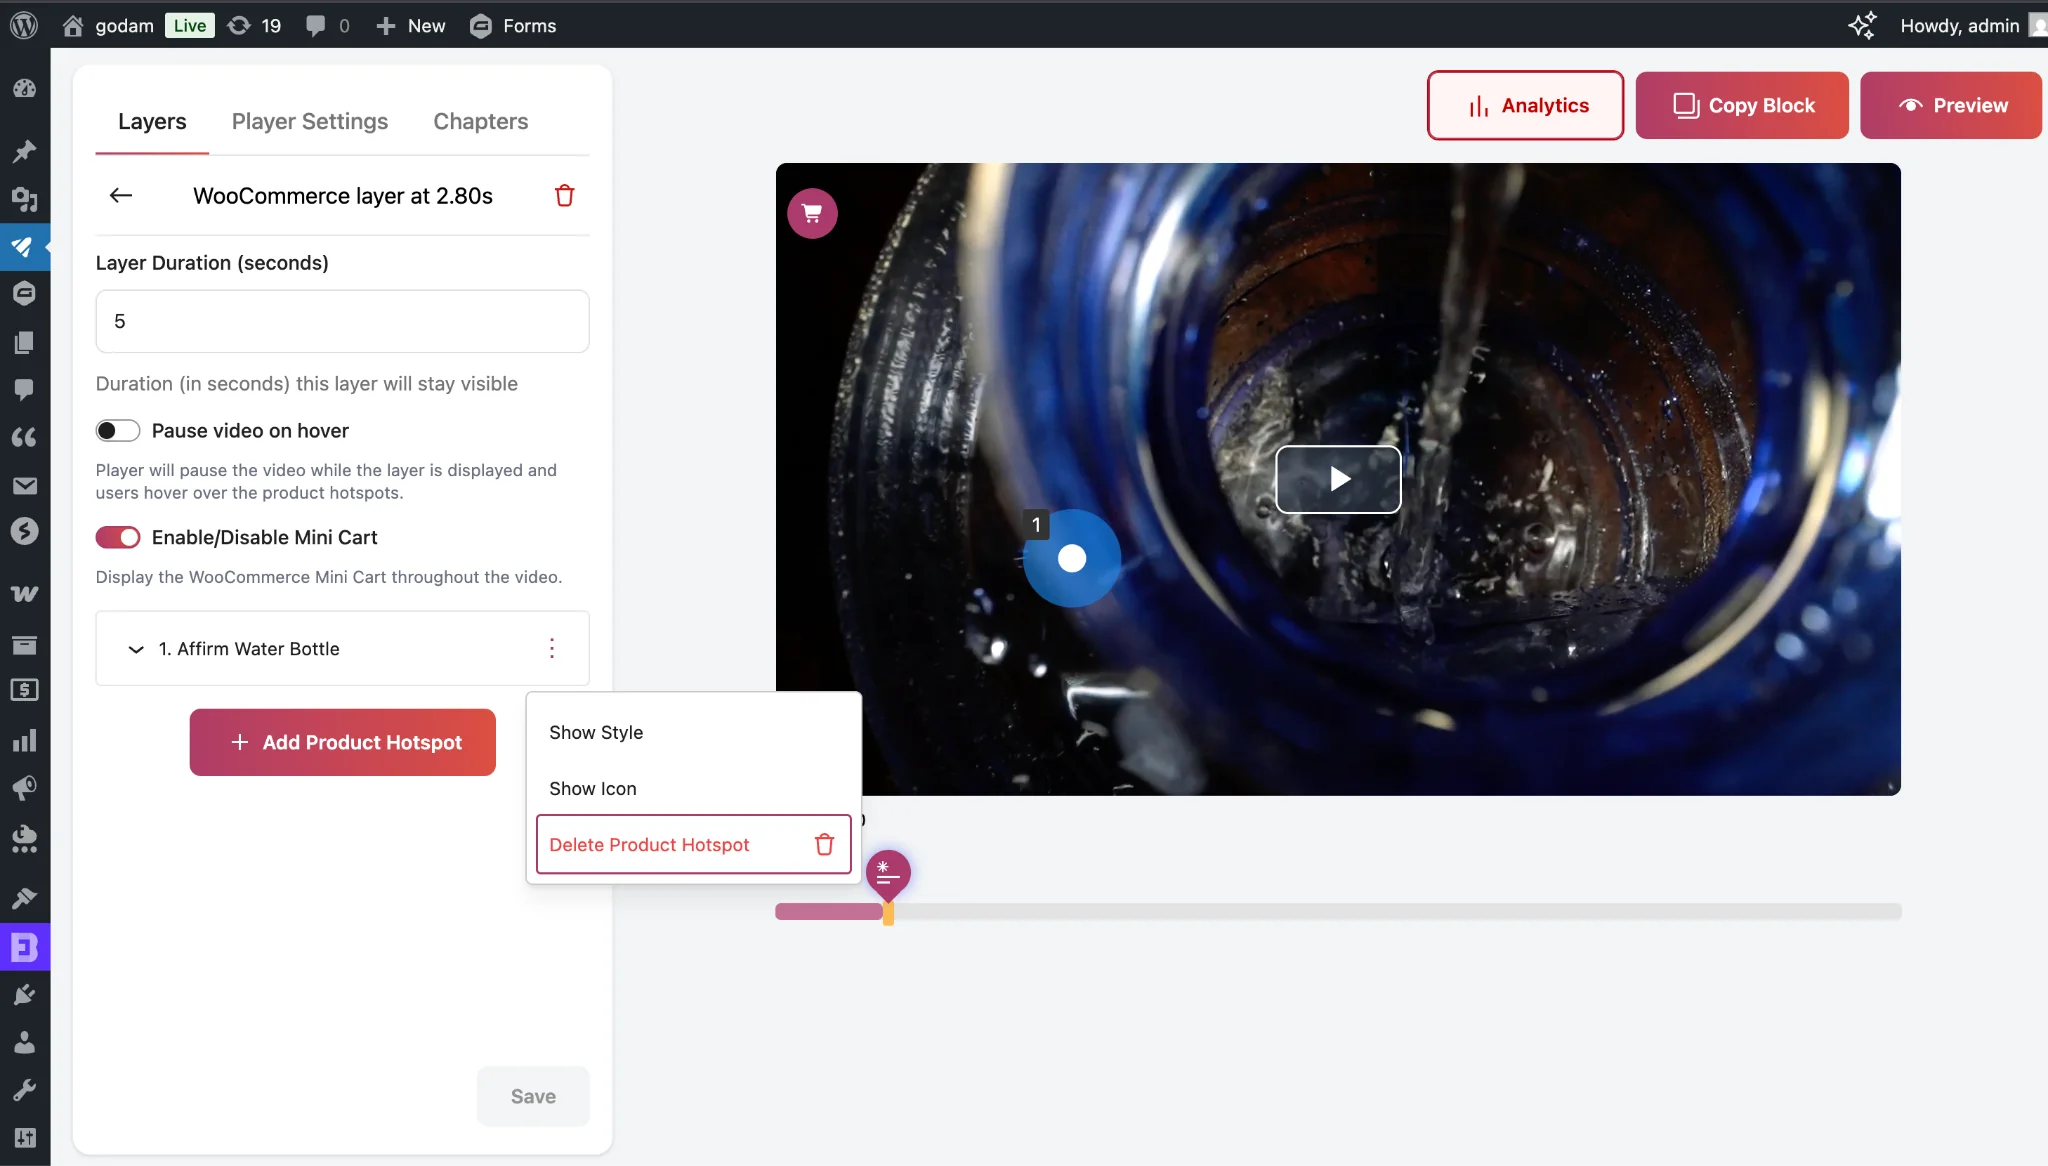
Step 8: You could further customize the product hotspot using the options mentioned in below screenshot:

Upon clicking show style, you can select the background color from the color selector for individual product hotspot:

Step 9: To add icons as a hotspot, select show show icon from the menu
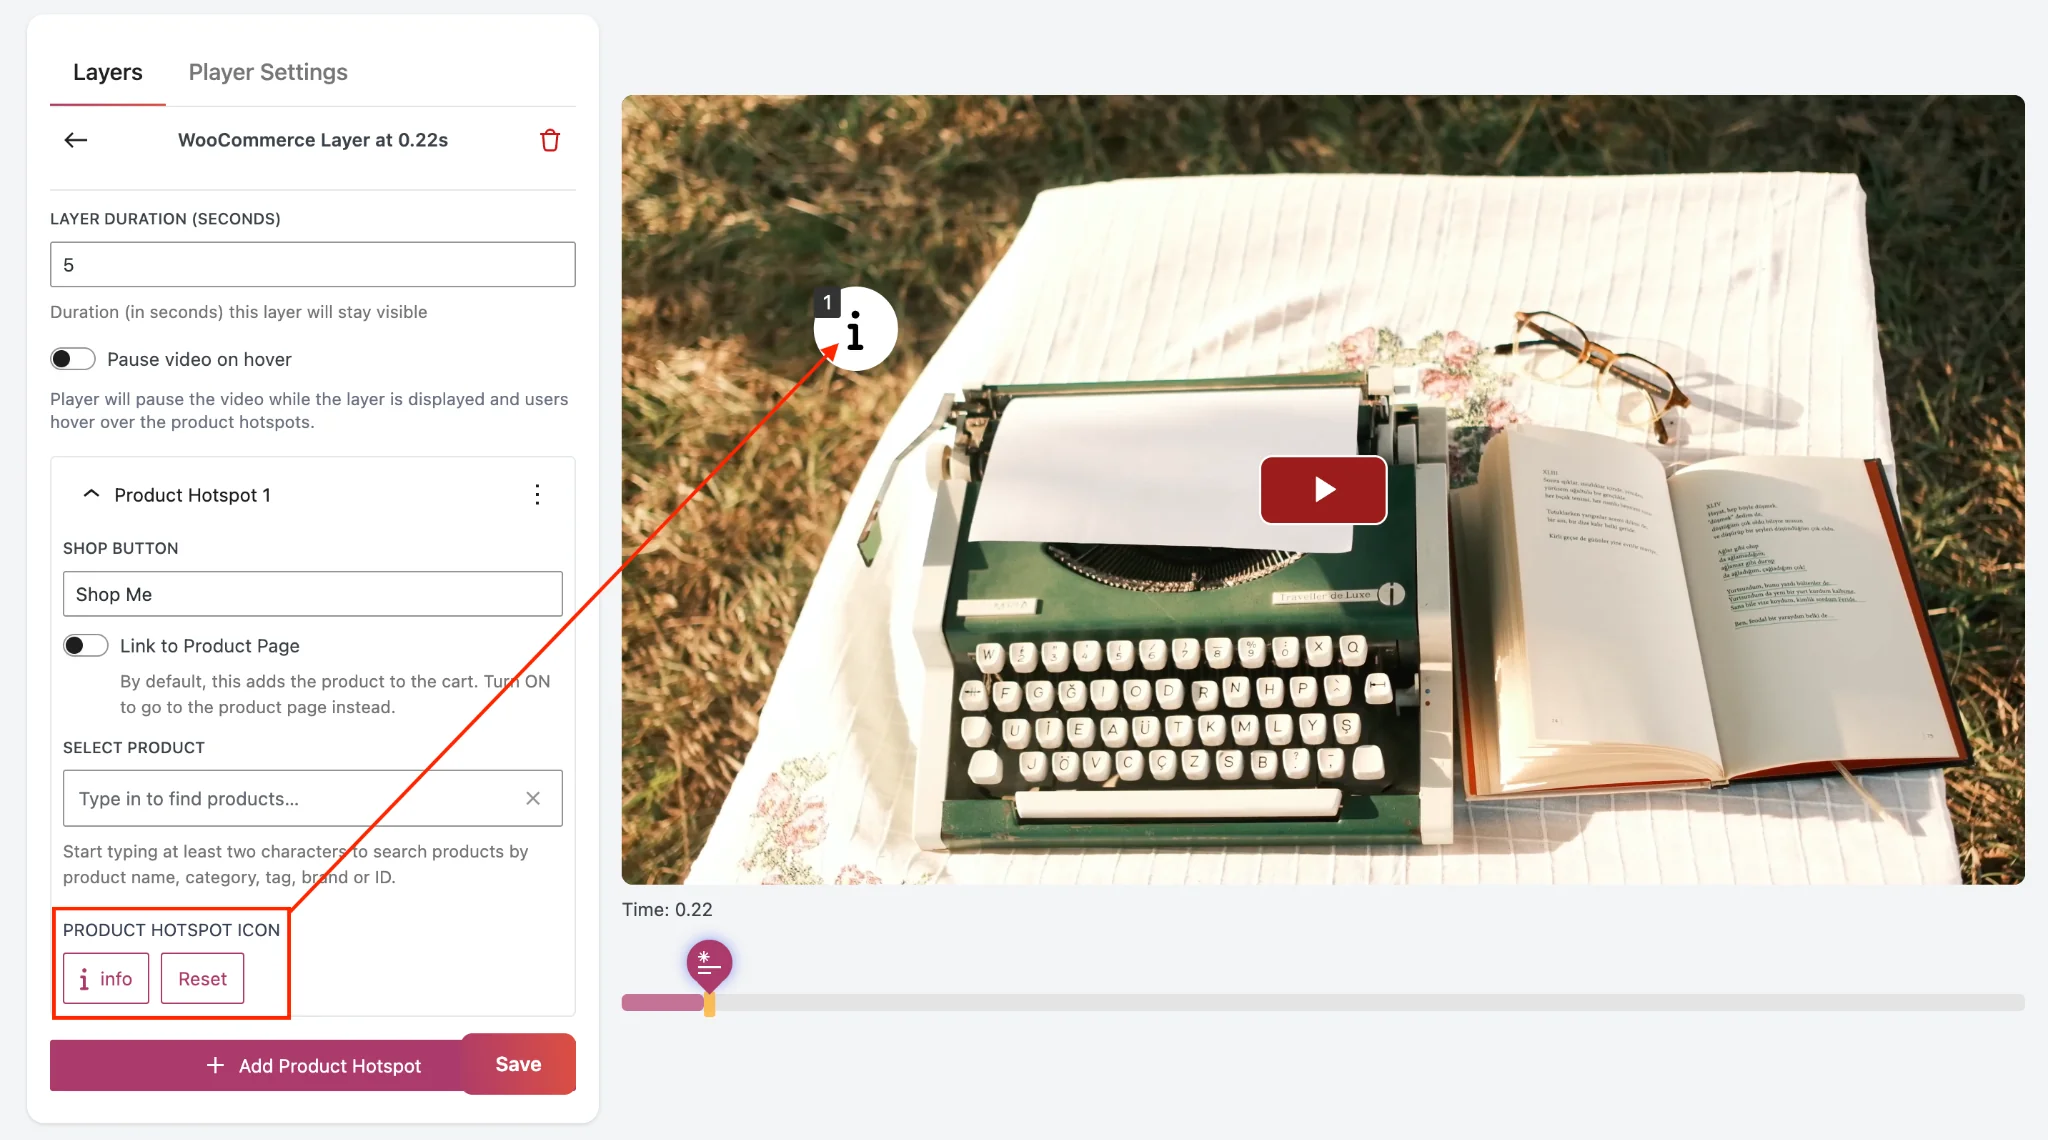
Step 10: You can select an icon from the popup that appears after clicking on the select icon button.
HOW TO USE WOOCOMMERCE MINI-CART WITH PRODUCT HOTSPOTS?
You can Enable/Disable the Mini-Cart using the “Enable/Disable Mini Cart” toggle button in the side panel.
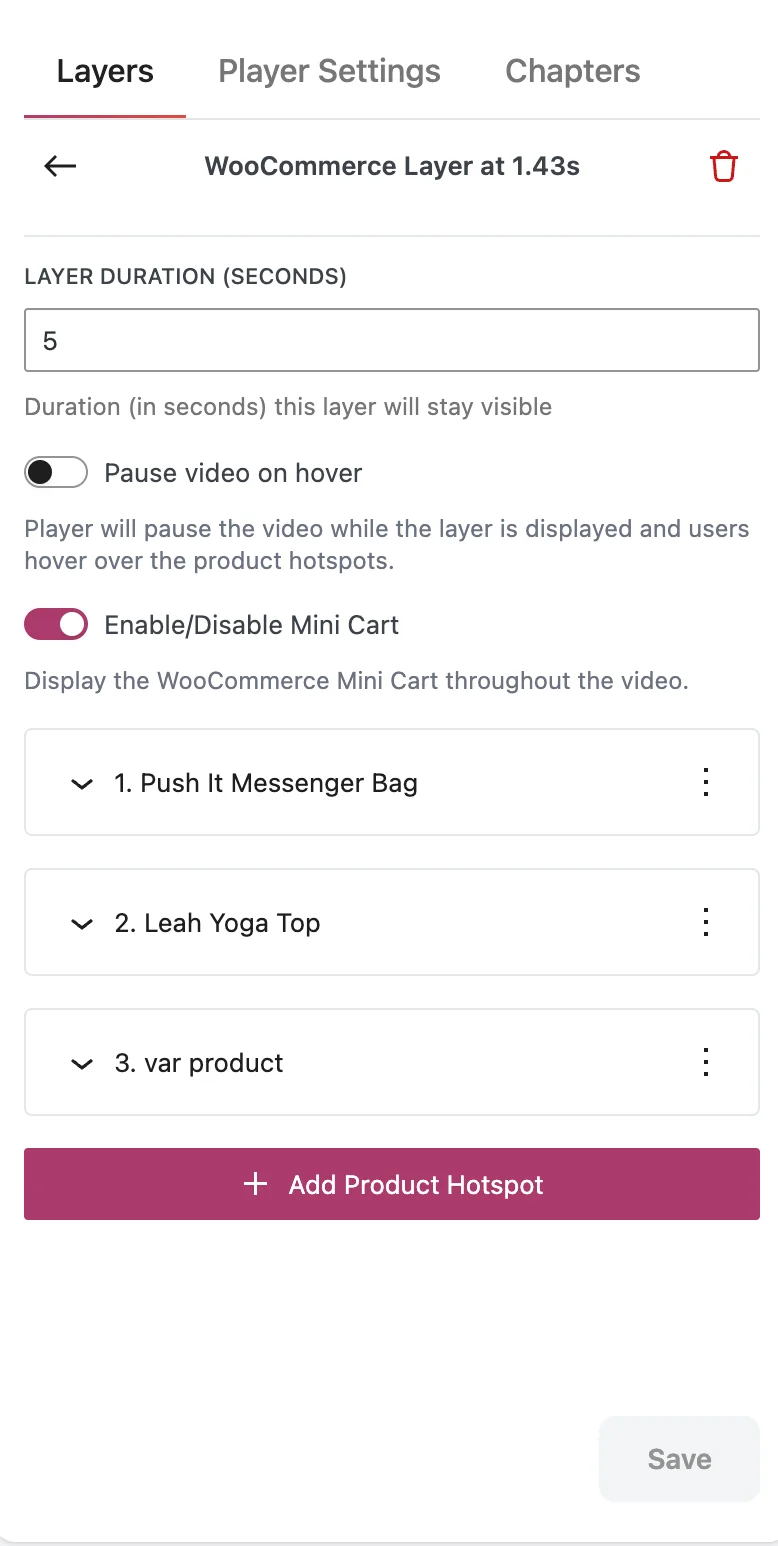
Once the Mini-Cart is enabled, it will be on-screen throughout the video duration.
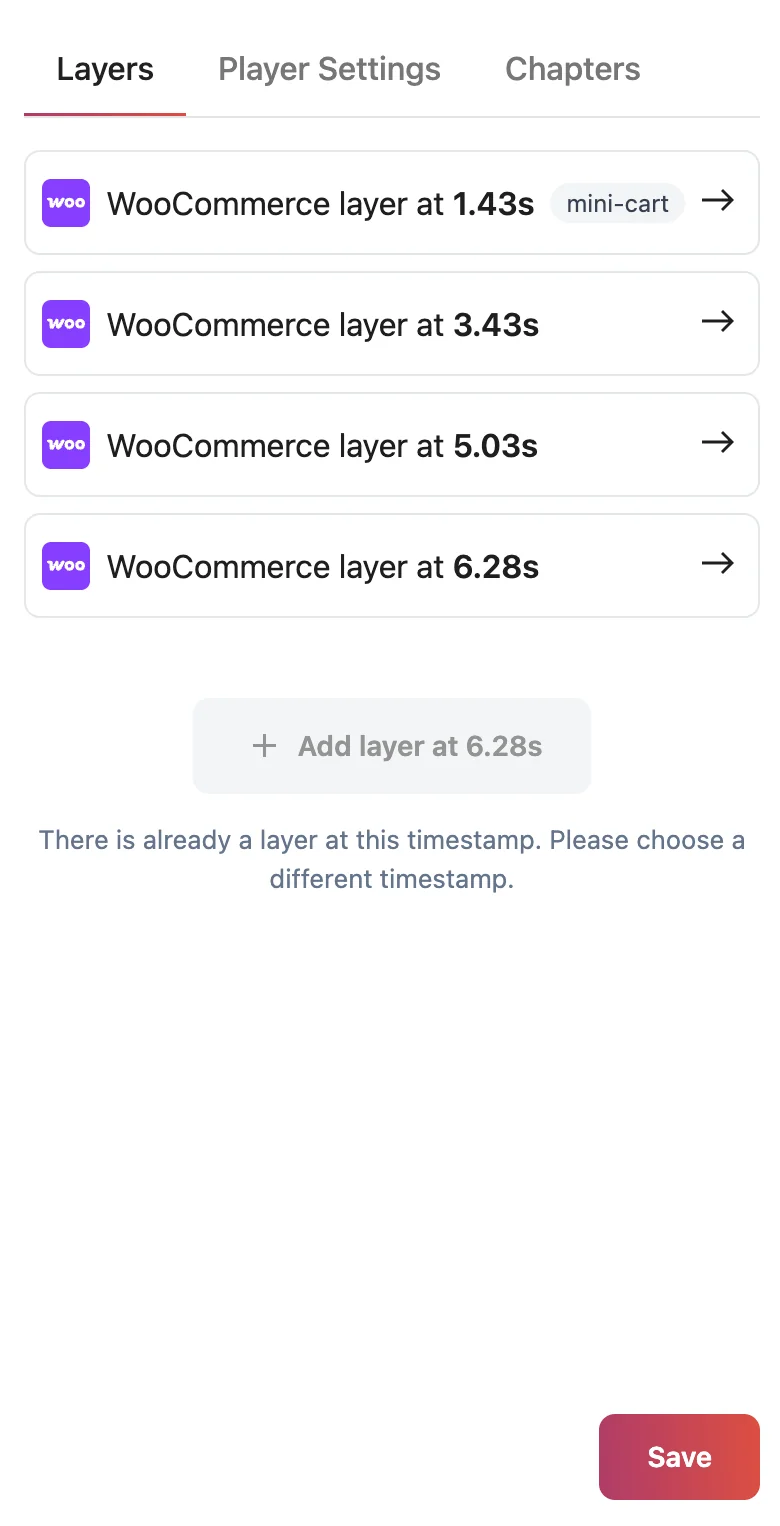
Note: If you add multiple WooCommerce layers to a video, the Mini-Cart toggle will only work on the first layer you added. Later layers will have it disabled. You can identify the first layer by the mini-cart tag shown in the side panel.
Mini-Cart customization options
The mini-cart button automatically adapts to your WordPress theme’s styling. But in case it does not please follow the below given instructions.
Developer Note:
The variables –wp–preset–color–primary and –wp–preset–color–secondary are essential for styling. If your theme doesn’t define them, add them to your CSS and set values based on your brand colors.
:root {
–wp–preset–color–primary: #0073aa; /* Primary brand color */
–wp–preset–color–secondary: #005177; /* Secondary brand color */
}
You can also scope them to a specific container if you don’t want them applied globally:
.my-gallery {
–wp–preset–color–primary: #ff6600;
–wp–preset–color–secondary: #cc5200;
}
HOW TO DELETE A PRODUCT HOTSPOT?
Select “Delete Product Hotspot” from the menu.
FRONTEND PREVIEW