Fluent Forms is a fast, modern, and user-friendly WordPress form builder that helps you create responsive forms effortlessly with its intuitive drag-and-drop interface. GoDAM Fluent Forms integration enables you to capture leads directly from videos when added as an interactive video layer. The integration’s built-in form recorder feature allows users to record or upload videos right inside the form using a Fluent Forms camera input field, from their webcam, screen, or local files. It’s ideal for use cases like video applications, customer testimonials, identity verification, and auditions. All entries are conveniently accessible from the Fluent Forms entries dashboard.
How to integrate the Fluent Forms inside a video at a specific timestamp
Requirements
To follow this tutorial, you will need:
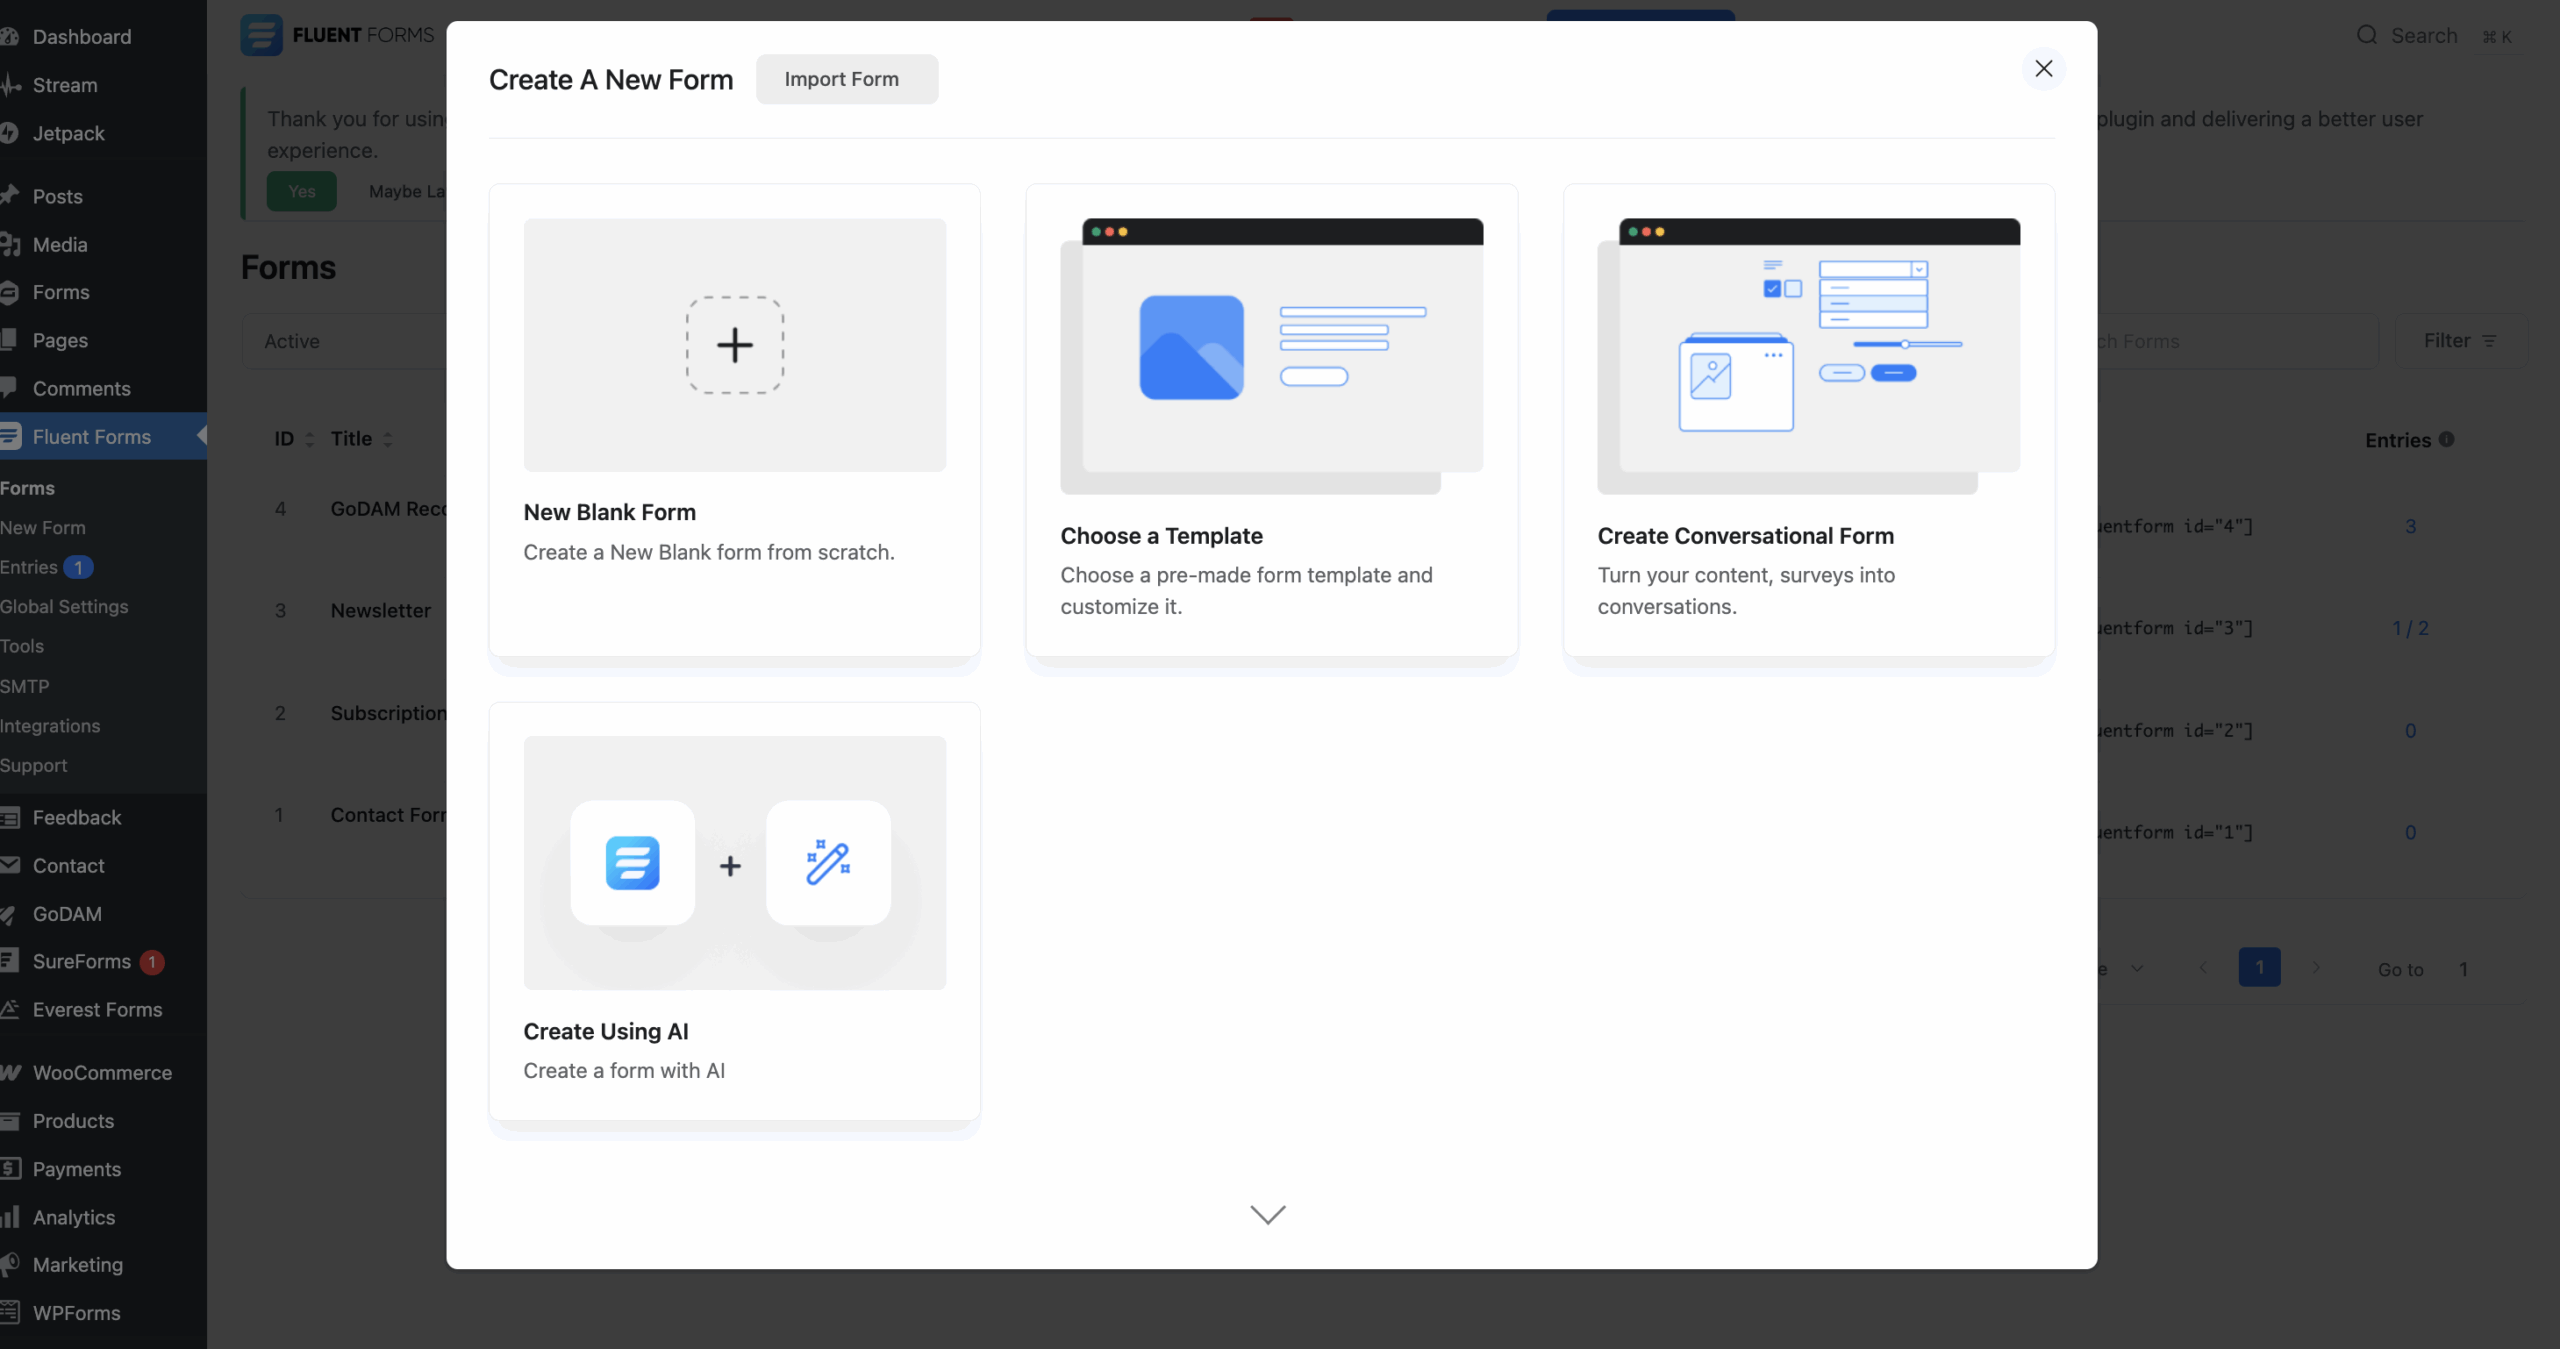
Step 1: Create a Fluent Form
Start by setting up a new form in your WordPress Fluent forms dashboard. Define the basic structure and fields you need, such as name, email, or any other required information. Skip this step if you’re using an existing form.
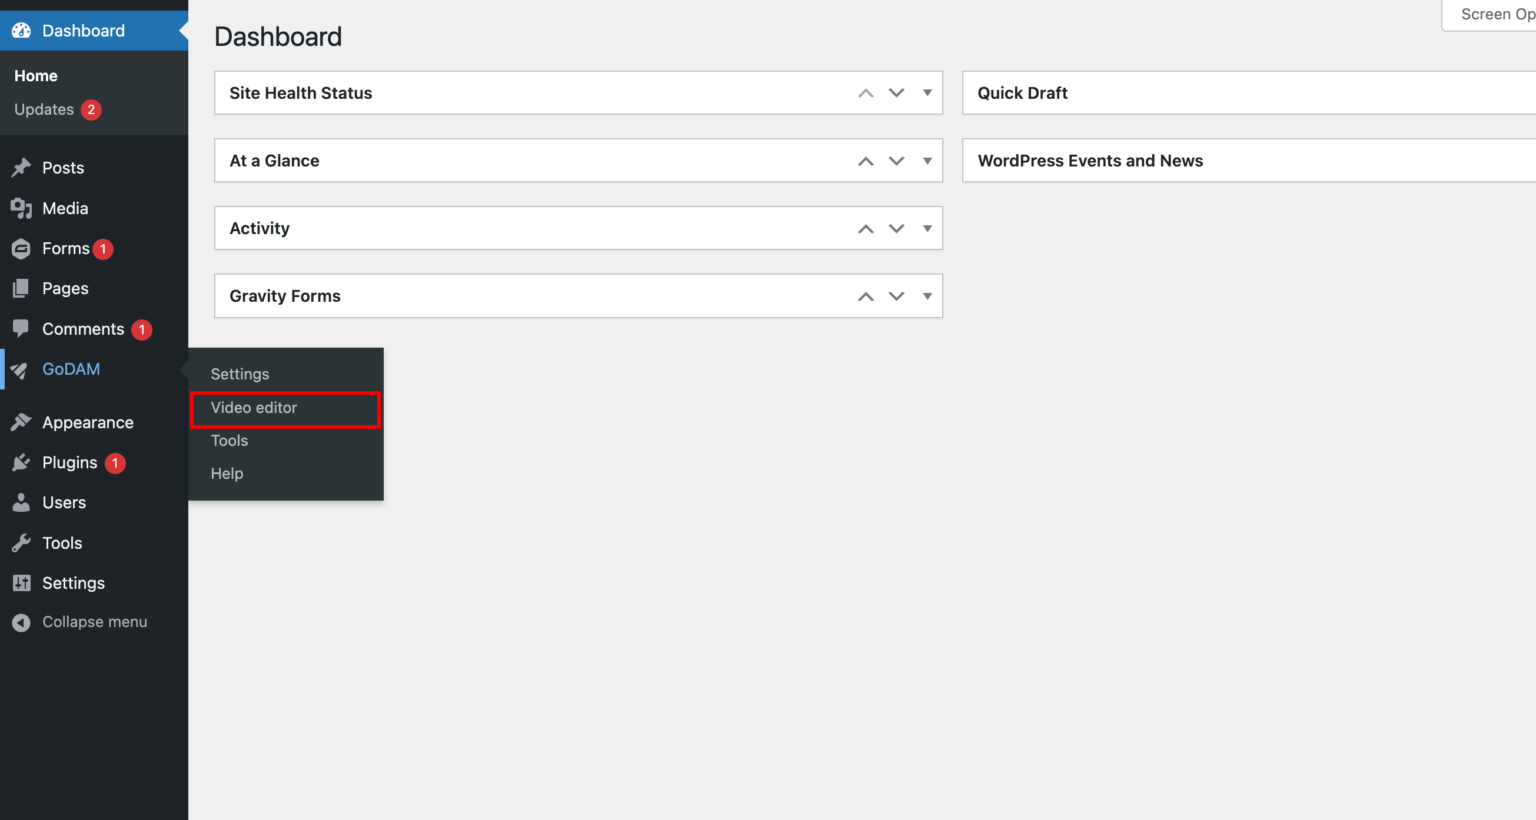
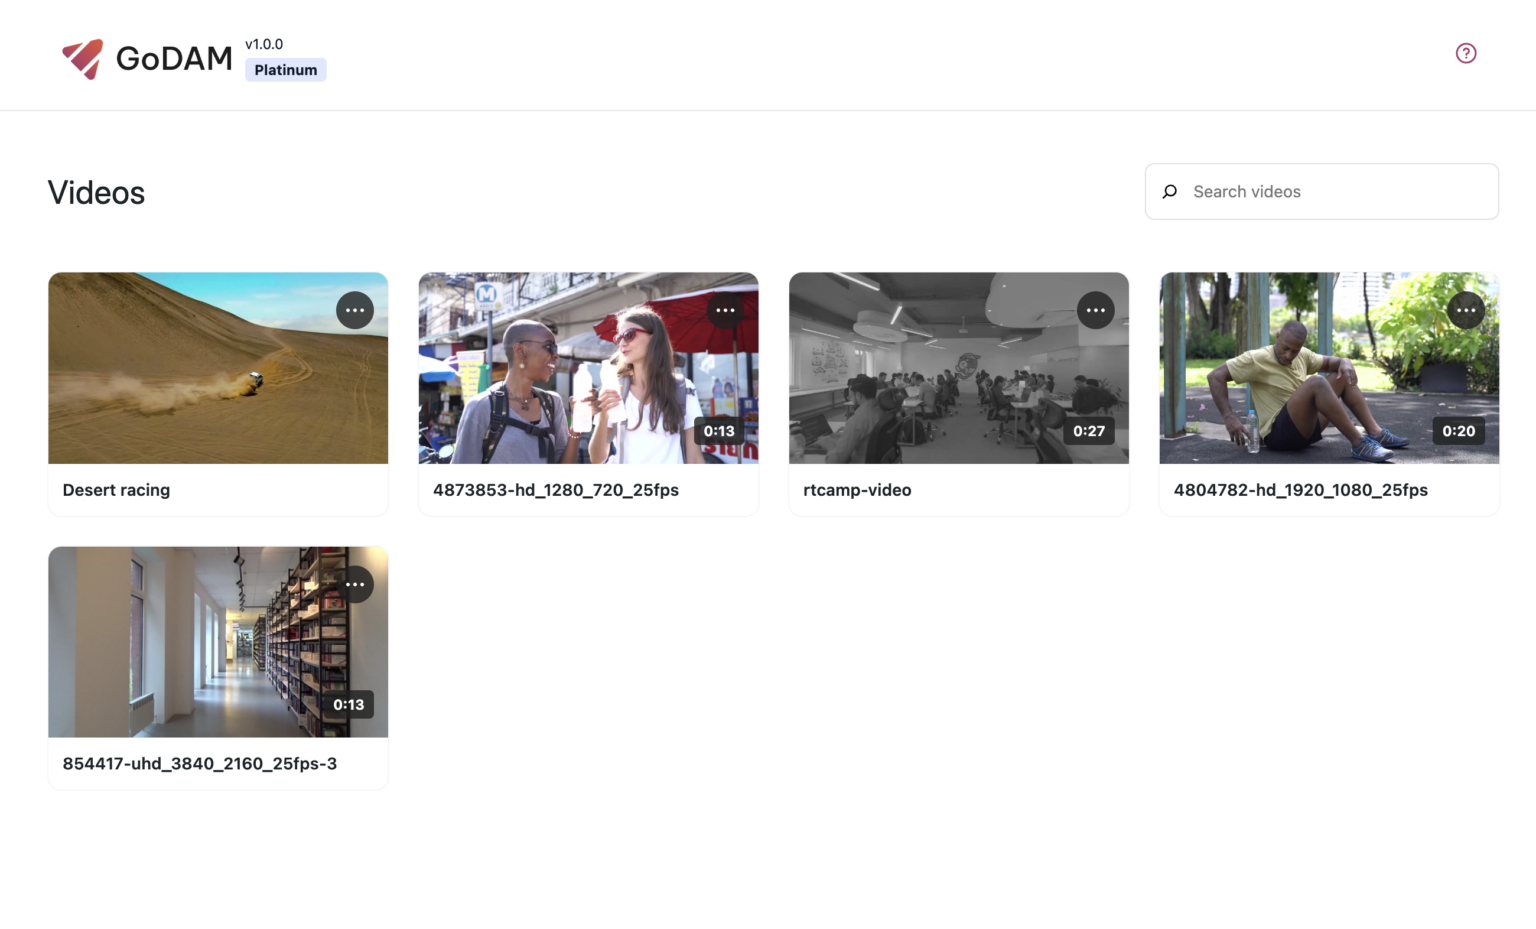
Step 2: Open the video editor interface
Visit the WordPress media library and find the video on which you want to integrate the form. Click on the video and then the Edit Video button. It will open up a new screen where you can edit a specific video and insert the form at a specific timestamp.
OR
Visit GoDAM Video Editor page and select the video on which you want to insert the Fluent form layer. It will open up a new screen where you can edit a specific video and insert the form at a specific timestamp.
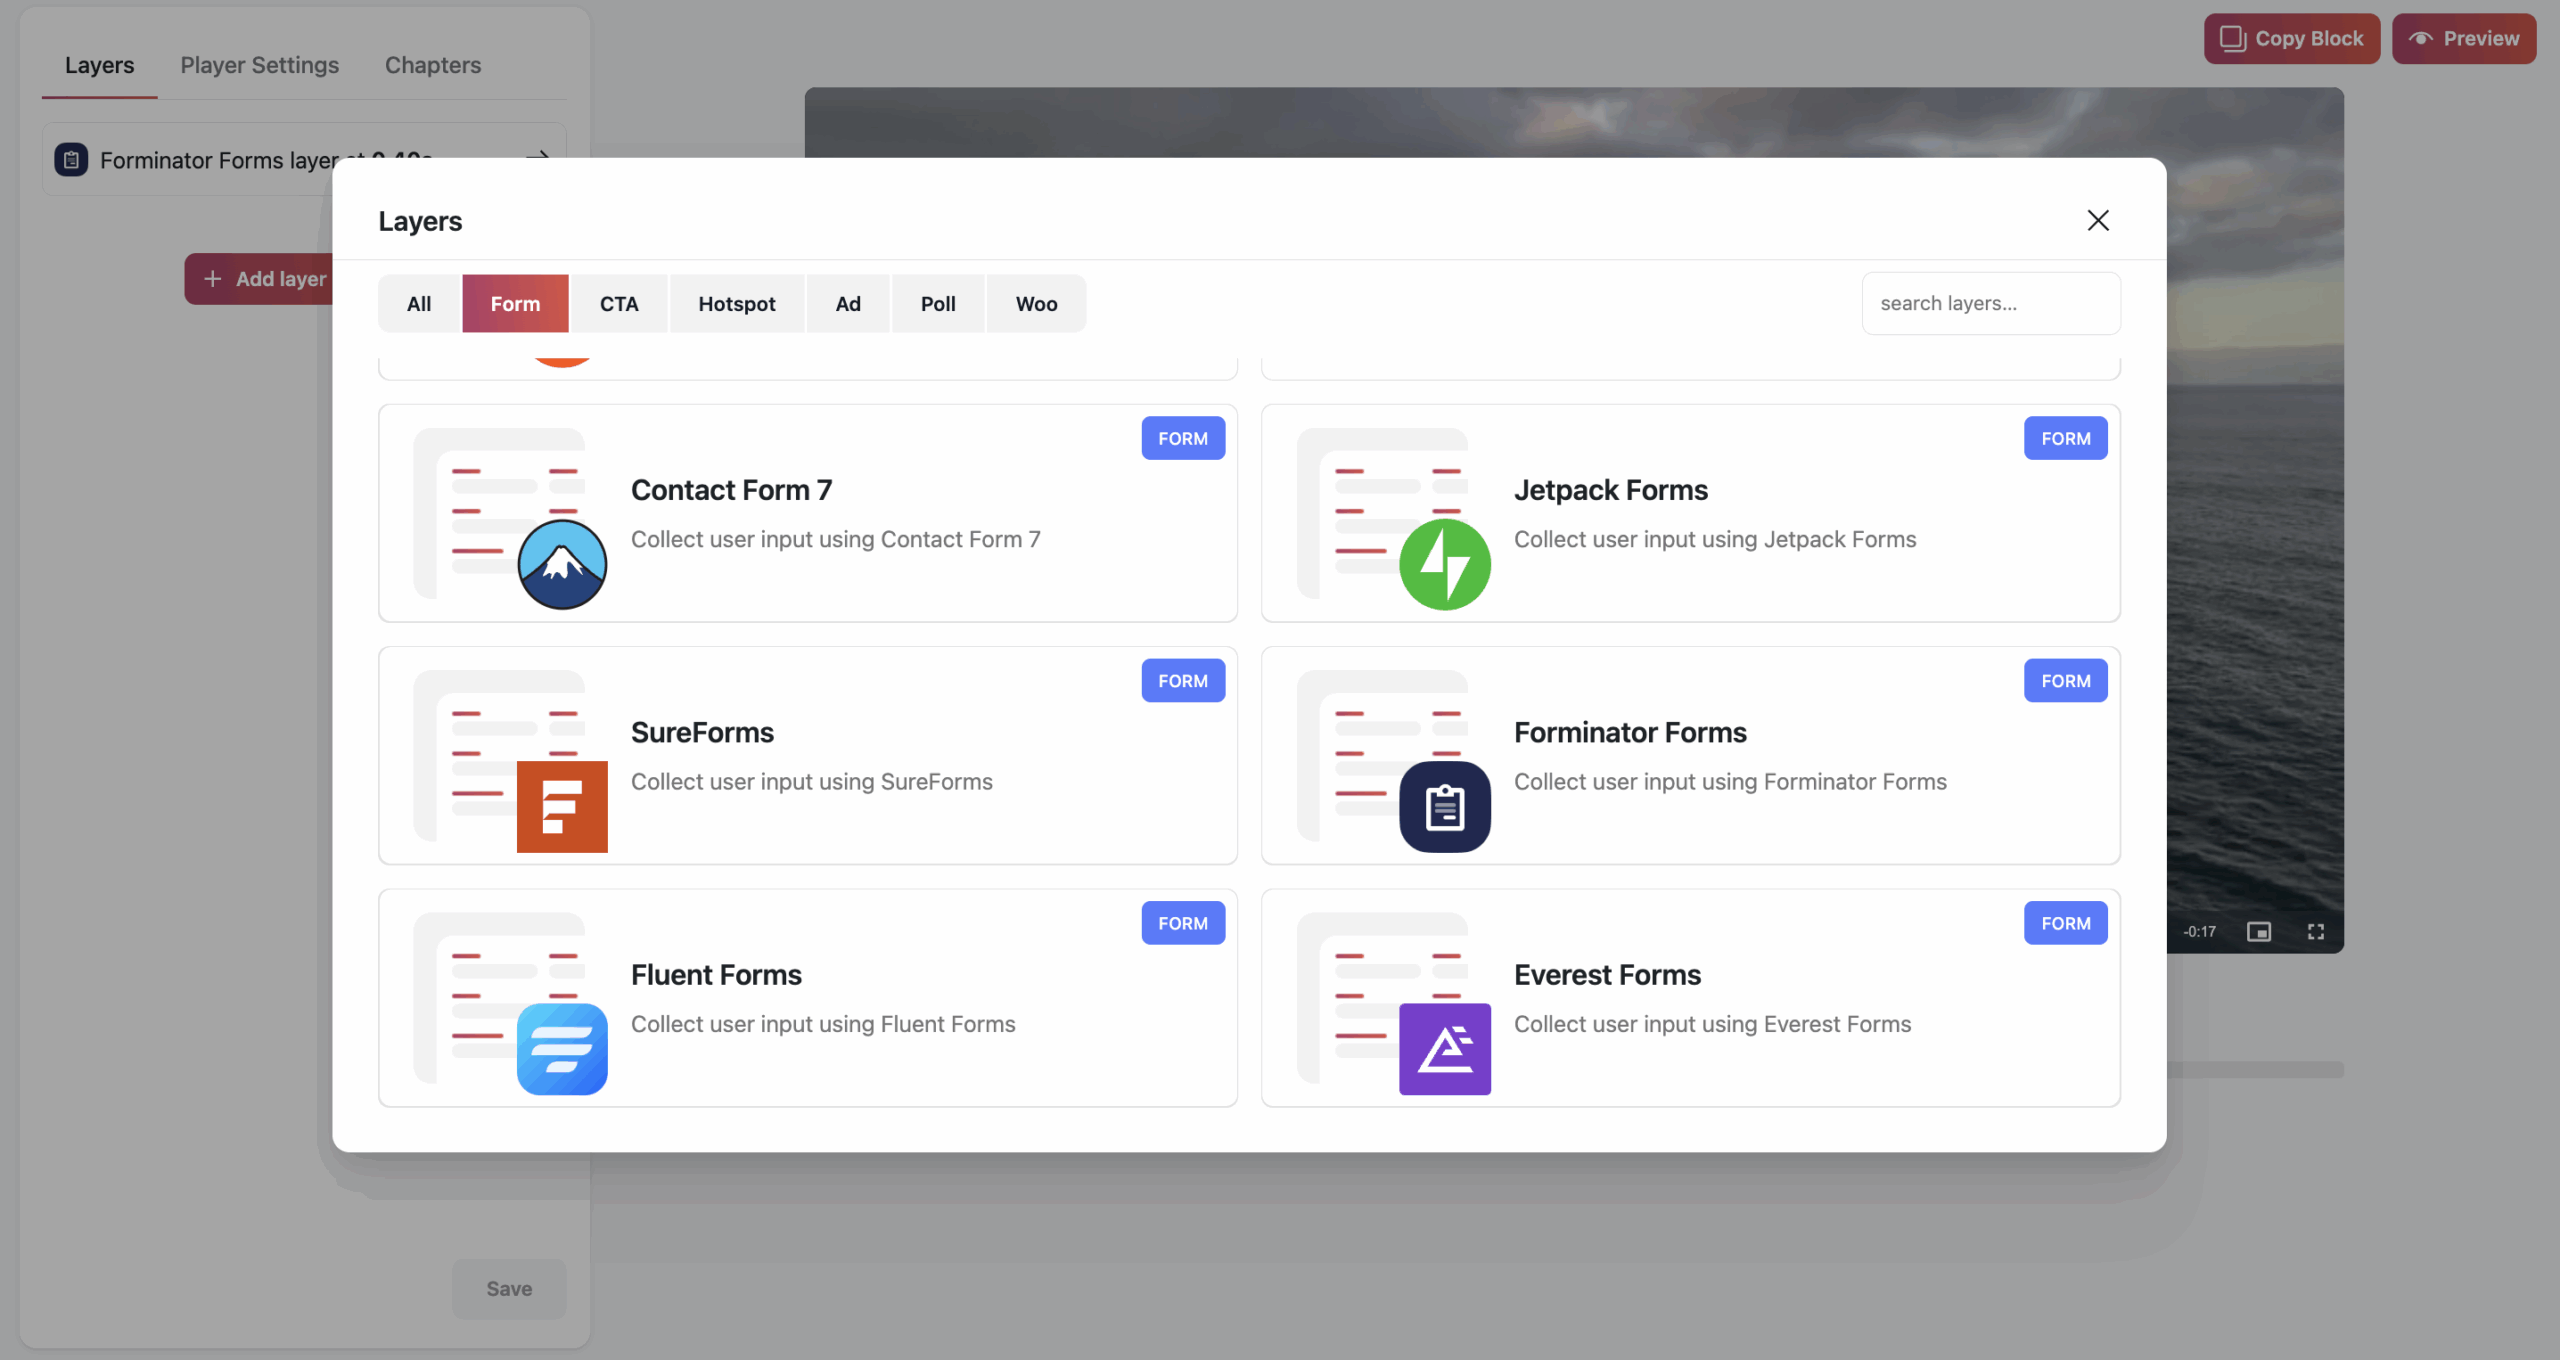
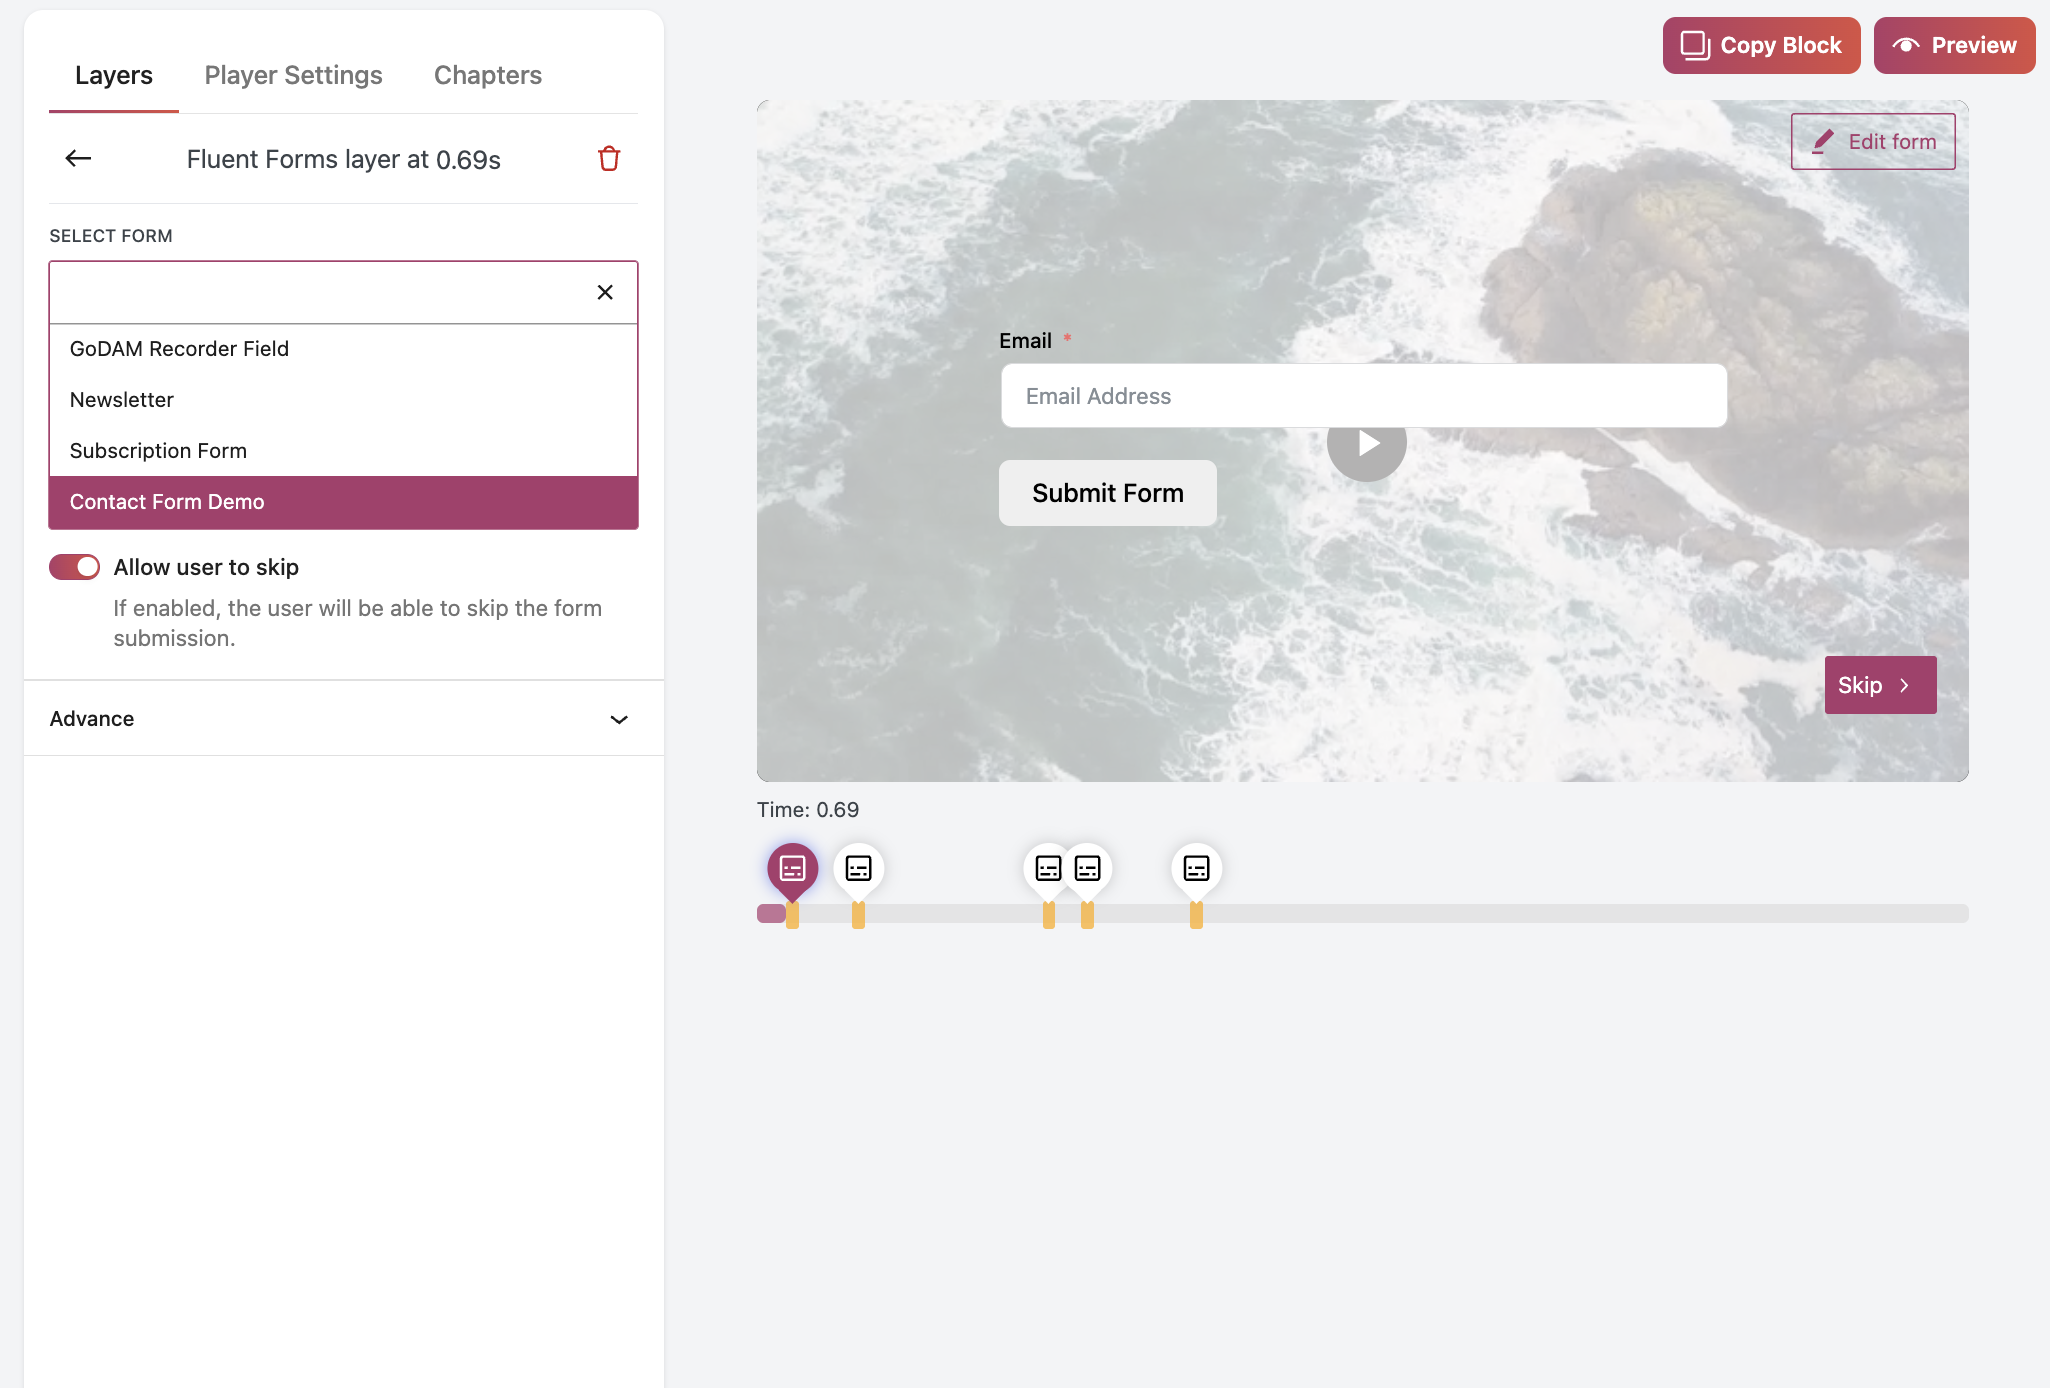
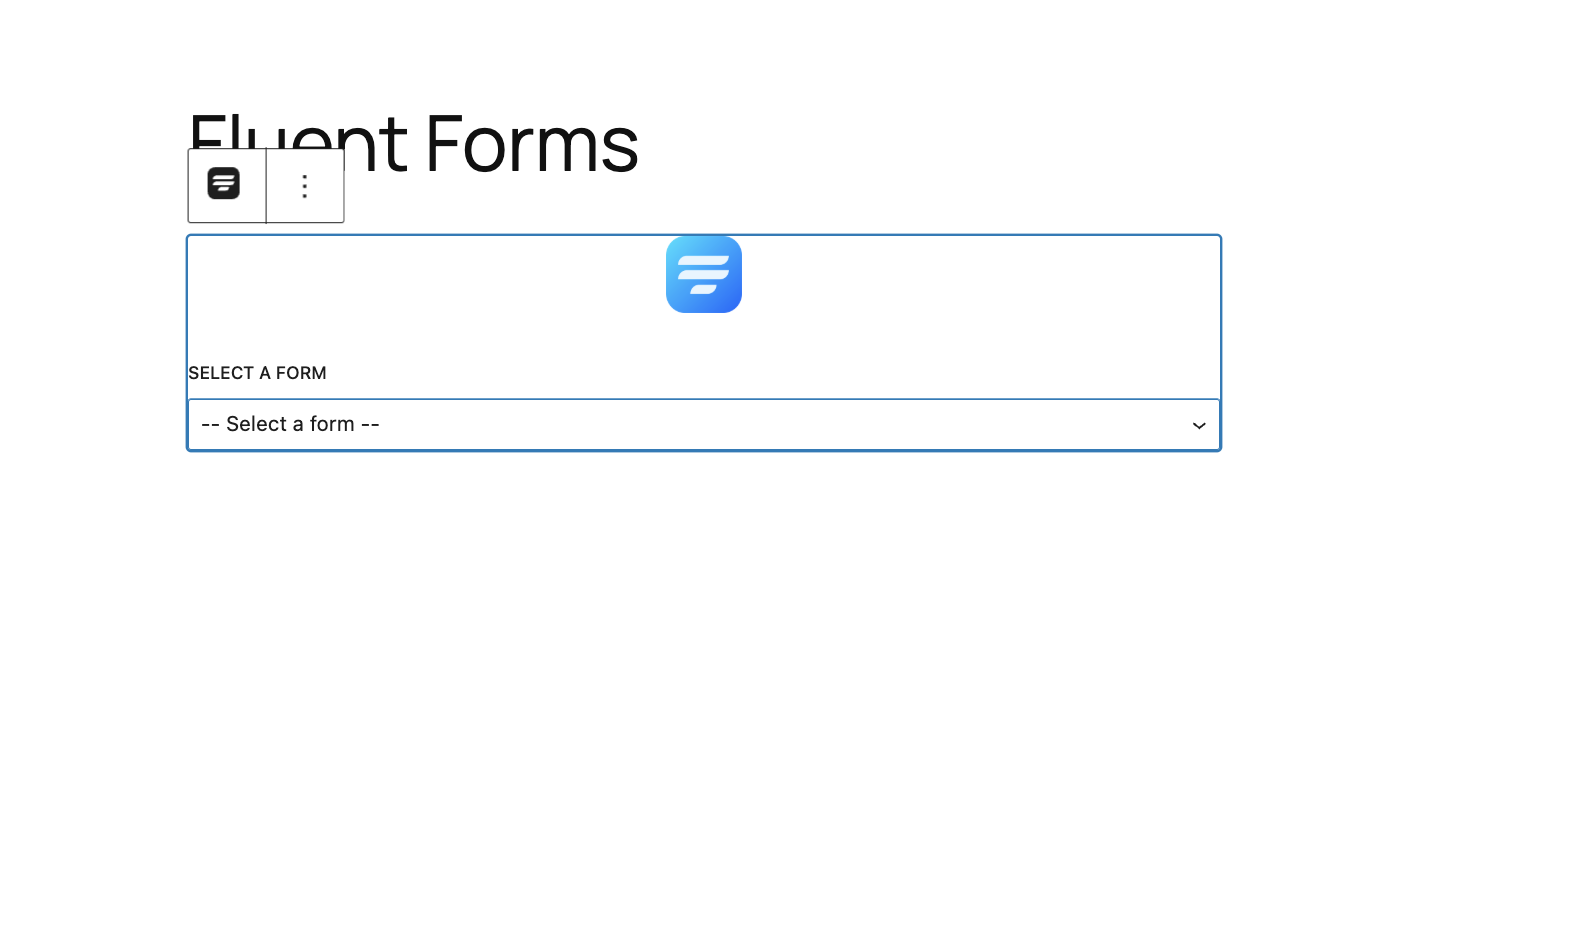
Step 3: Insert the form layer inside a video and save
Step 4: Add a GoDAM video on a post or a page
Visit any post or page where you want to insert the video in which you added the Fluent form. You can use the “GoDAM video” block or [godam_video id=”1”] shortcode to insert a video inside a post or page.
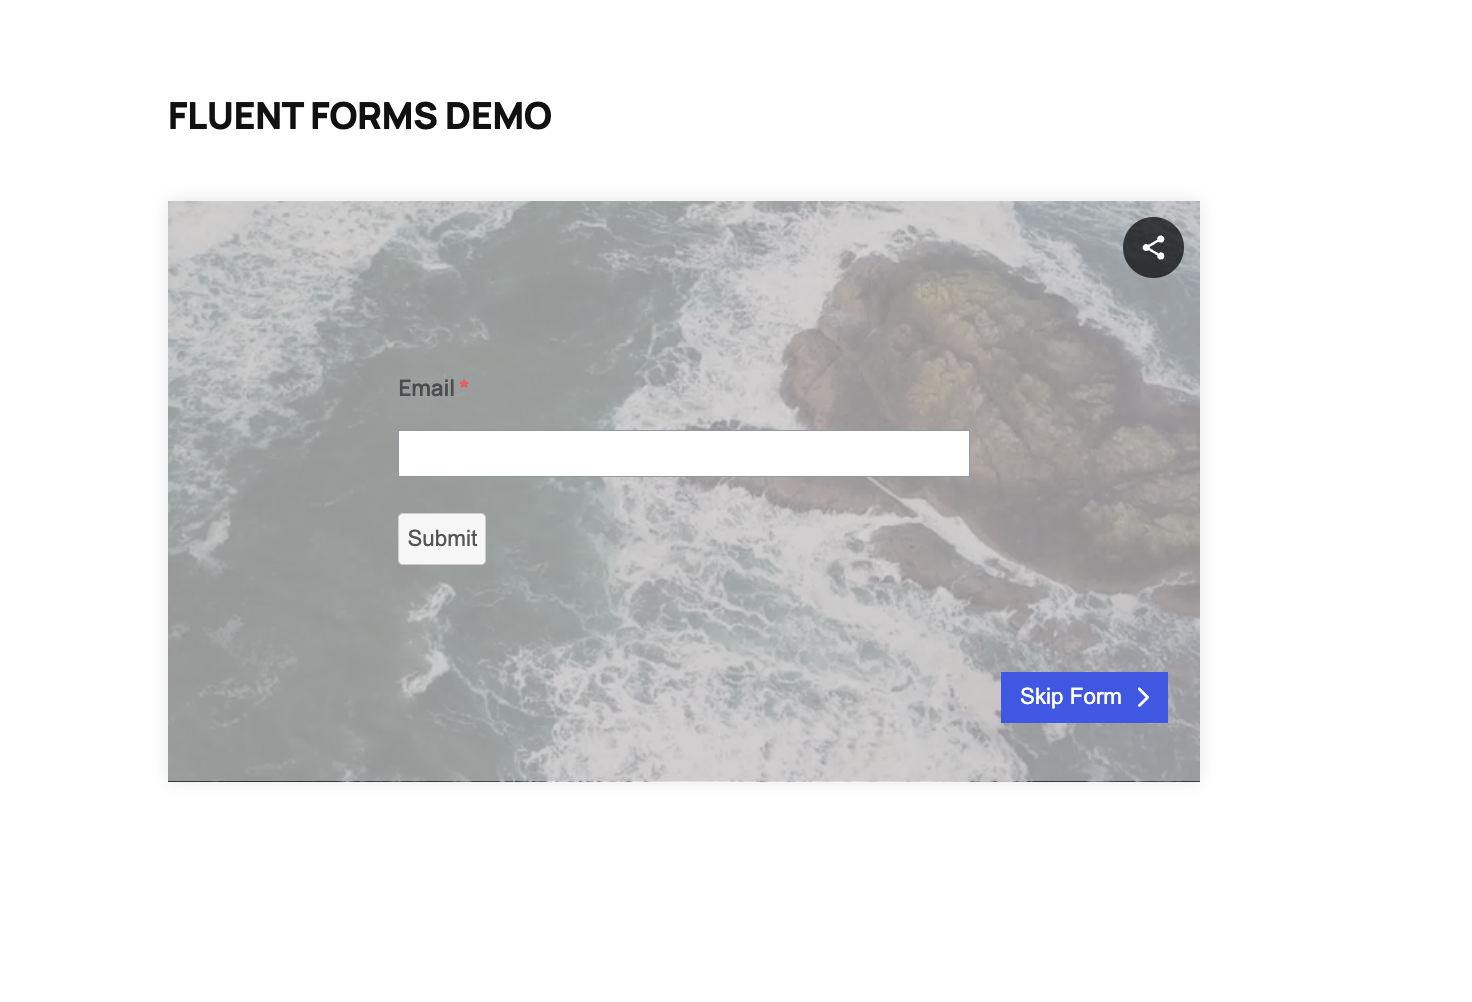
To view user entries, navigate to the entries section of Fluent Dashboard.
How to Integrate GoDAM Record field with Fluent Forms
Step 1: Create a New Fluent Form
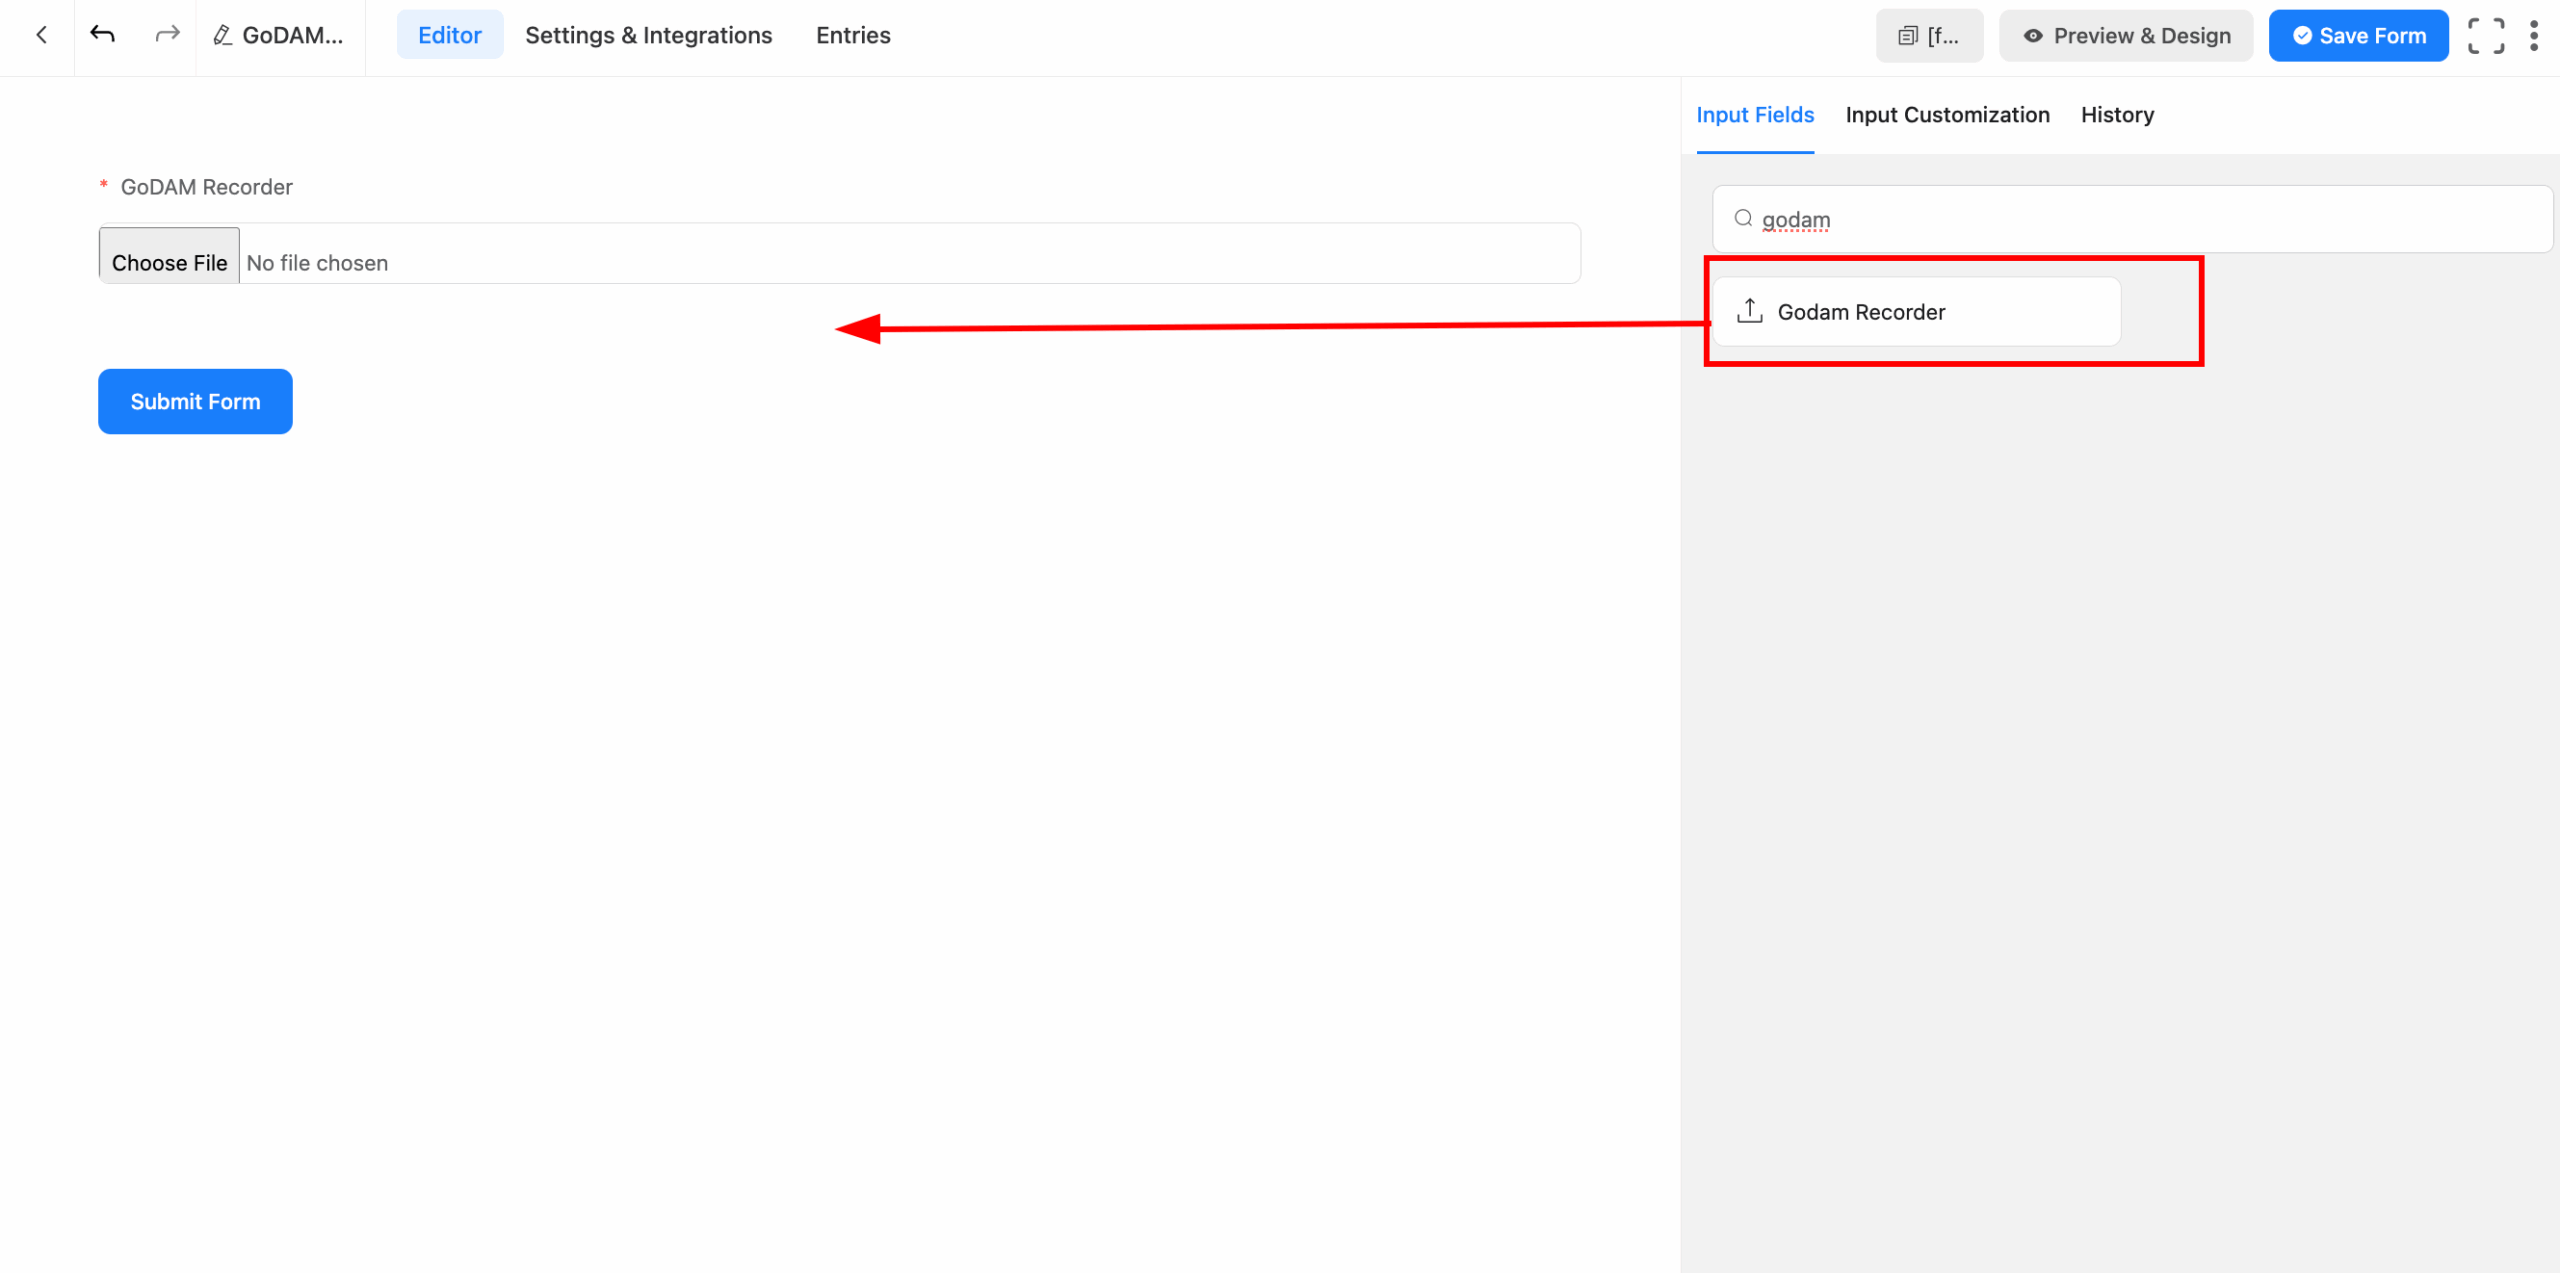
Step 2: Add the GoDAM Recorder Field
From the available form fields, locate the GoDAM Recorder field and add it to your form. This custom field enables users to record webcam videos, capture screen recordings, or upload video files directly through the form interface. Configure any specific settings for the recorder if needed, then save your form.
Step 3: Embed the Form on Your Site
Once your form is ready, embed it into posts, pages. This allows your visitors to easily access the form wherever you want them to submit video content.
Step 4: Test the Recording and Submission Workflow
Before going live, perform a test submission to verify that the GoDAM Recorder is functioning correctly. Record a sample video or upload a file, fill out the other form fields, and submit. Confirm that the video uploads successfully and plays back within the submission confirmation or admin panel.
Step 5: Review and Manage Submitted Videos
After submissions start coming in, use the Fluent Forms entry management interface to preview each submitted video directly via the embedded GoDAM player. You can download videos as needed for offline review or processing. If you have the premium GoDAM feature, you can also access all submitted videos organized neatly in your GoDAM central media folder for easy tracking and management.
Free Features
- Webcam Video Recording: Users can record videos directly from their webcam within the form, no need to upload files separately.
- Screen Recording (Screencast): Capture screen activity for detailed support requests, tutorials, or demonstrations.
- File Upload: Users can also upload pre-recorded video files in popular formats.
- Embedded Video Playback: Submitted videos are displayed within the form entry using an integrated video player for easy preview.
- Download Submitted Videos: Form owners can download any submitted video files directly from the entry details.
- Unlimited Usage: No restrictions on the number of videos recorded or uploaded through the form.
Premium Features
- Scalable for Enterprise: Ideal for businesses or organizations handling large volumes of video submissions requiring centralized media management.
- Centralized Video Storage: Automatically store all submitted videos in a dedicated folder on your GoDAM central media platform, keeping all form submissions organized in one place.
- Advanced Video Management: Effortlessly track, search, and manage videos by form title within your GoDAM central media library.
- Priority Support: Get fast, dedicated assistance and updates to keep your video submission workflows running smoothly.