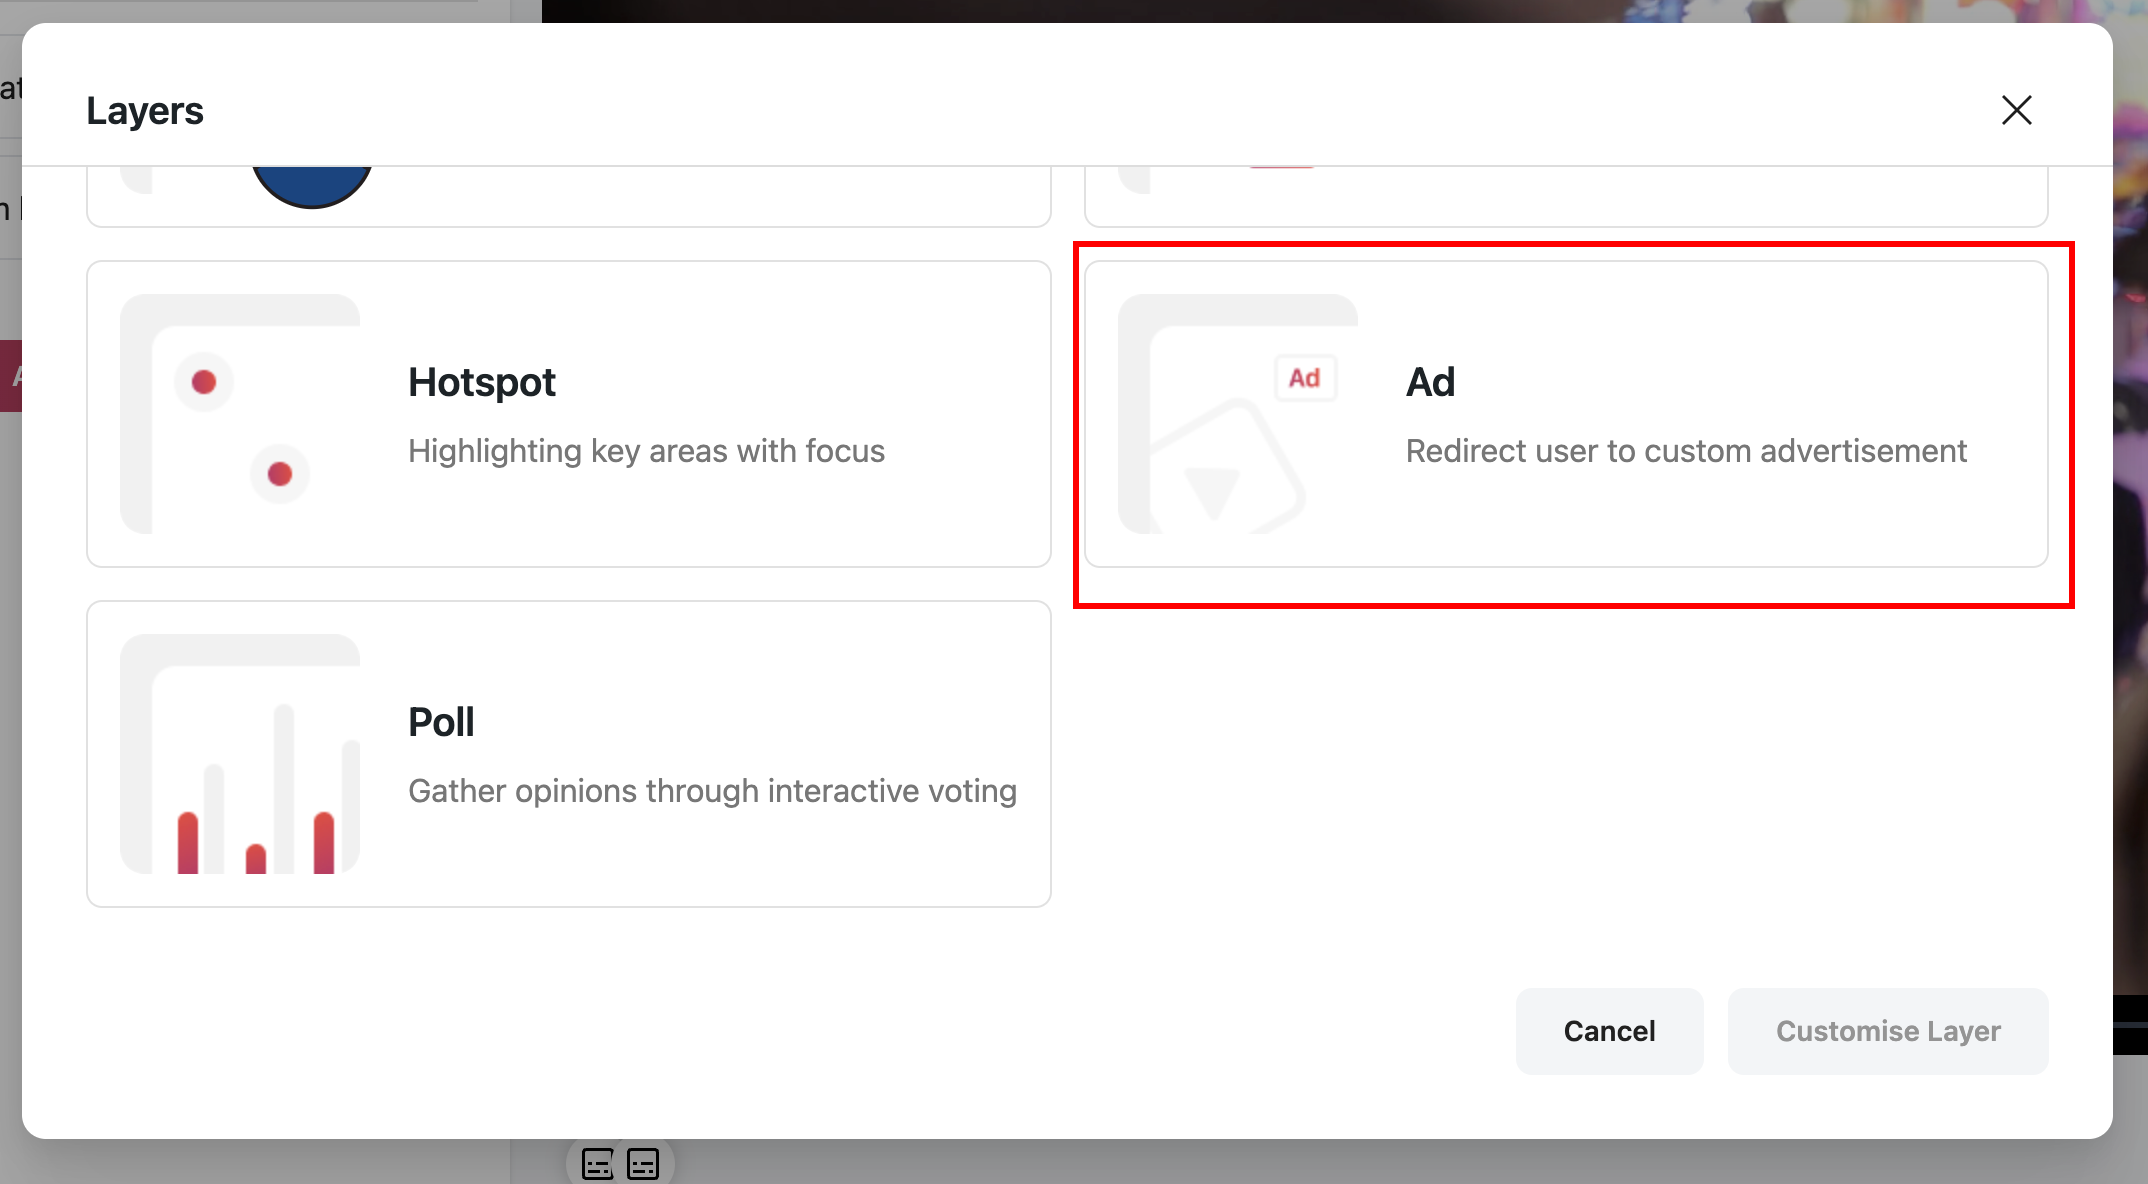
The GoDAM Video Ads Layer feature allows you to insert custom advertisements at any point within a video. You can either use self-hosted ads from your WordPress media library or integrate third-party ad servers (e.g., Google Ads). This helps in monetizing your videos and enhancing audience engagement.
Steps to Add a Self-Hosted Ad Layer
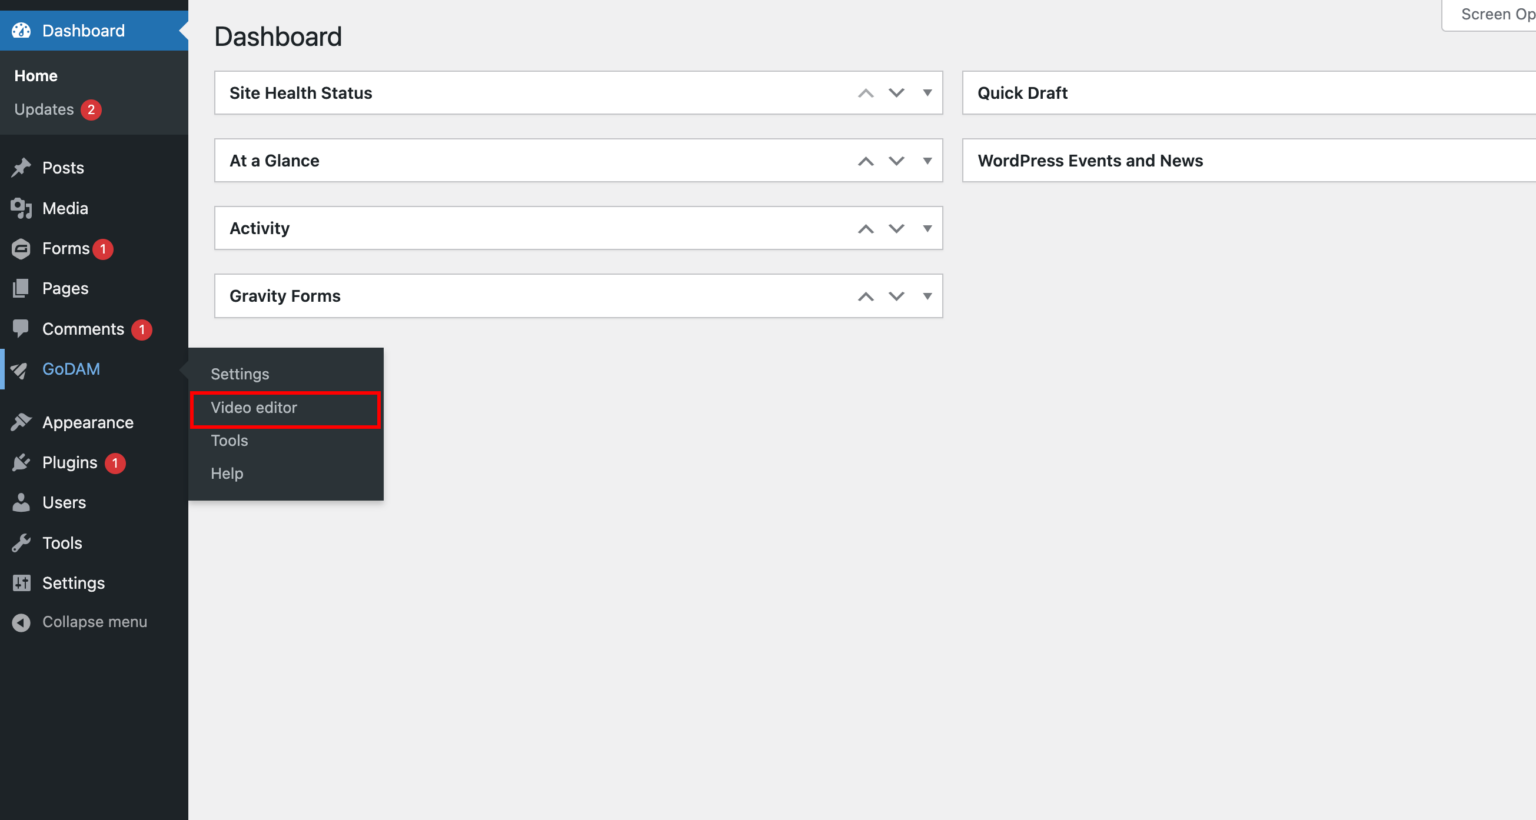
Step 1: Navigate to the Video Editor under the GoDAM menu.
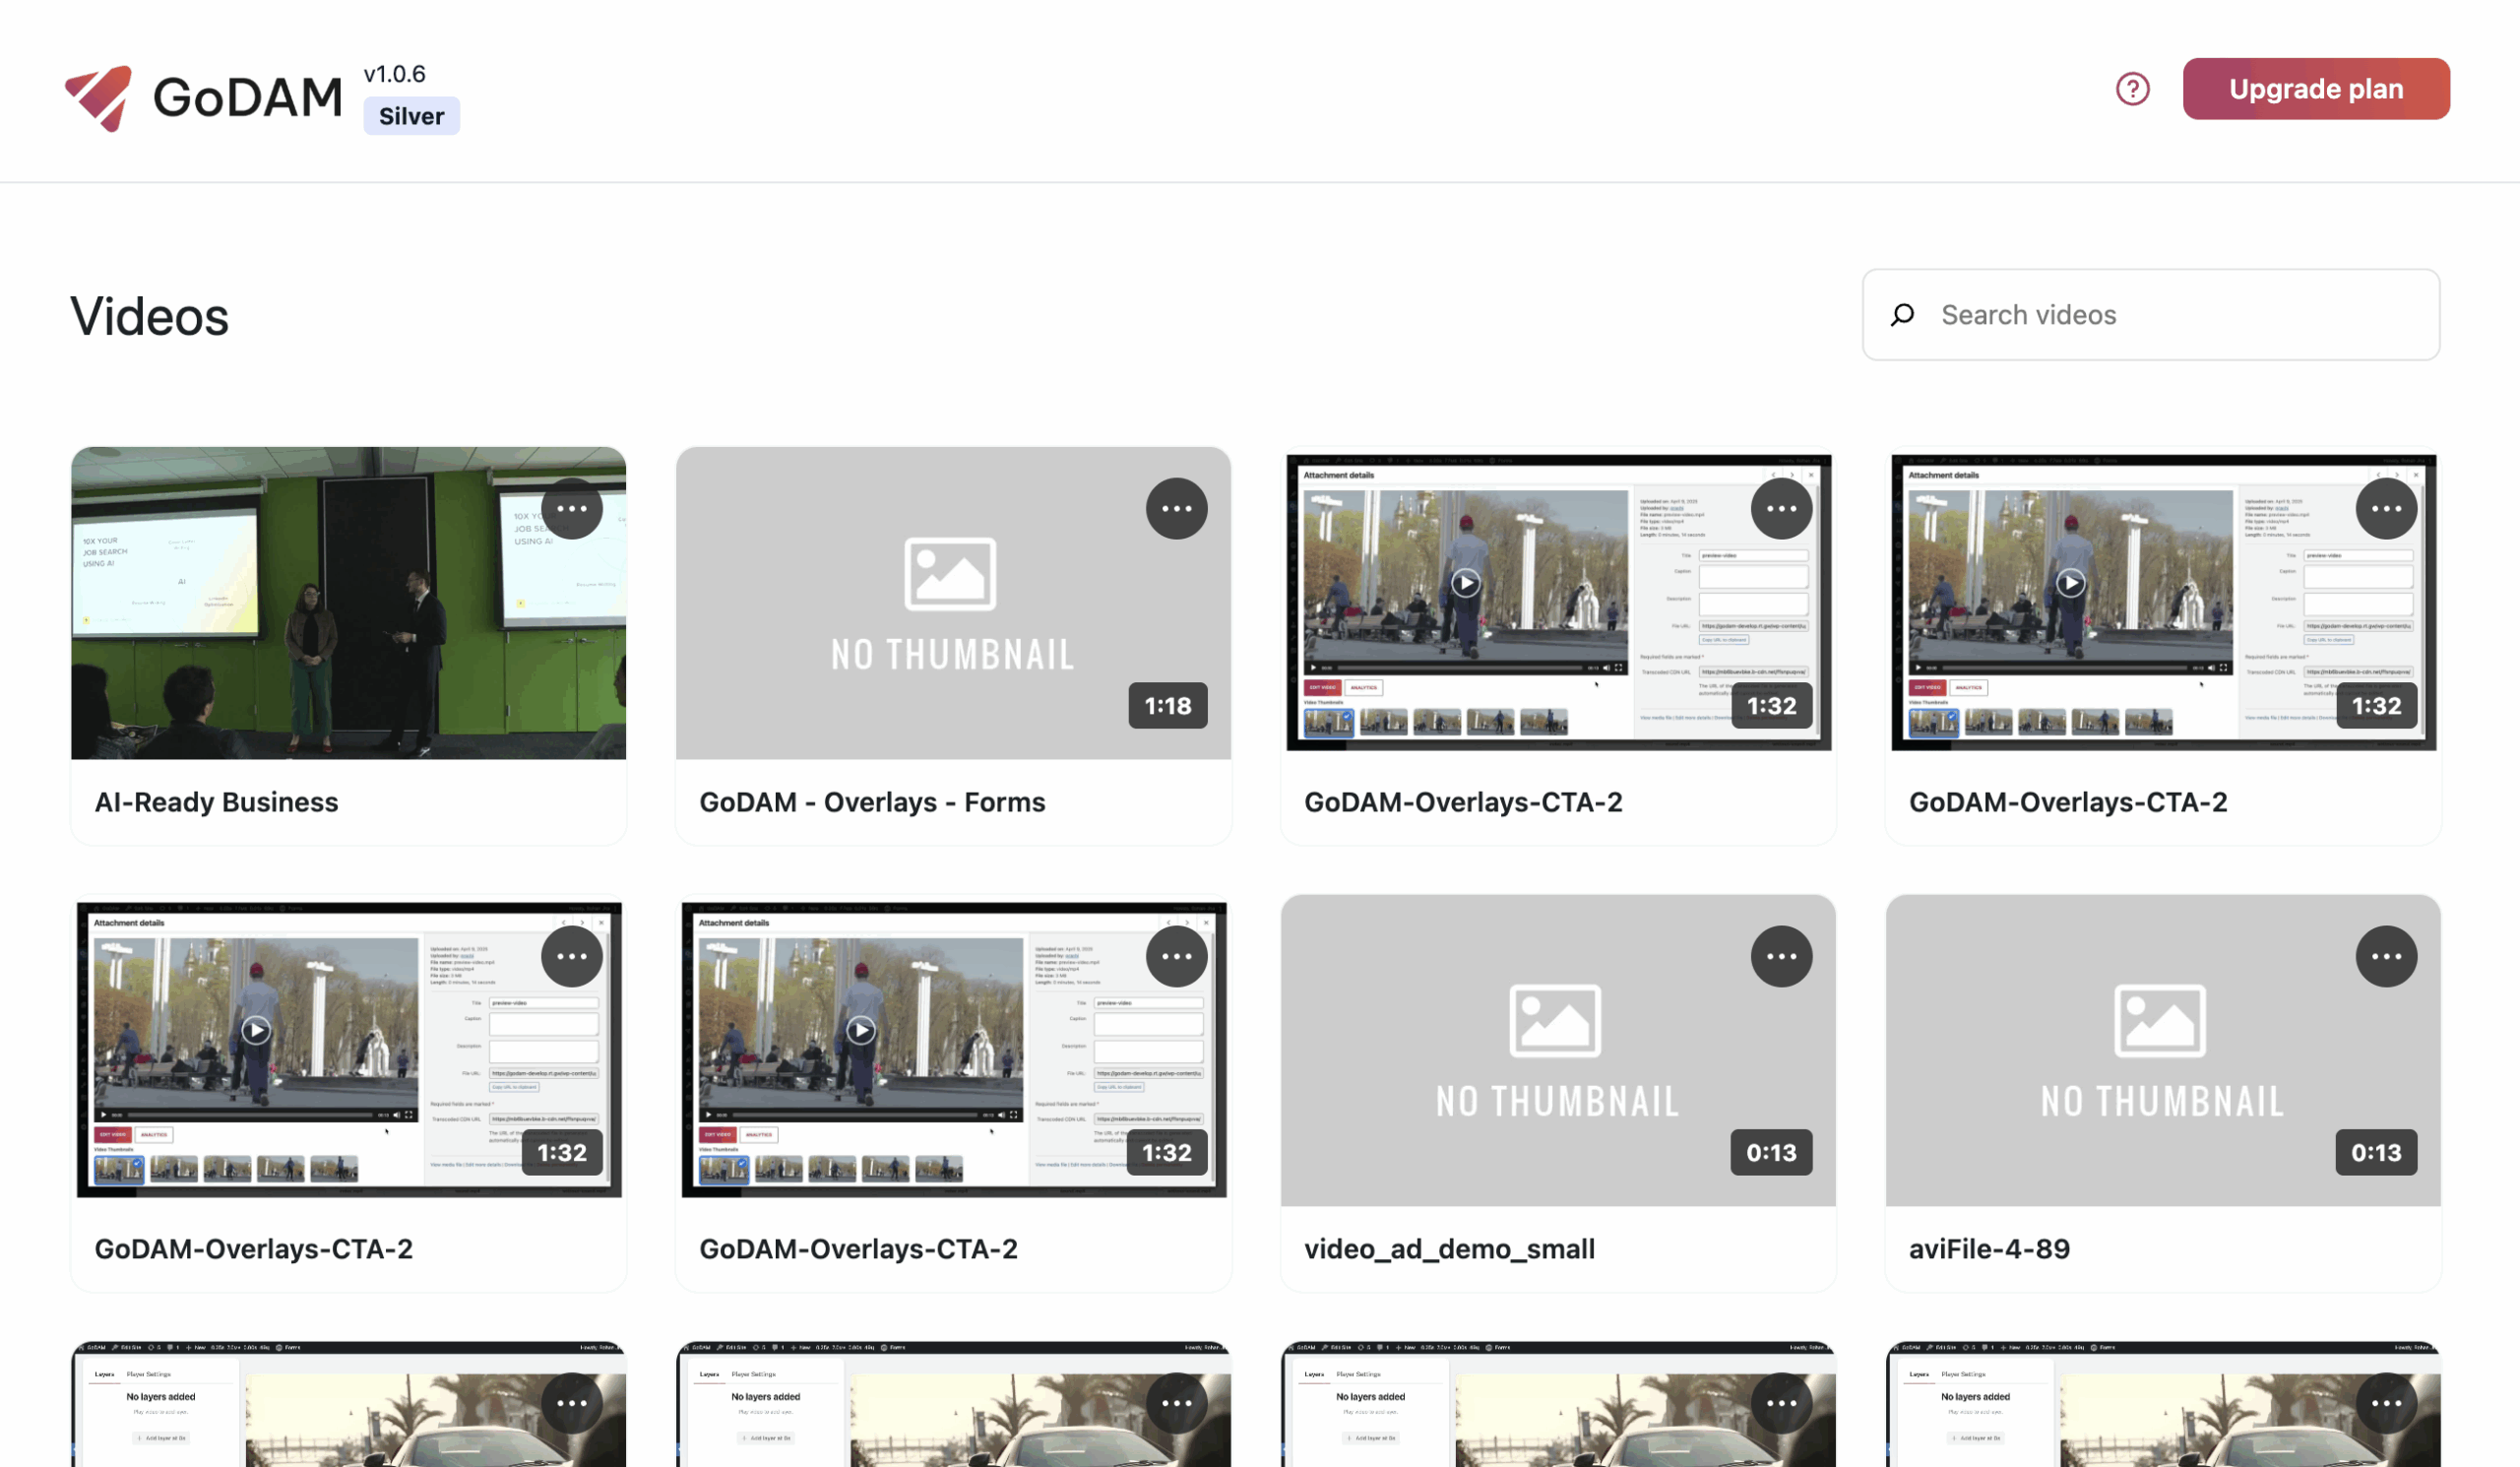
Step 2: Choose a video
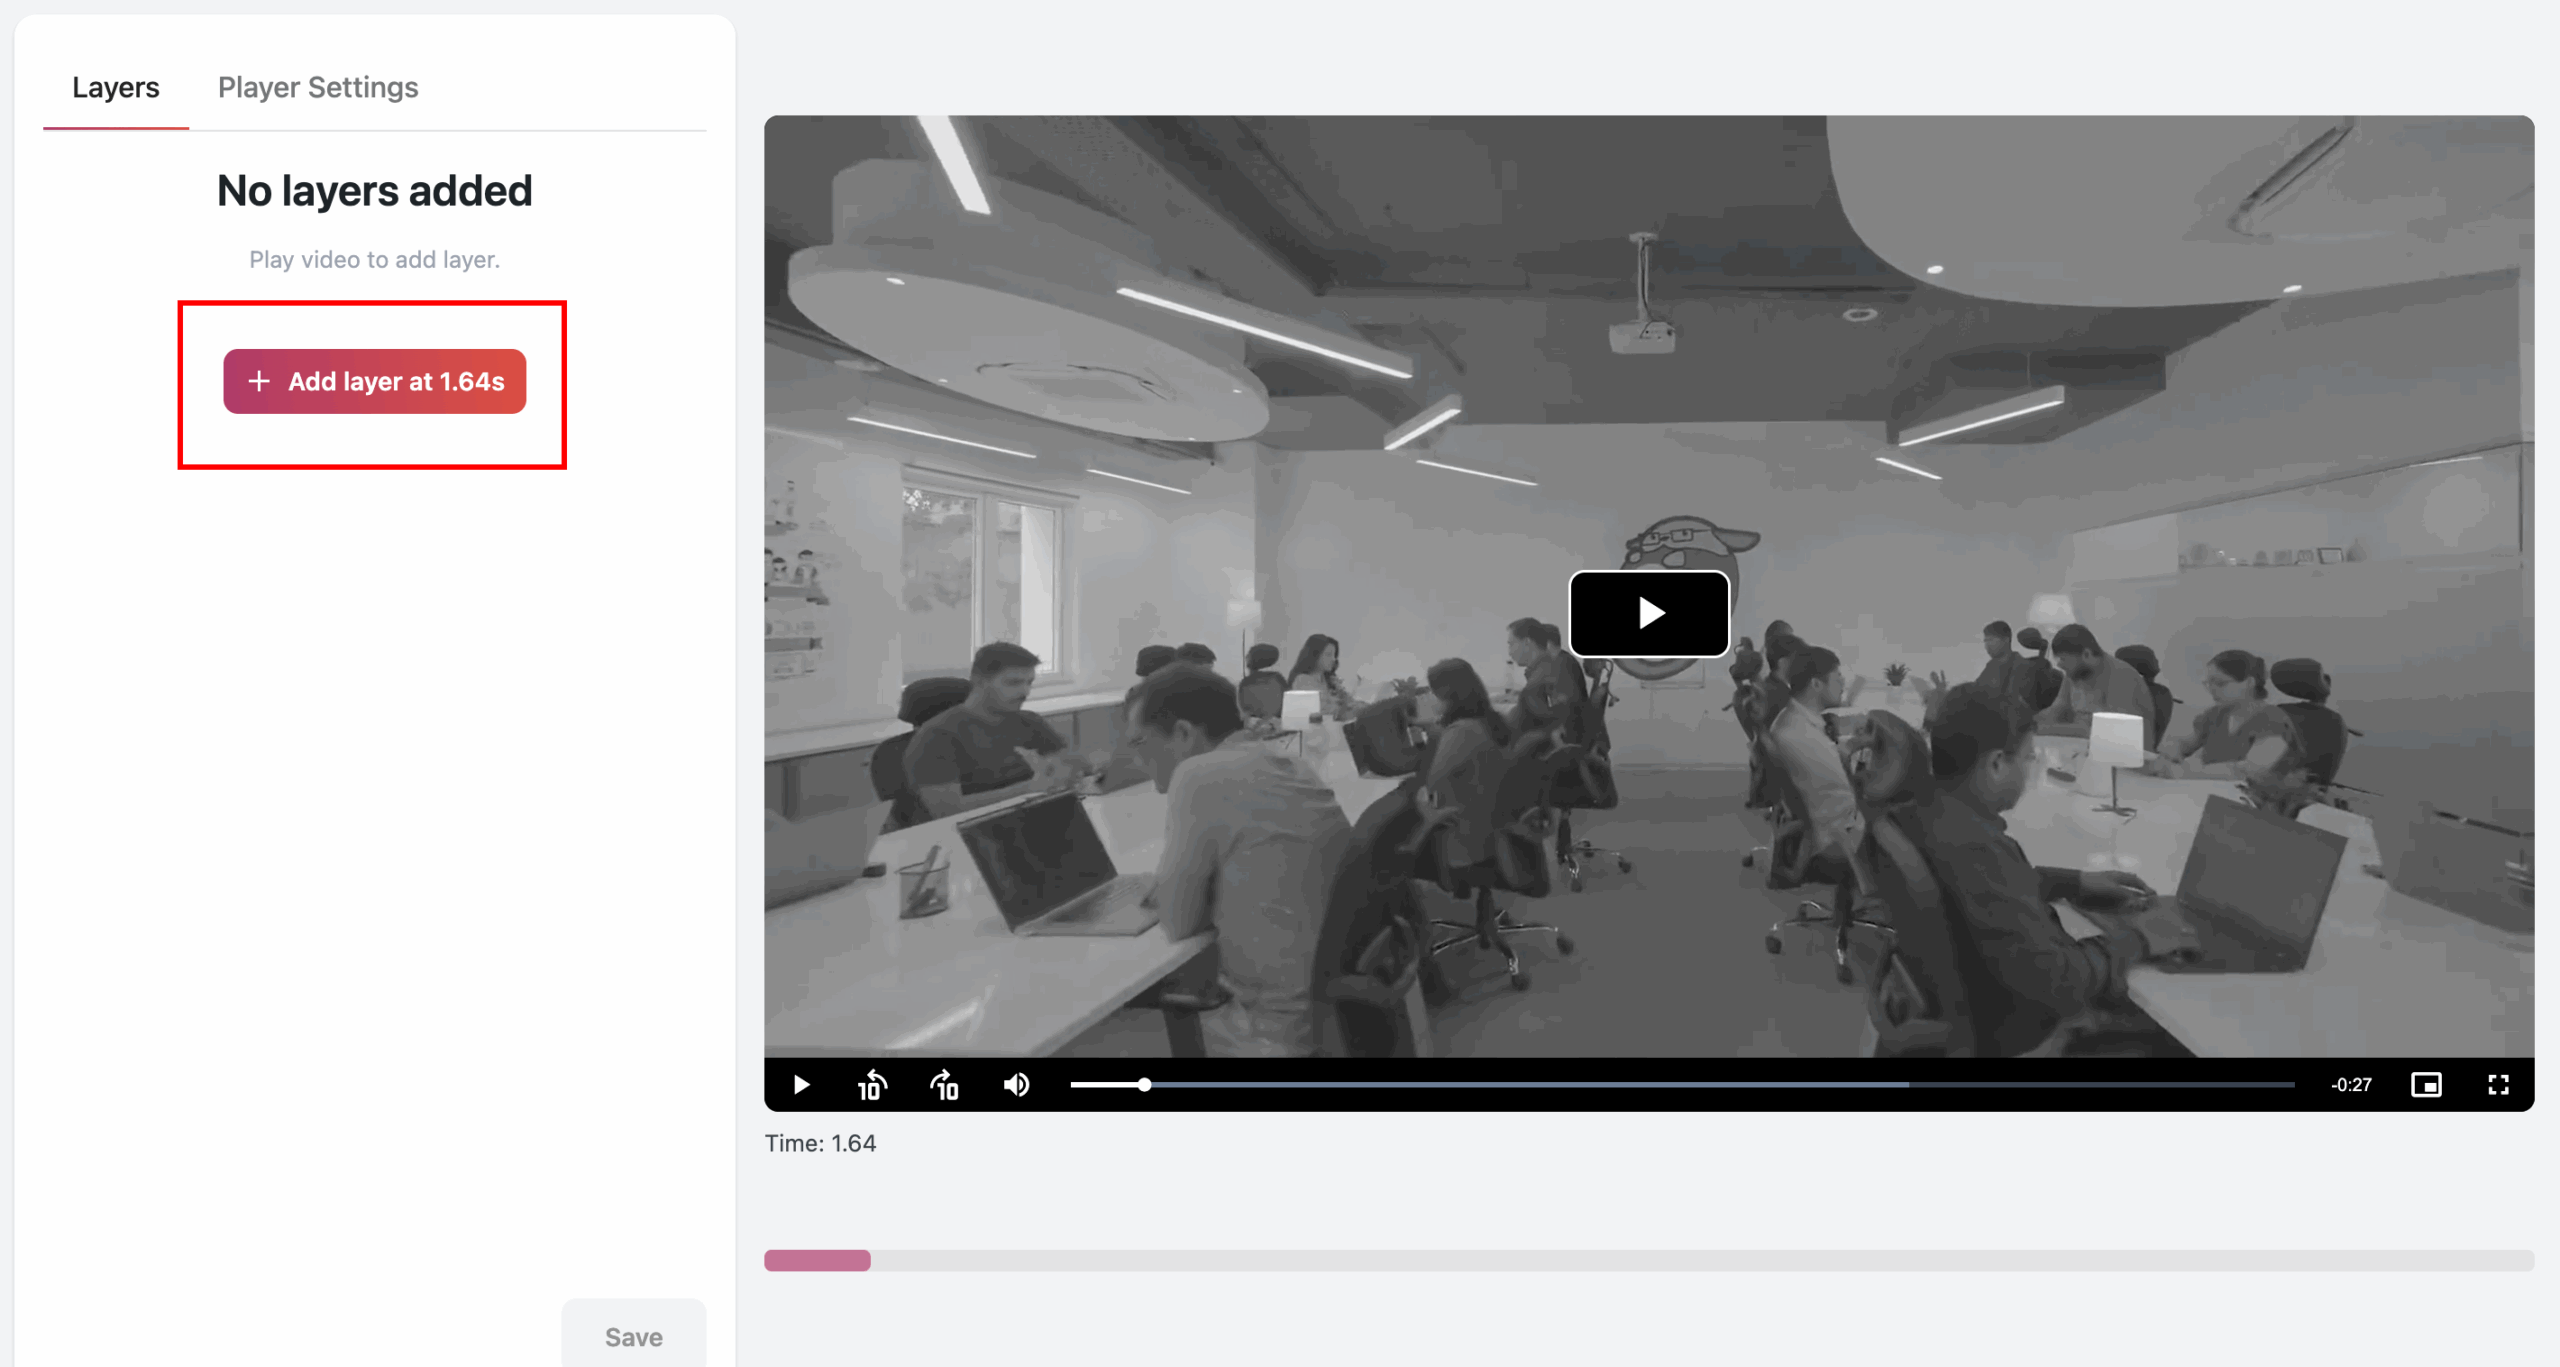
Step 3: Select a Timestamp
Move to the specific timestamp in the video where you want the ad to appear
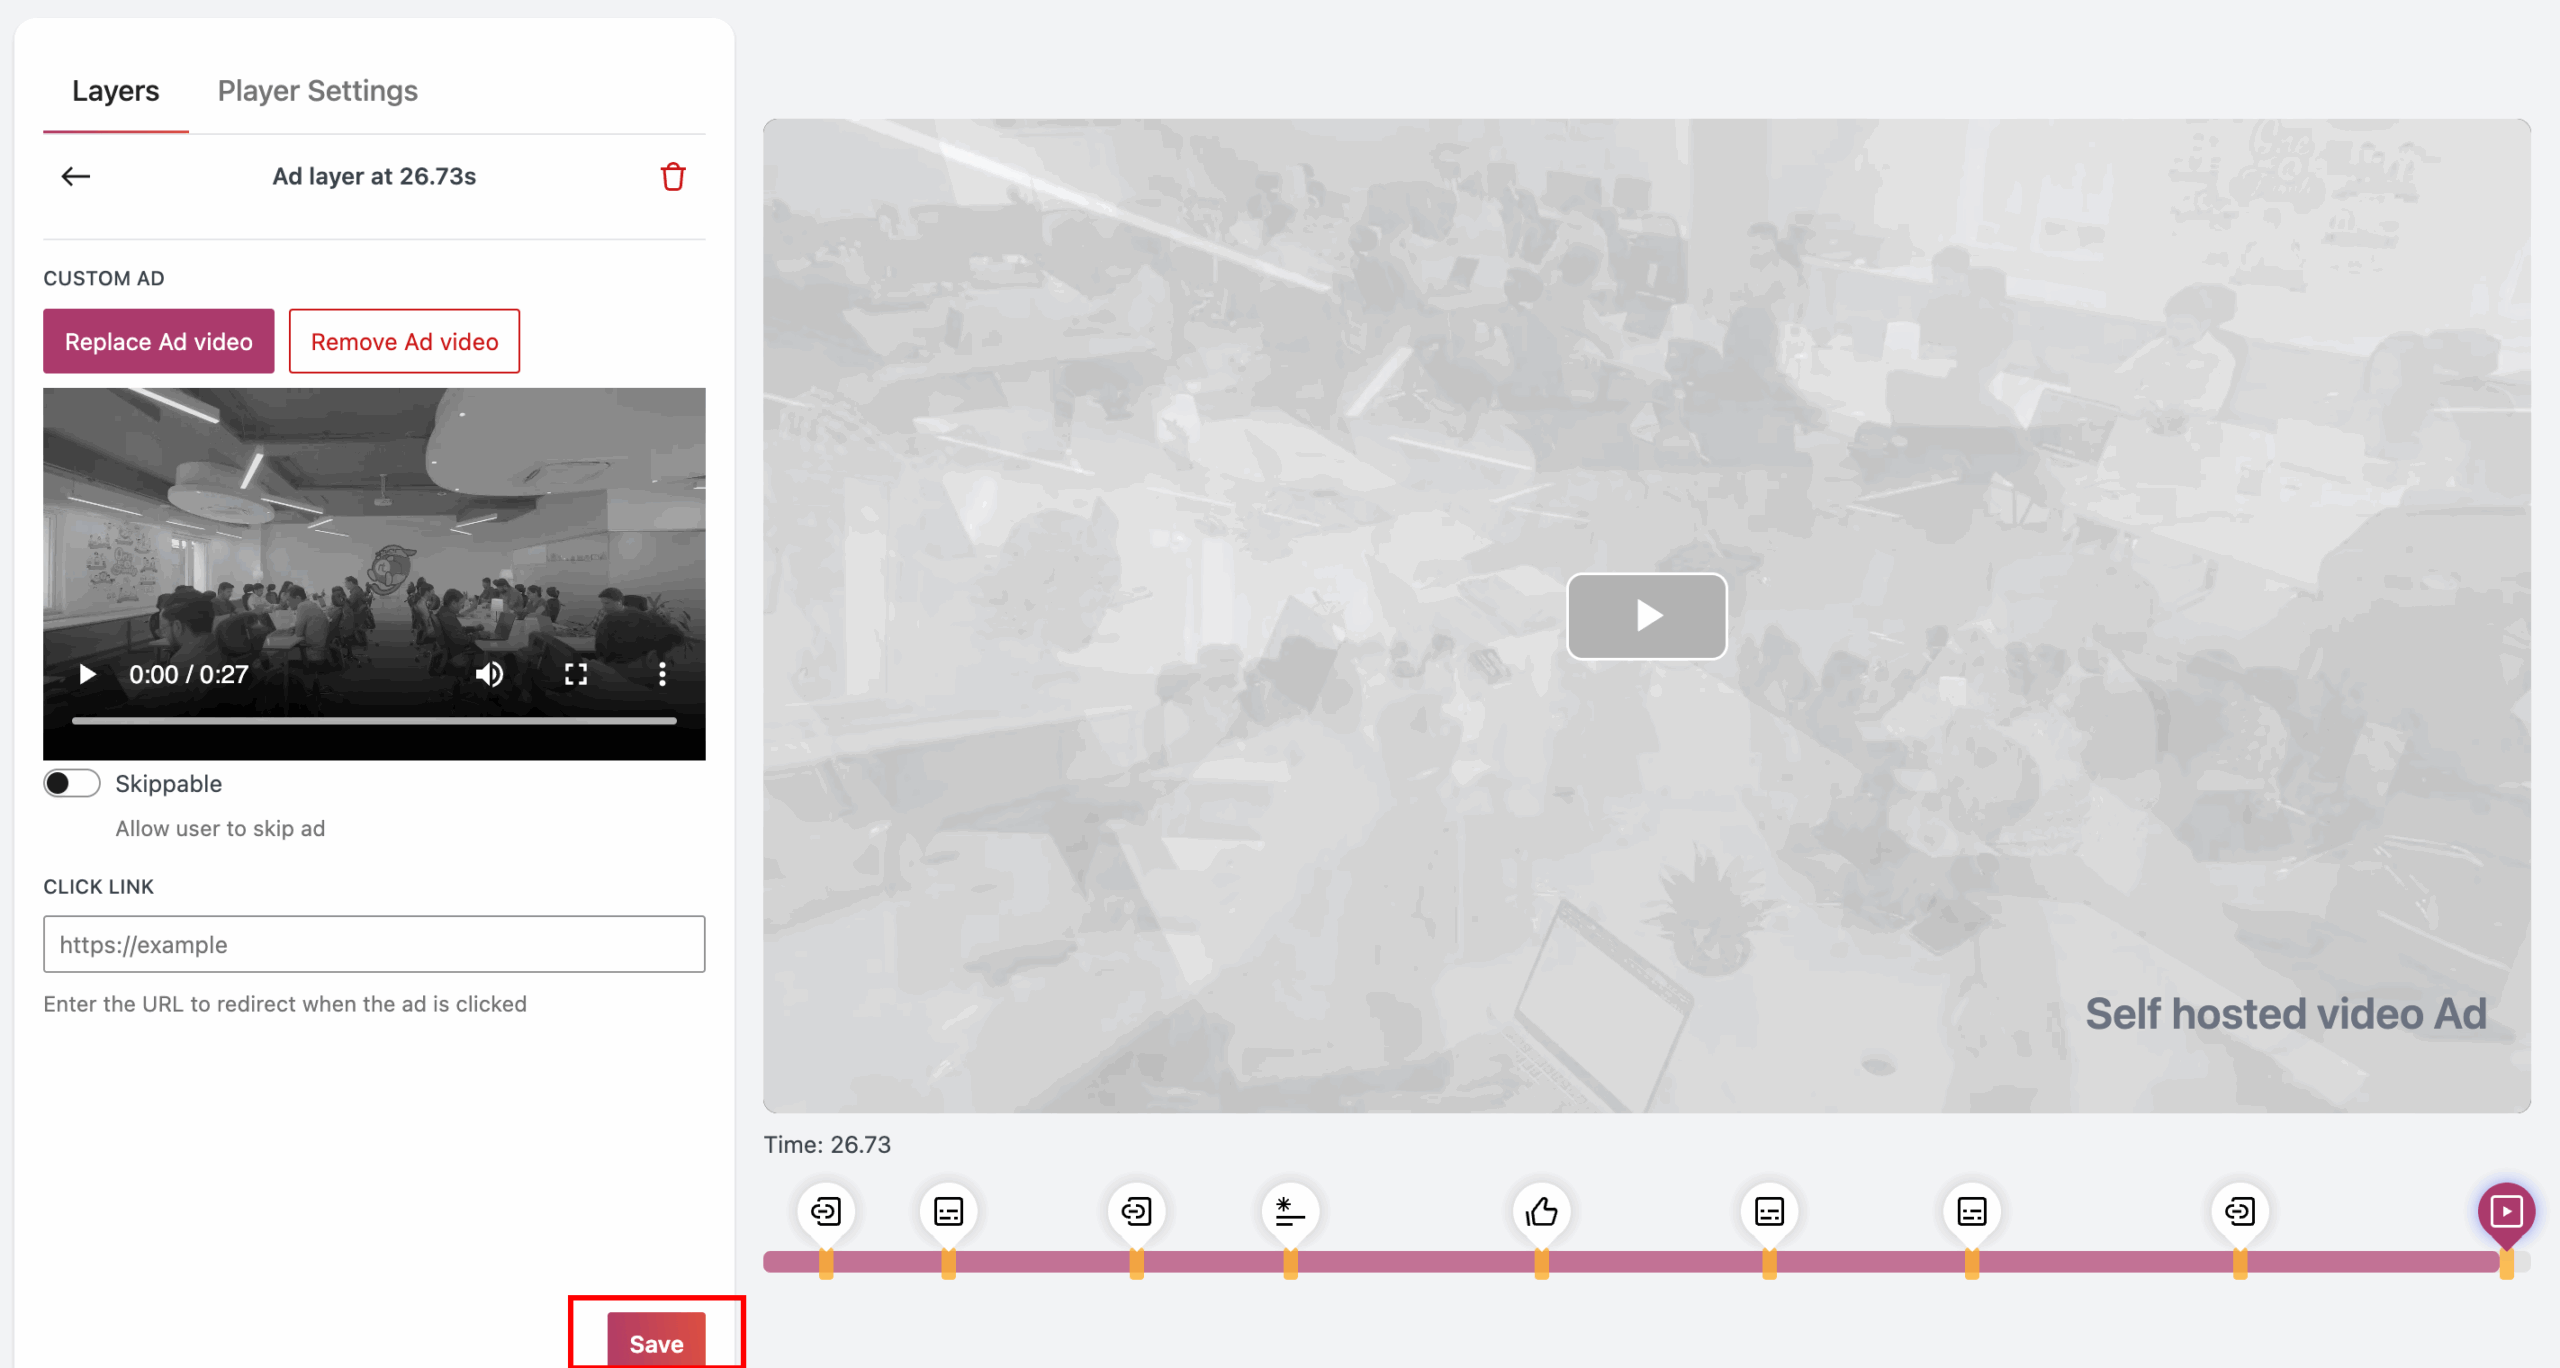
Step 4: Select AD from the popup
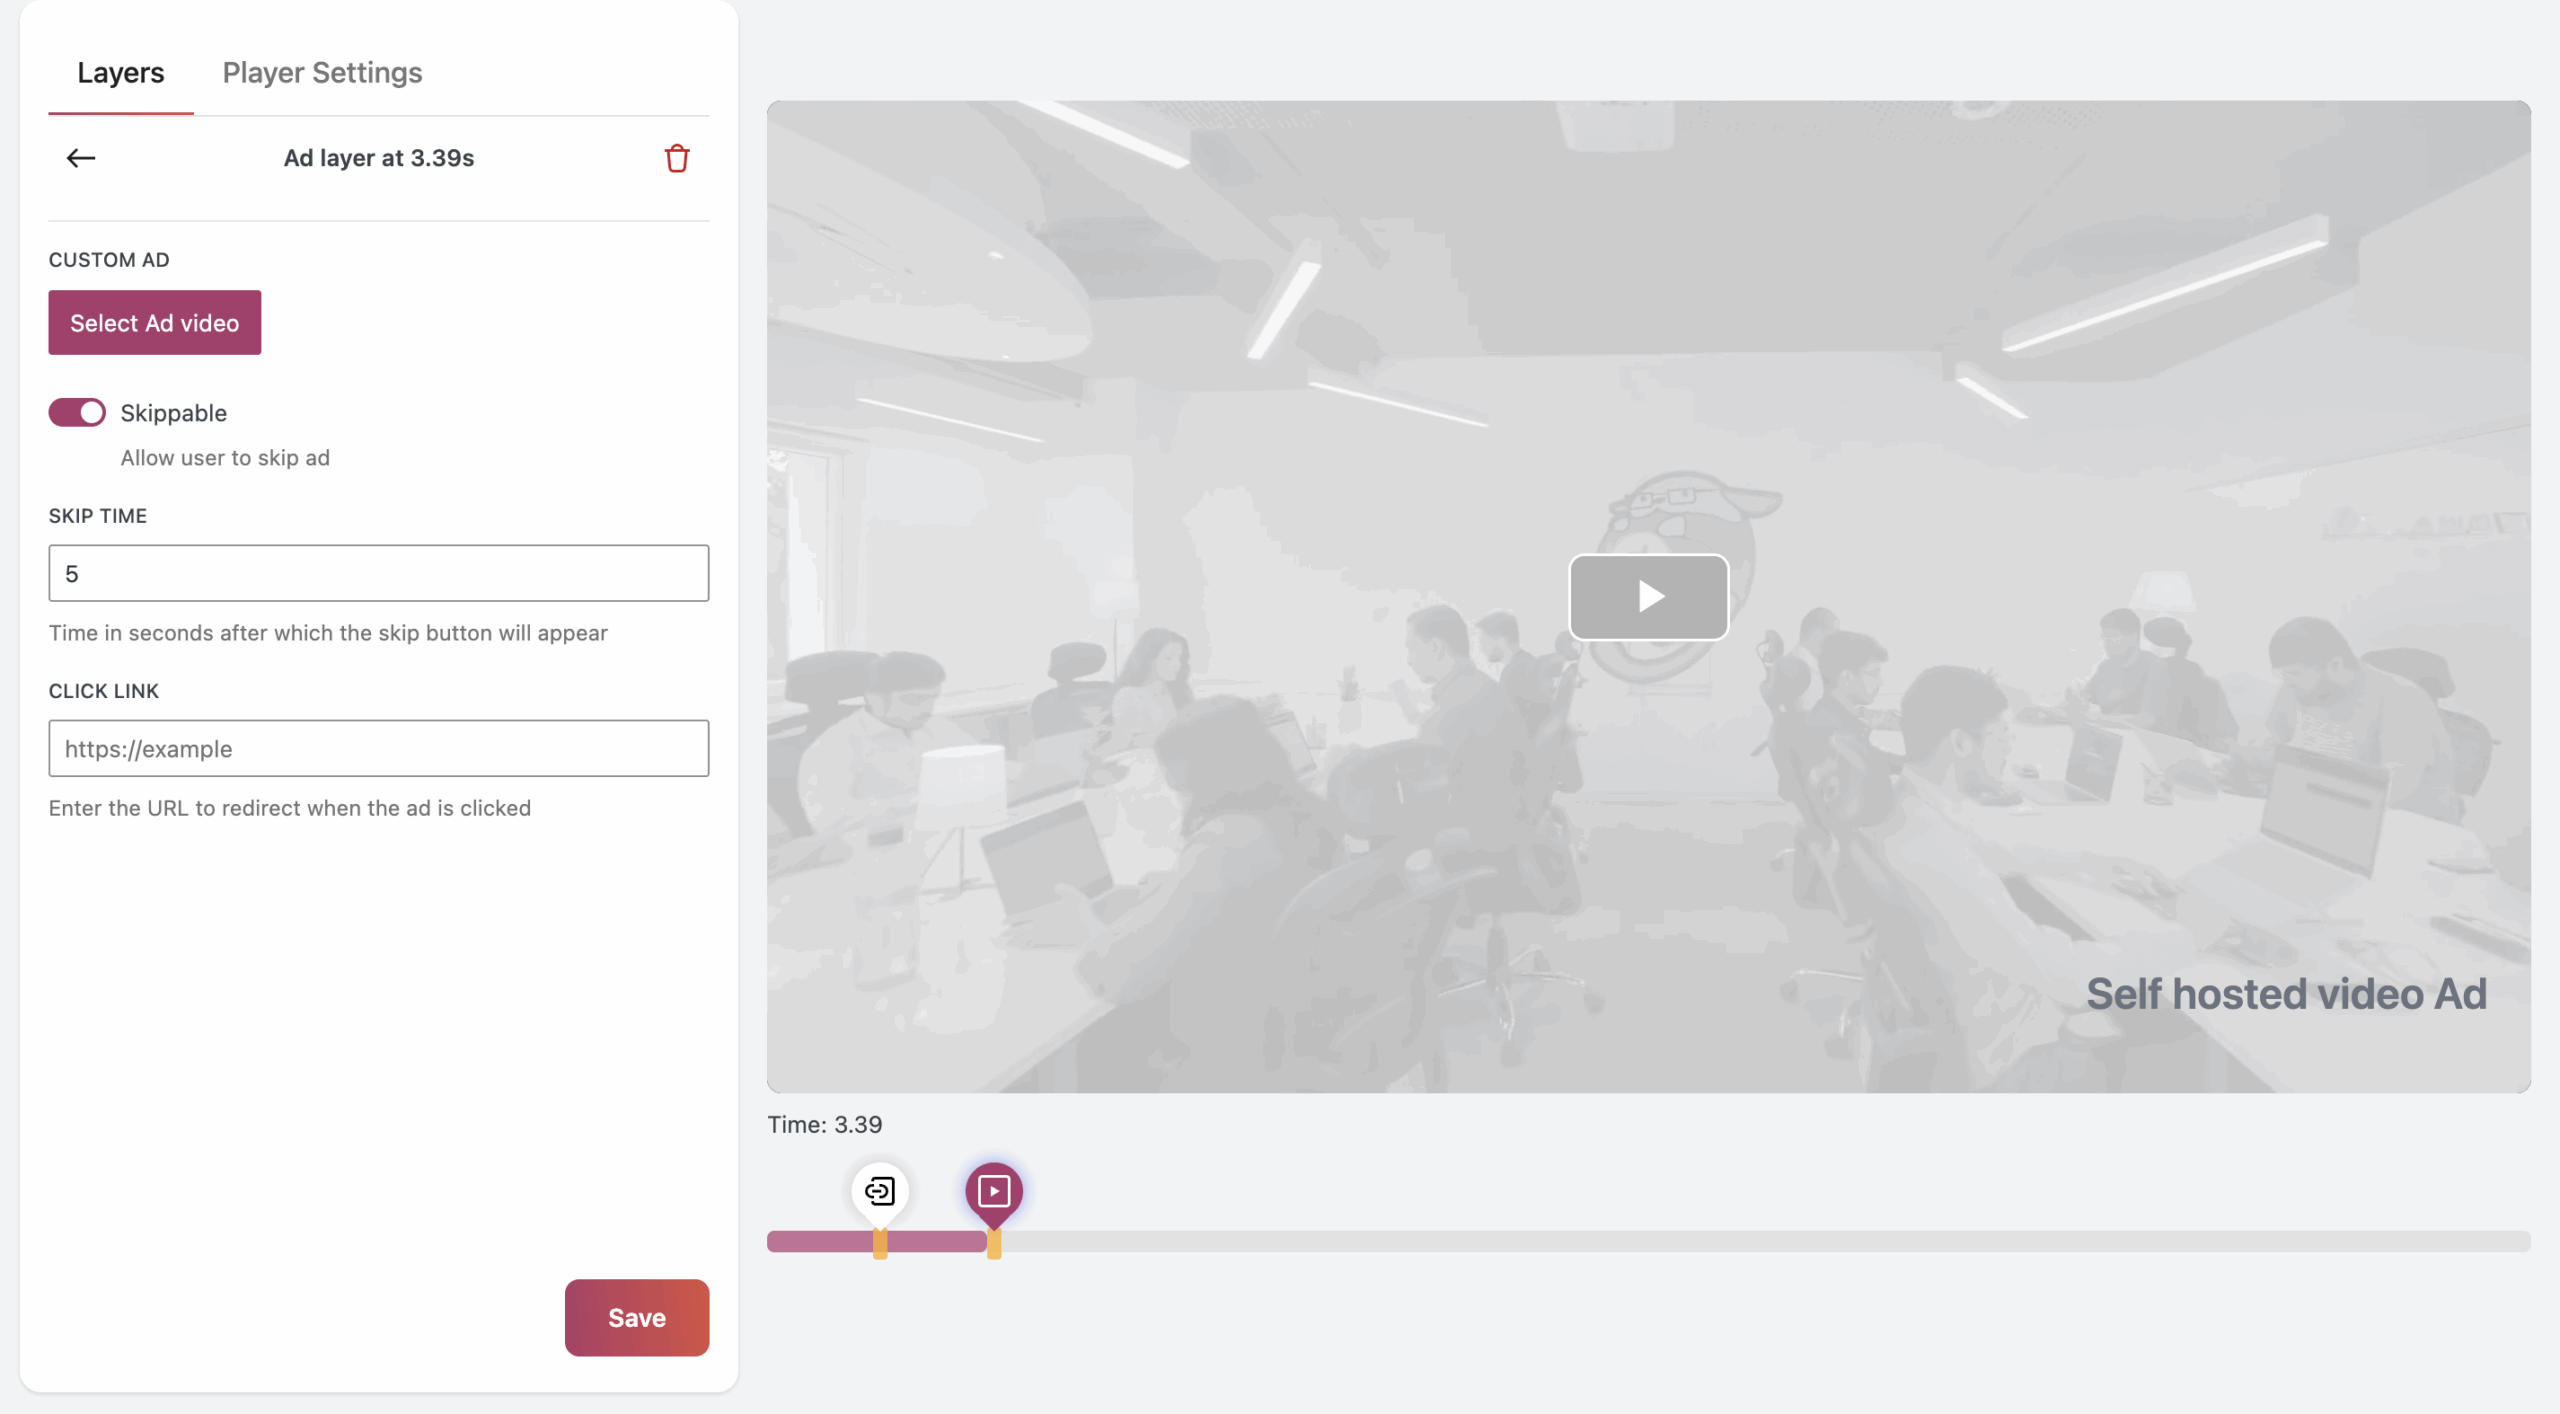
Step 5: Click on “Select AD Video”
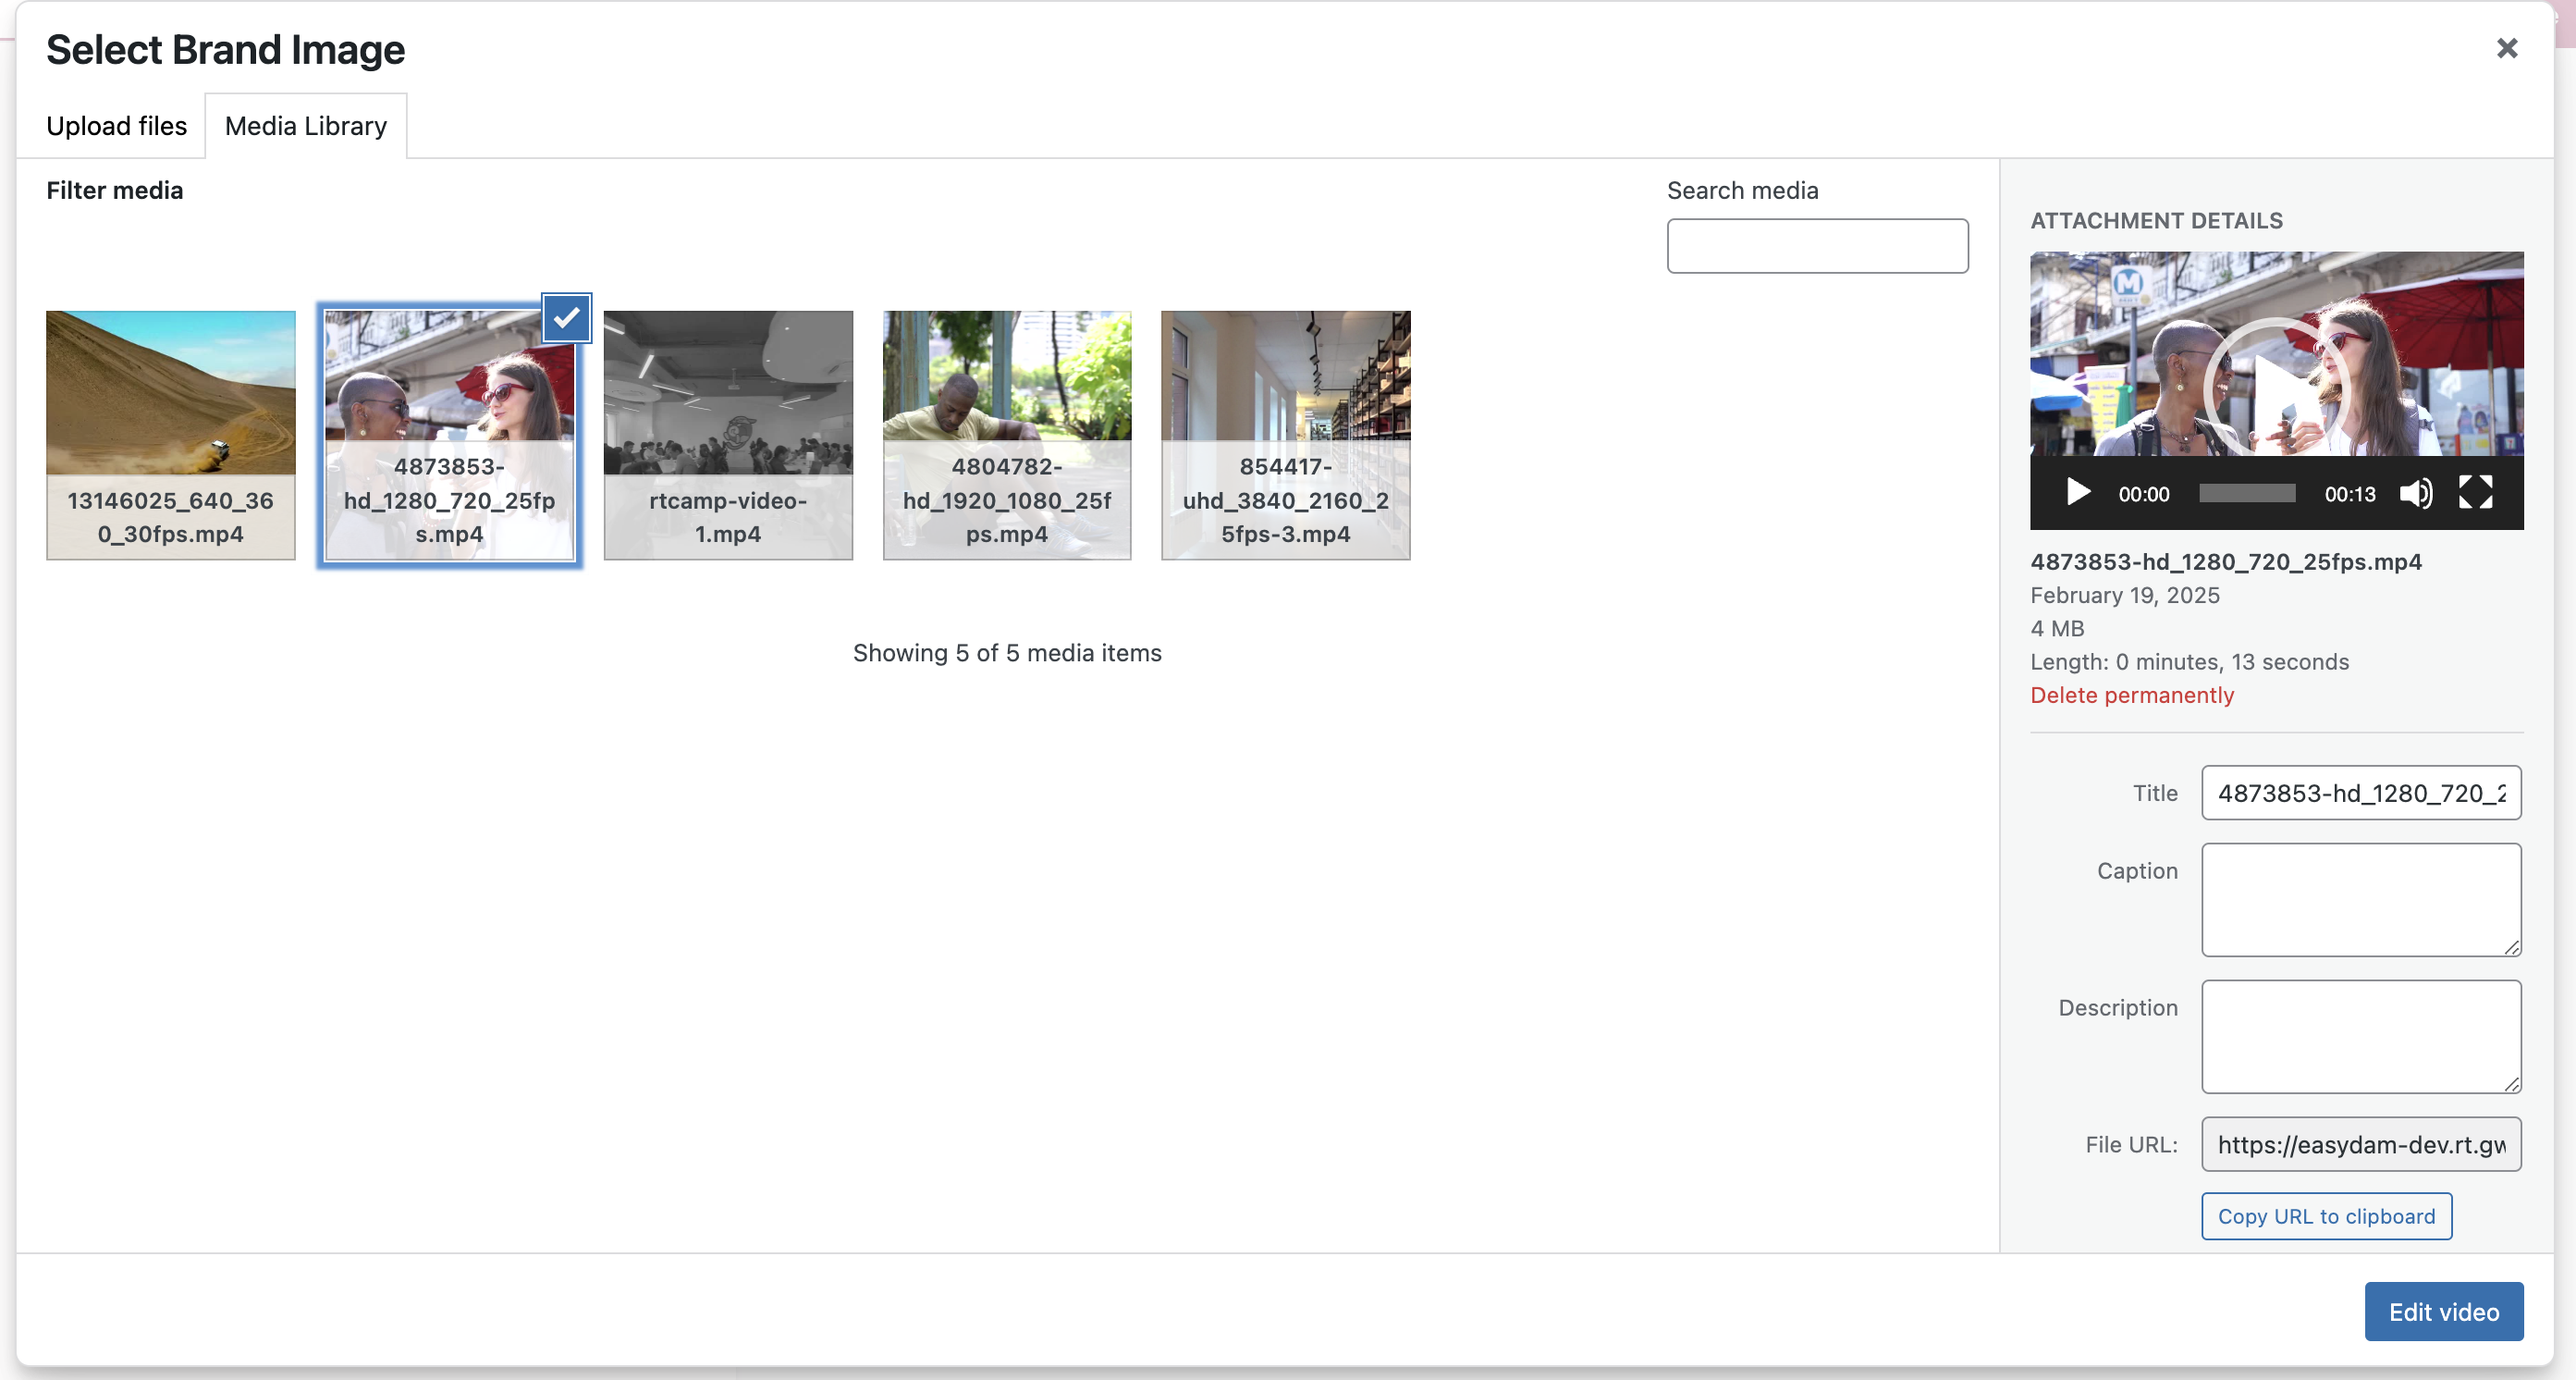
Step 6: Select a video from the WordPress Media Library to use as an ad
Step 7: Configure the “Skip Ad” button, which allows users to skip the ad after a set duration (default is 5 seconds).
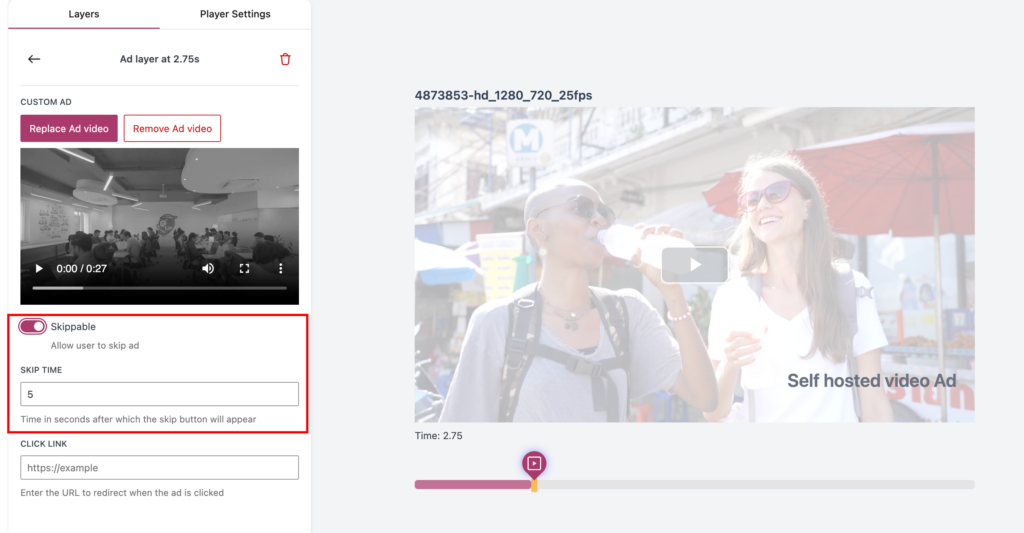
Step 8: Optionally, add a clickable link to the ad, which redirects users to a specified URL when clicked.
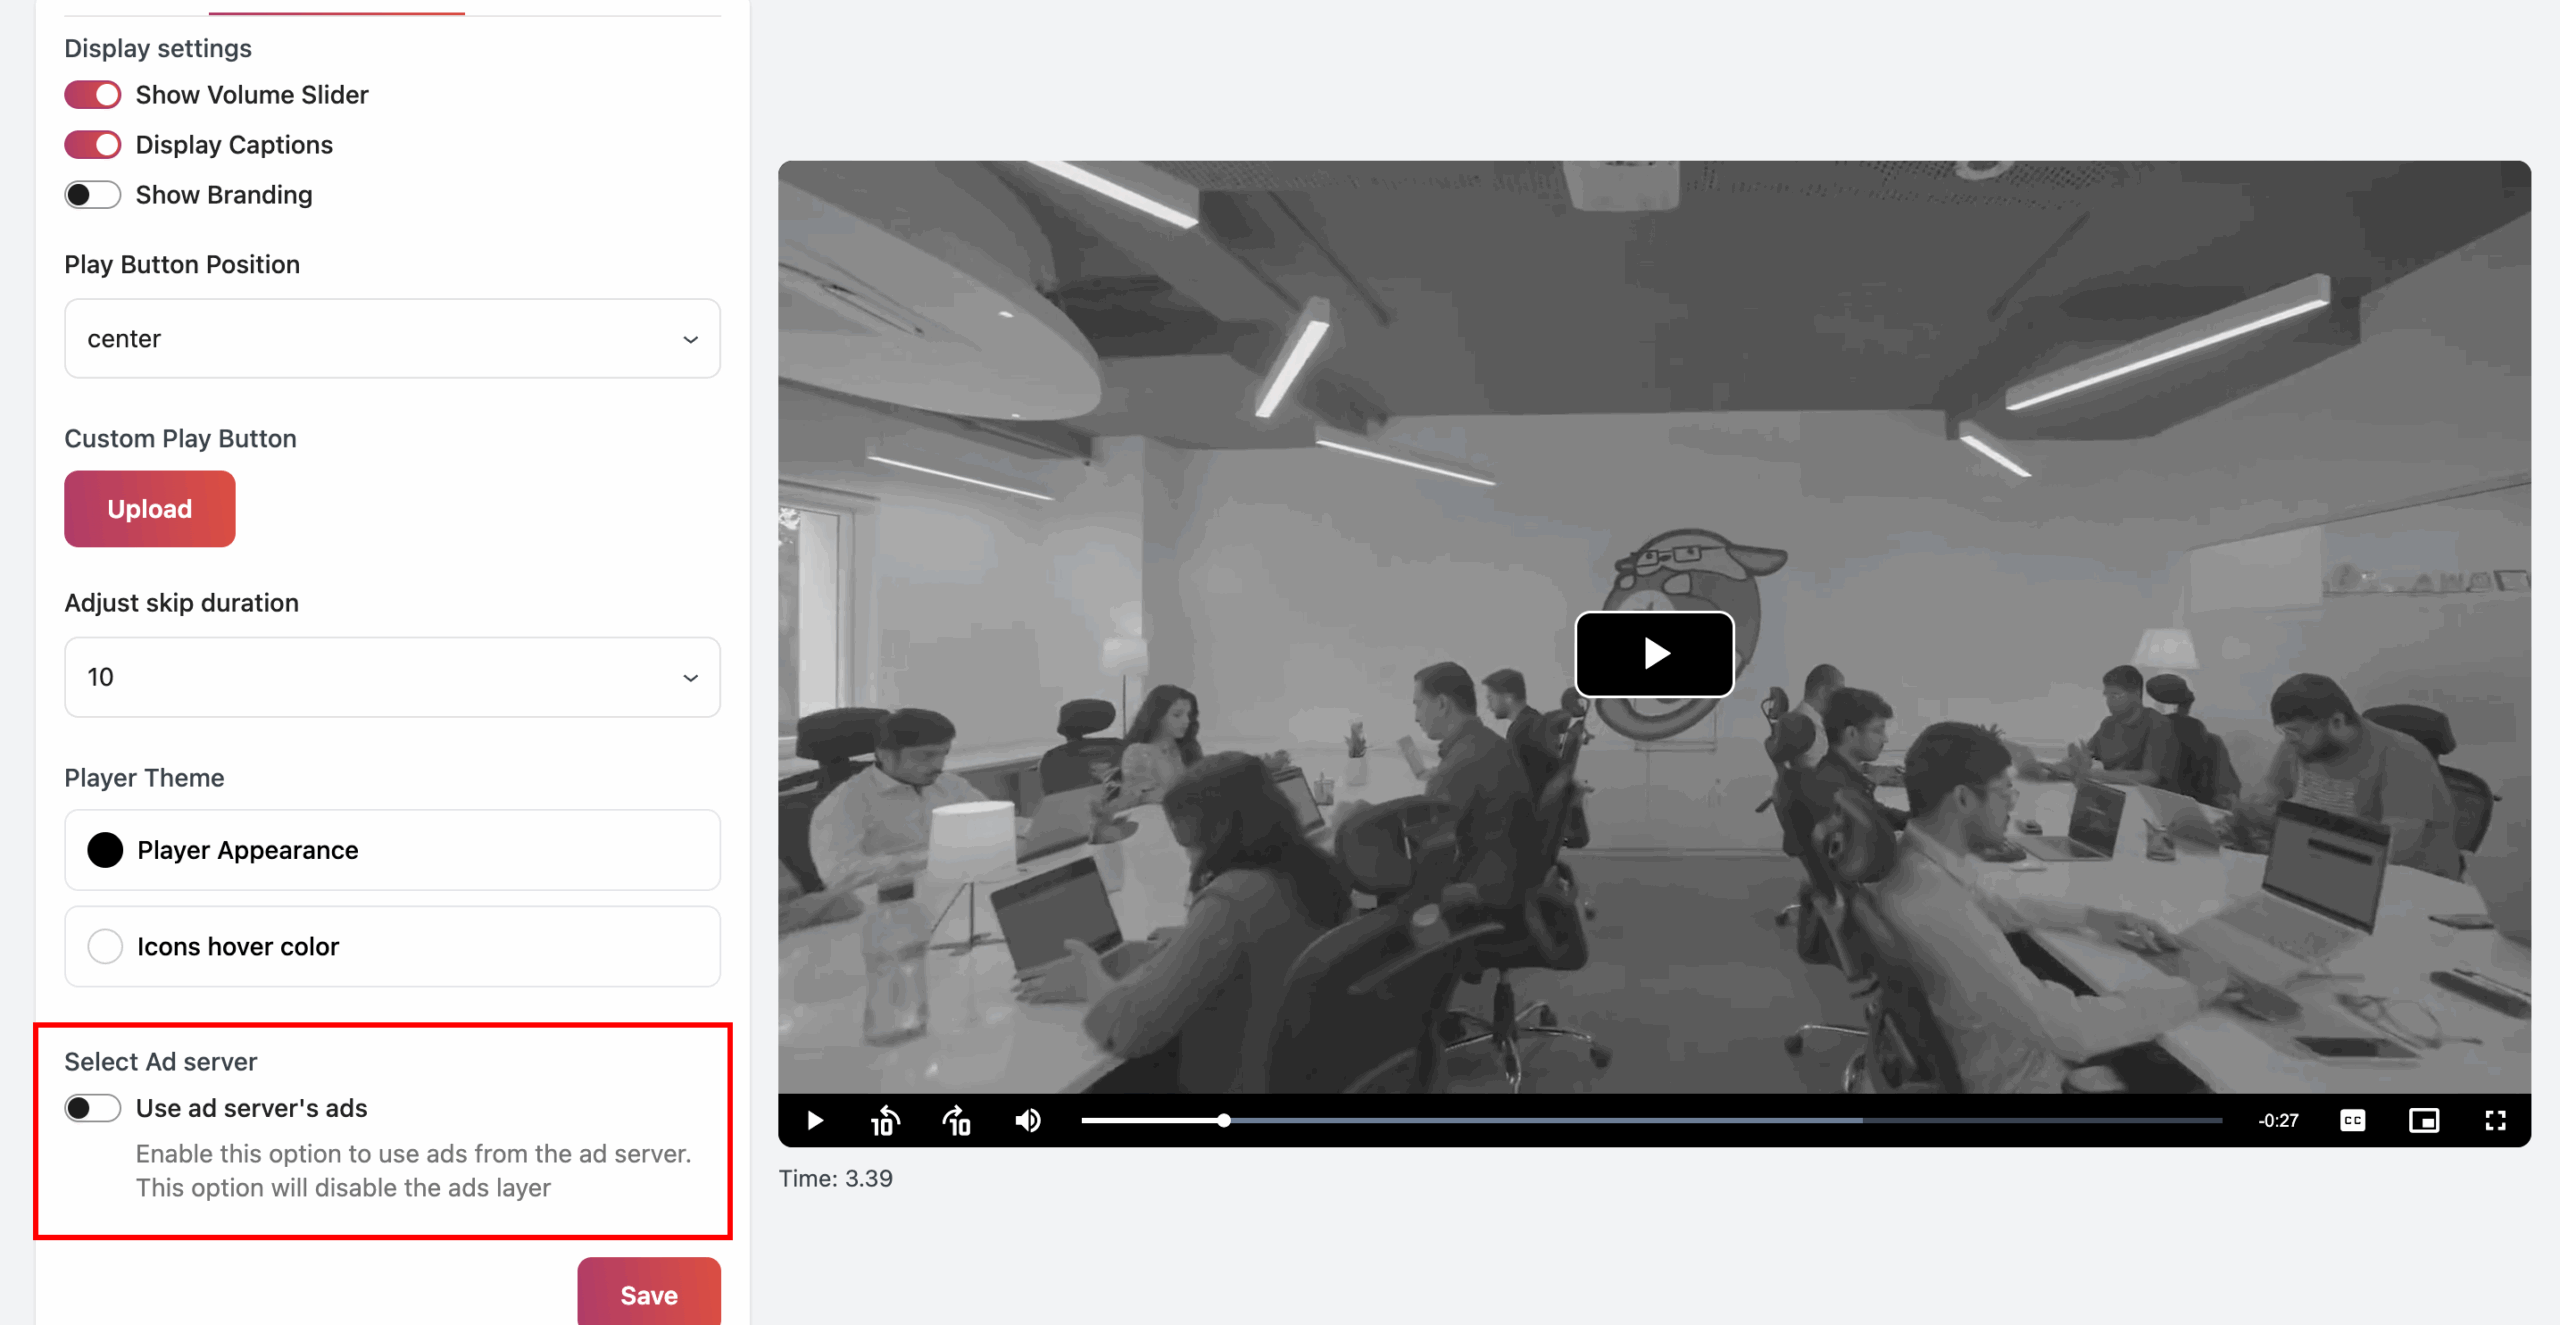
Steps to Integrate Third-Party Ad Servers
Step 1: Navigate to the Video Editor under the GoDAM menu.
Step 2: Choose a video
Step 3: Enable Ad Server Integration
Toggle “Use Ad Server’s Ads” to enable third-party ads.
Step 4: Enter the Ad Tag URL
Paste the VAST ad tag URL, which the video player uses to fetch ads from external ad networks.
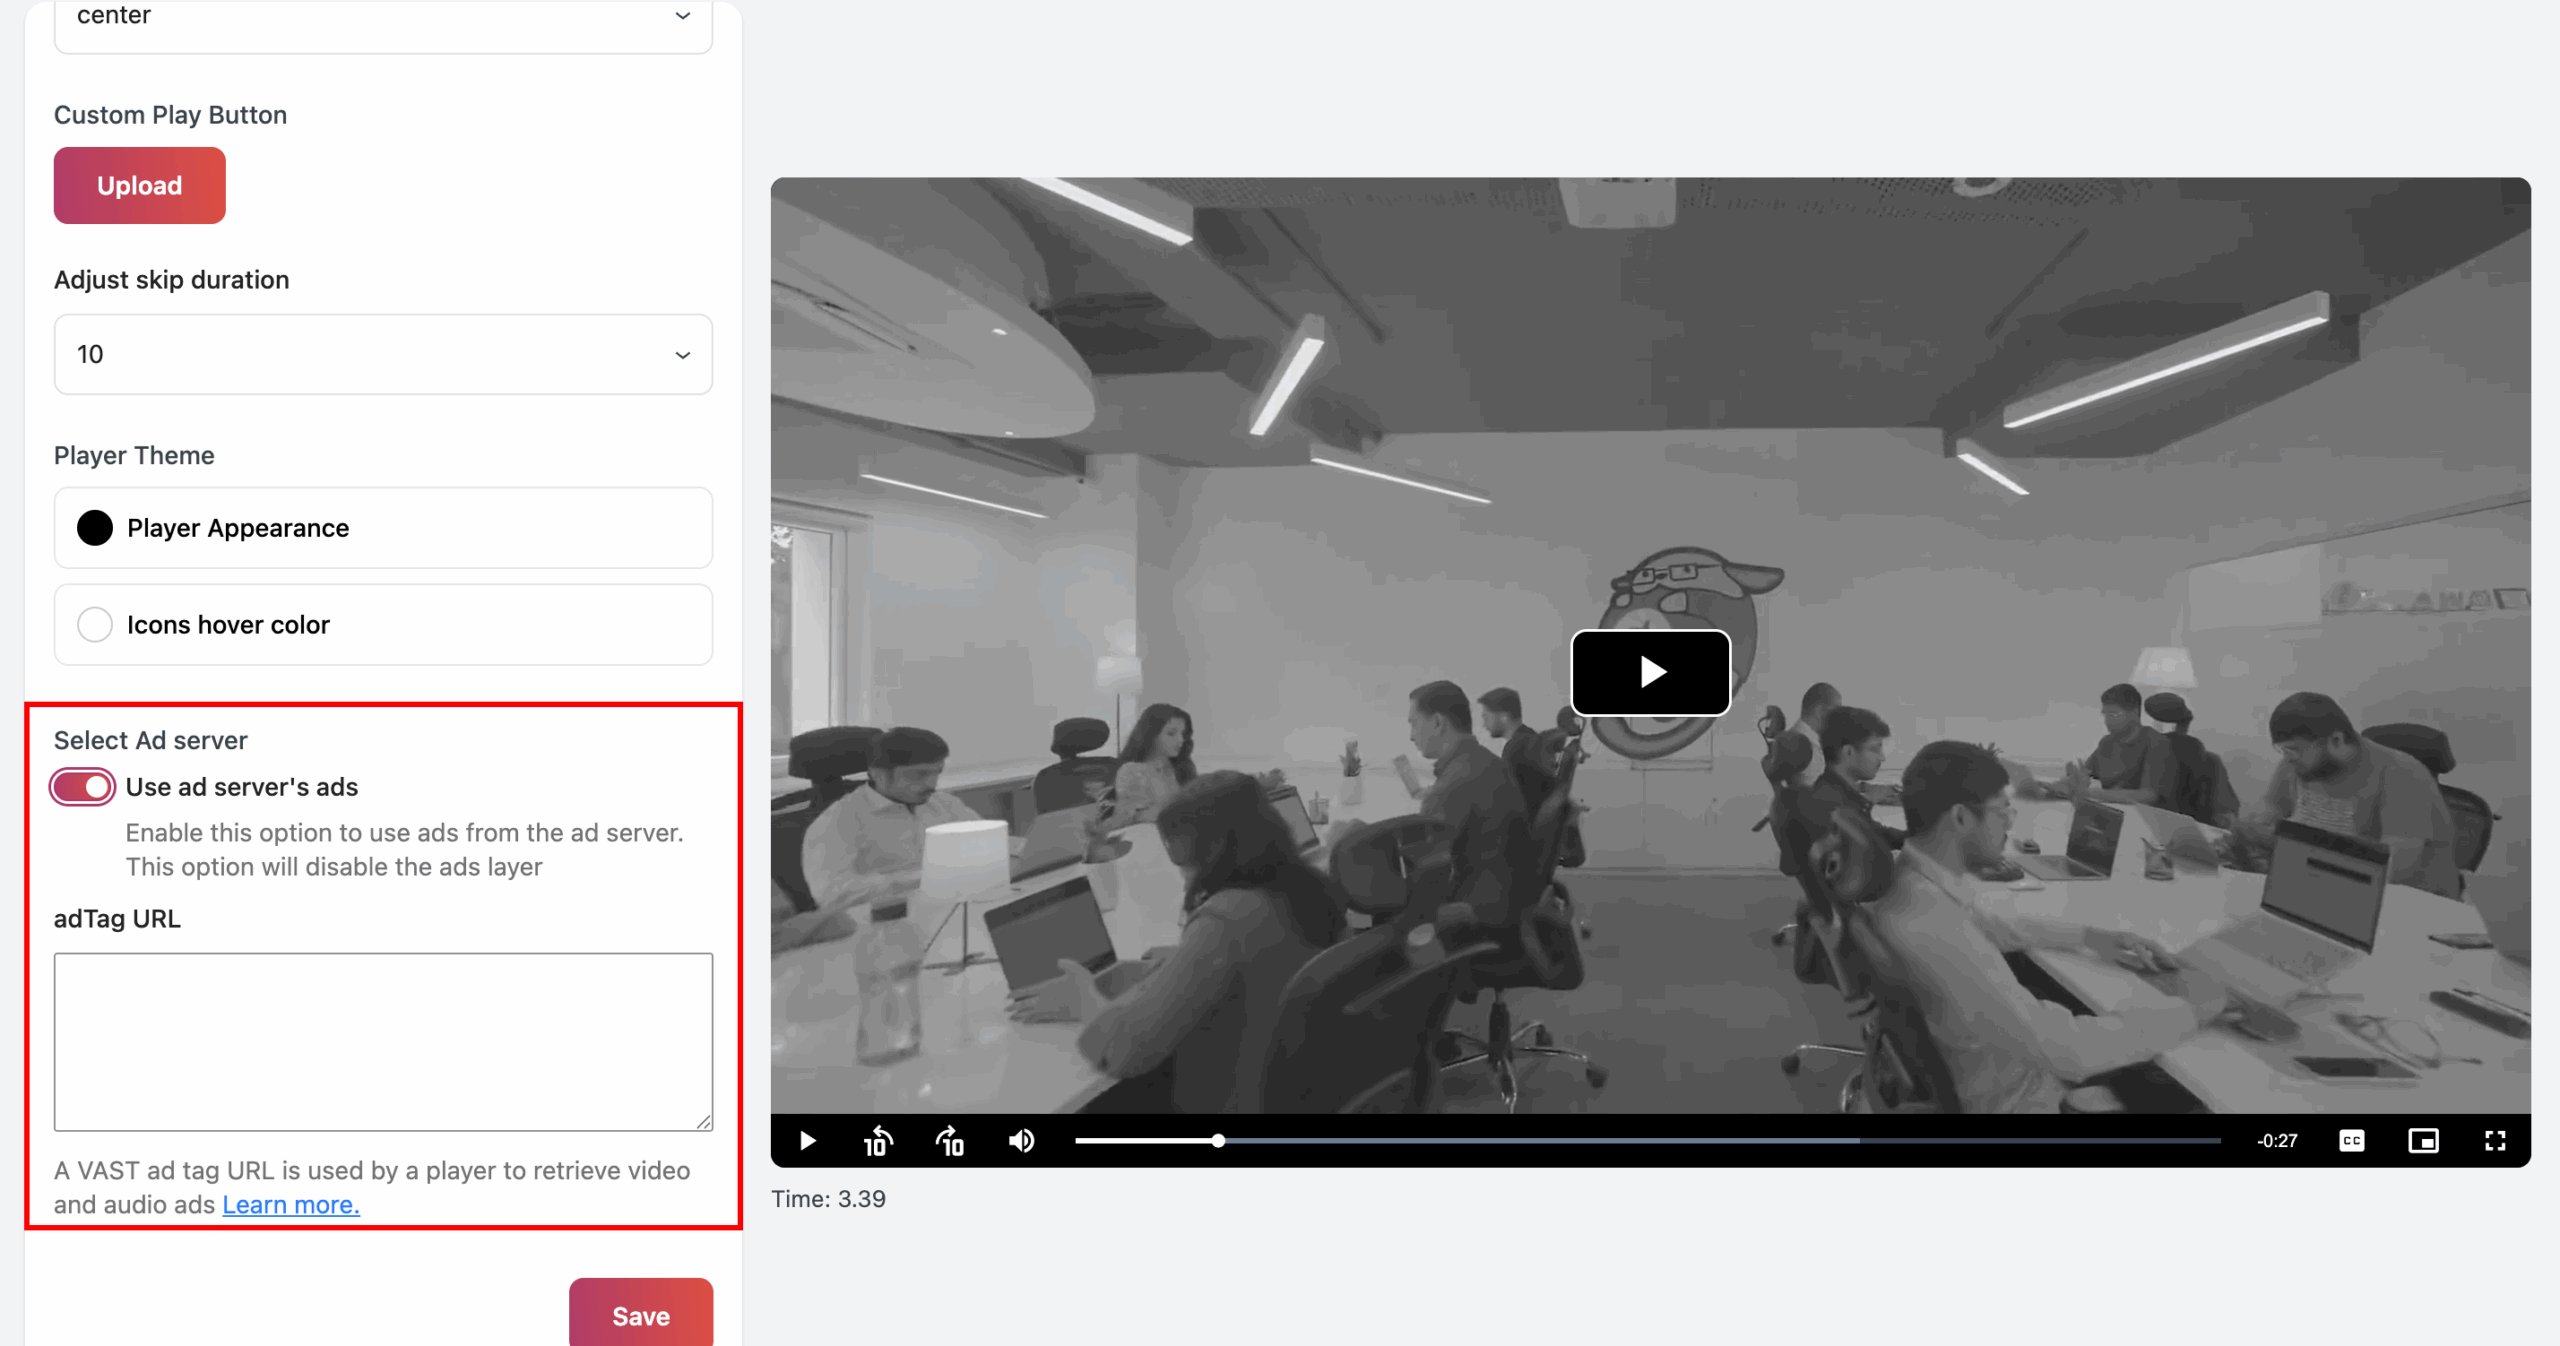
Step 5: Save Settings
Once enabled, third-party ads will override any self-hosted ads added through the Ads Layer.