Ninja Forms is a beginner-friendly WordPress form builder that lets you create professional forms using a simple drag-and-drop interface. GoDAM Ninja Forms integration enables you to capture leads directly from videos when embedded as an interactive video layer. The integration’s form recorder feature allows users to record or upload videos right inside the form, from their webcam, screen, or local files. It’s perfect for use cases like video job applications, customer feedback, identity verification, and auditions. All form entries are conveniently accessible from the Ninja Forms submissions dashboard.
Requirements
To follow this tutorial, you will need an account with:
How to integrate the Ninja Form inside a video at a specific timestamp
Step 1: Create Your Ninja Form
- Navigate to Ninja Forms: In your WordPress admin dashboard, click Ninja Forms from the left sidebar.
- Create a New Form: Click Add New, choose a template or start blank, and give the form a descriptive name.
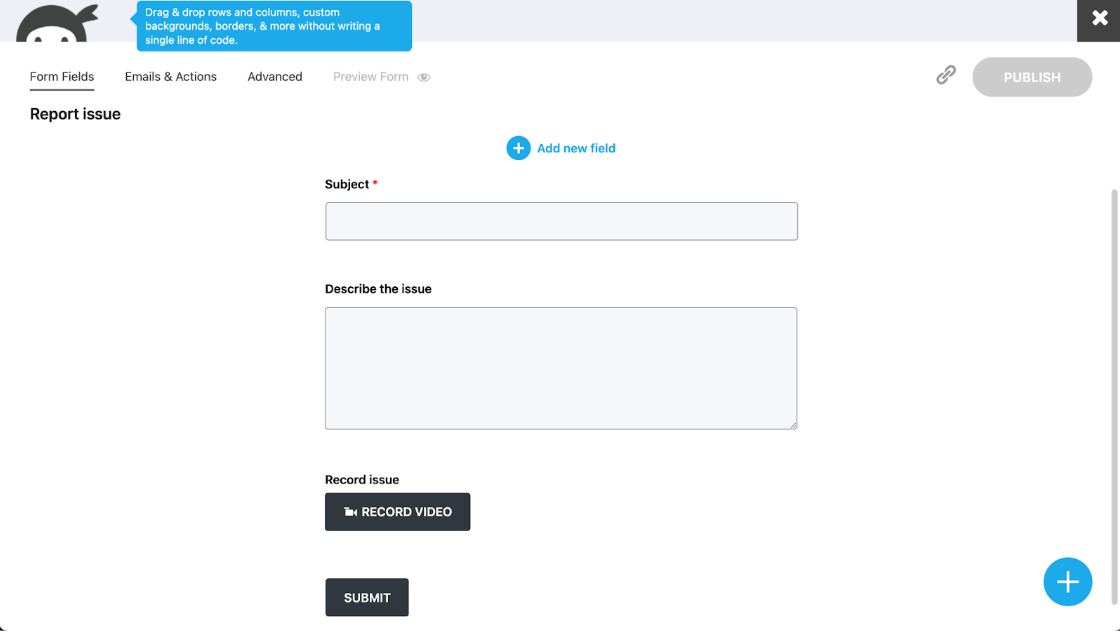
- Design Your Form: Use the drag-and-drop builder to add fields like text, email, dropdowns, checkboxes, file uploads, dates, numbers, hidden fields, HTML, or submit buttons.
- Configure Settings: Set up validation, required fields, success/error messages, entry storage, email notifications, and optional redirect pages.
- Publish: Click Publish to make your form live.
Step 2: Add Ninja Form to Your Video
- Open the Video Editor: In your GoDAM dashboard, select the video you want and click Edit.
- Position the Form: Select the timestamp where the form should appear.
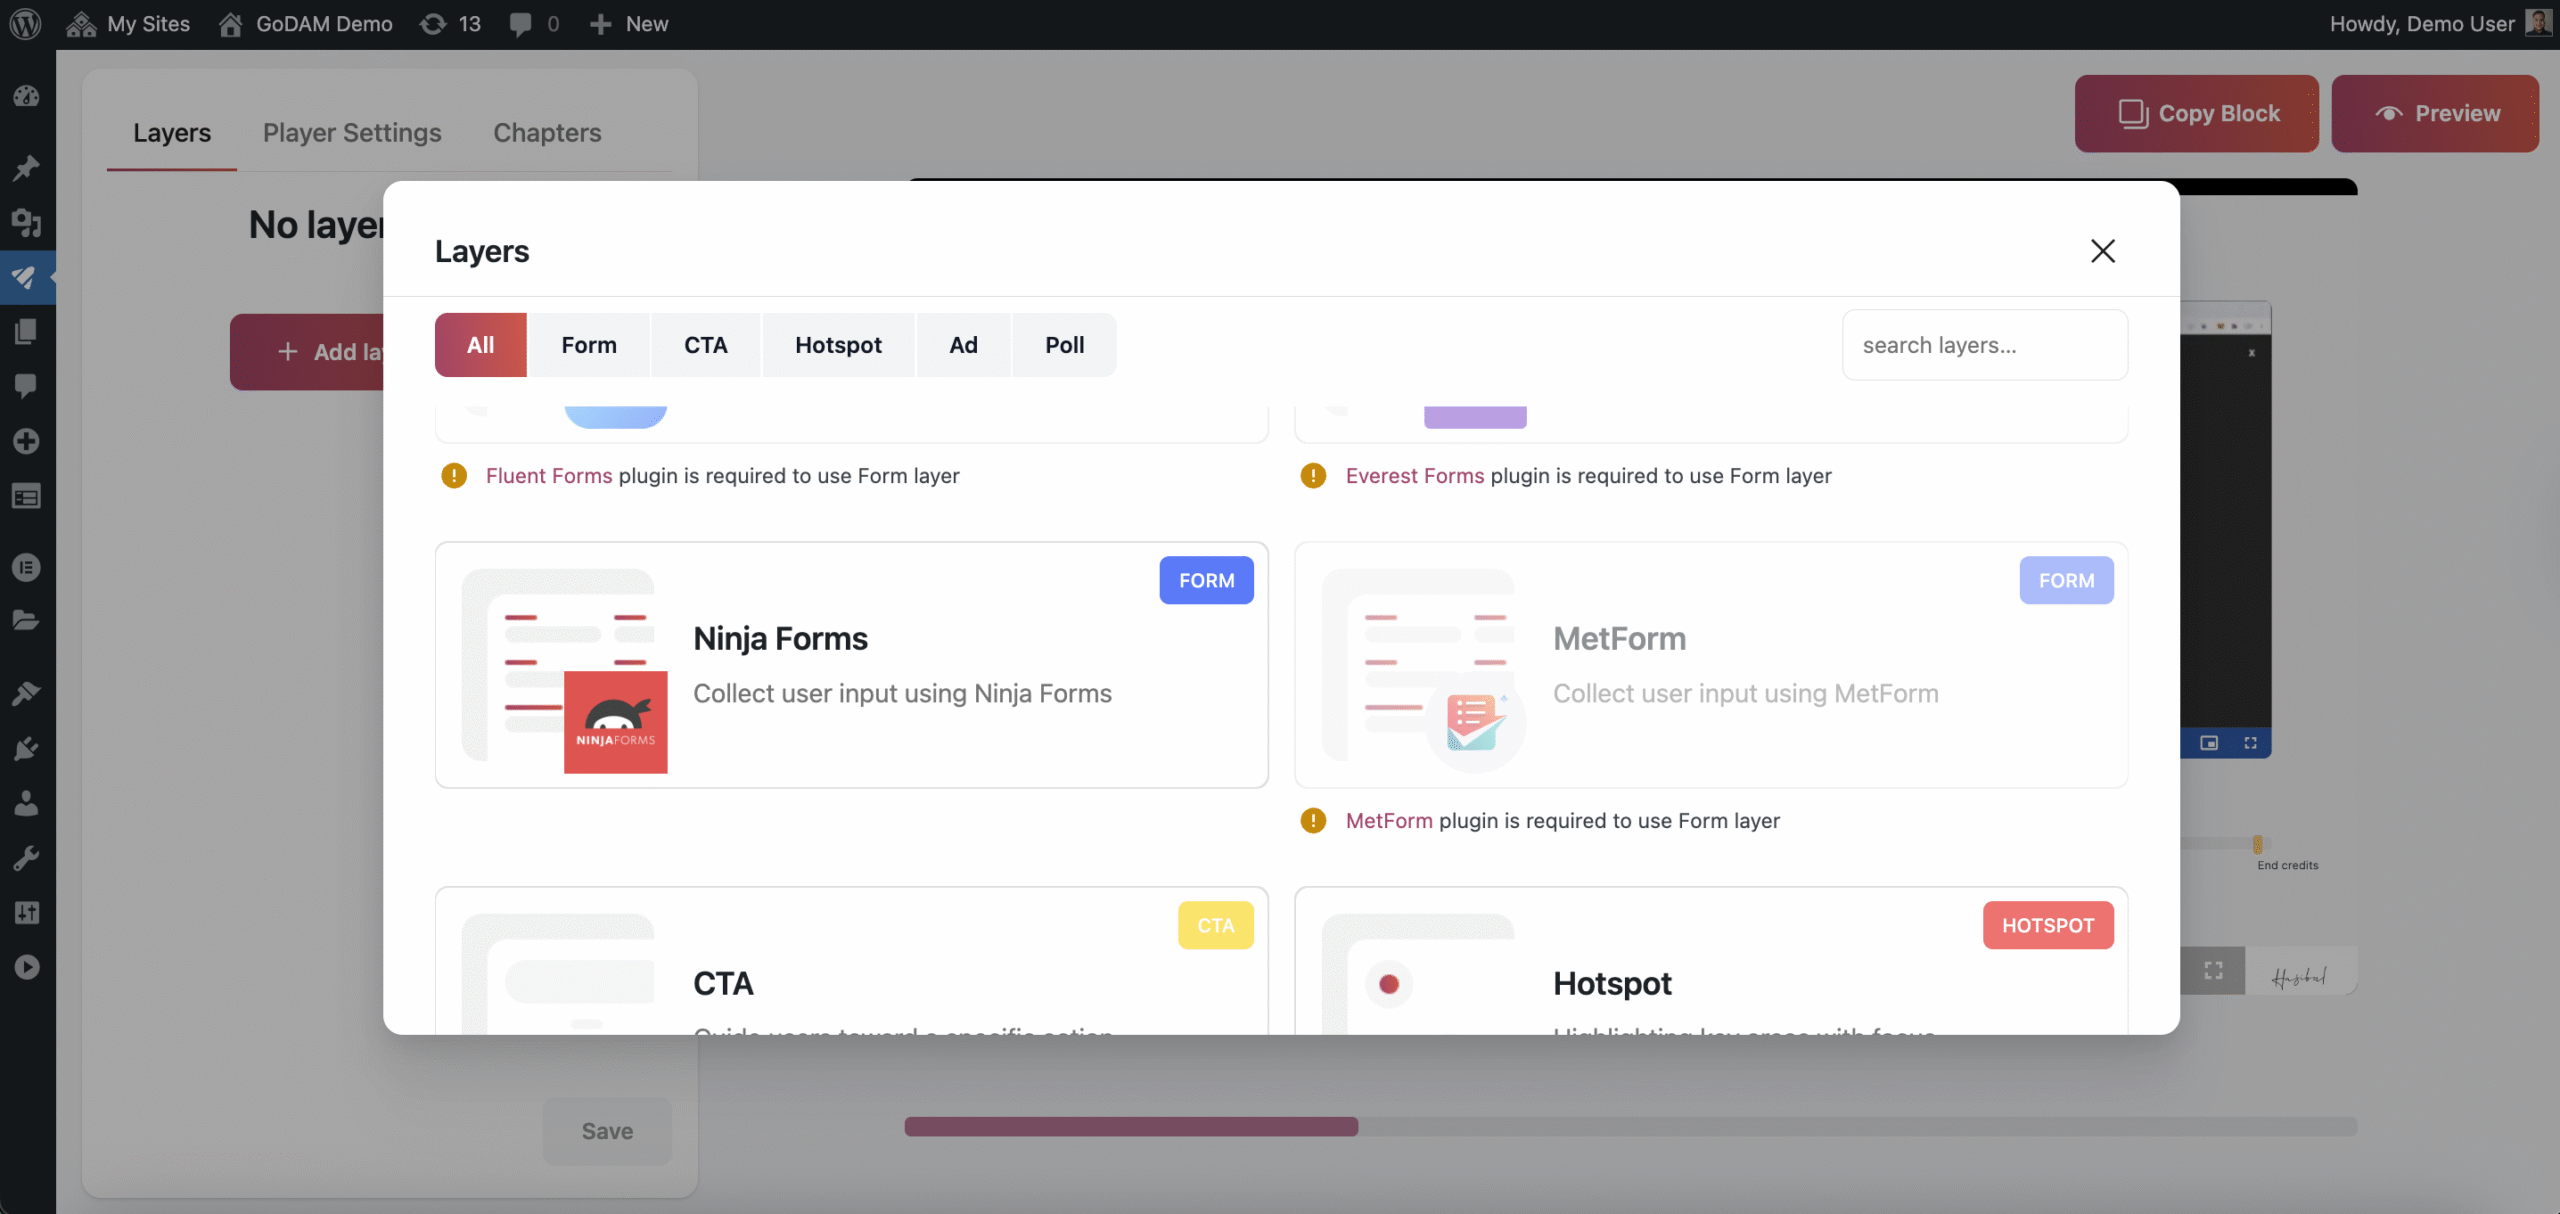
- Add the Form Layer: Click Add Layer, choose Ninja Form, and open the form selector.
- Select Your Form: Pick your Ninja Form from the dropdown. A preview will show how it looks to viewers.
Step 3: Configure Display Settings
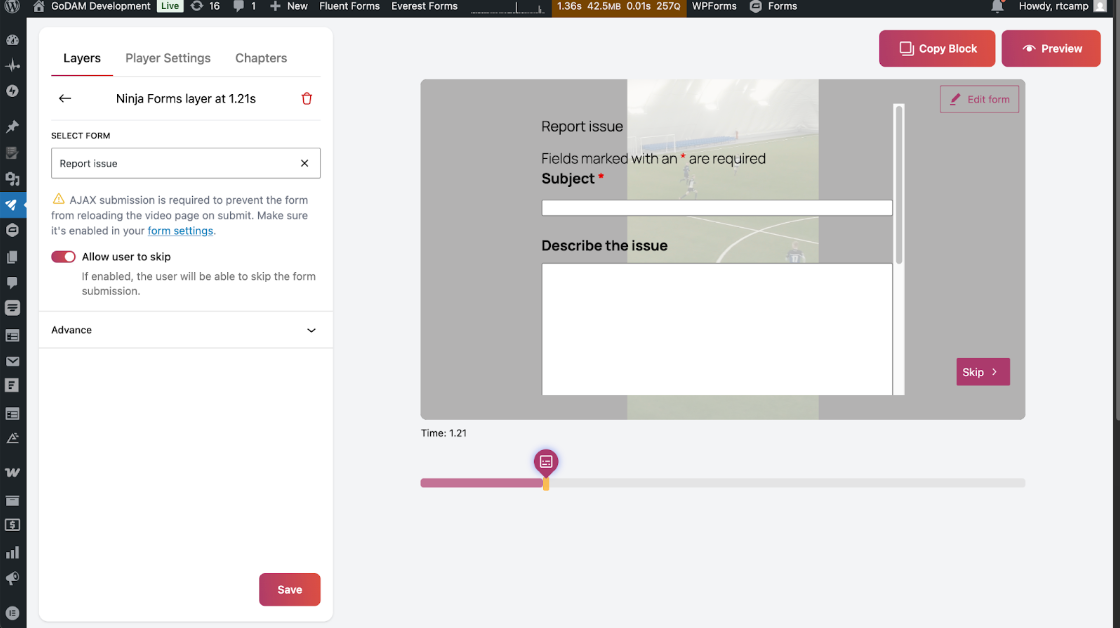
- Form Behavior: Decide if viewers can skip the form or must complete it.
- Timing: Edit display timestamp to a suitable position.
- Add background: You can add a background to the form to make the background less distracting.
- Preview & Test: Check how the form appears in the video and test submissions to ensure all fields work.
- Publish: Publish your video with the interactive form.
Step 4: Add your GoDAM video to a page or post
- Go to WordPress Gutenberg editor.
- Search for the GoDAM video block.
- Select the video you just added Ninja Form layer.
- Publish your post.
How to Integrate GoDAM Recorder Field with Ninja Forms
Step 1: Create a New Ninja Form
Open Ninja Forms → Add New and create a form with your desired fields (e.g., name, email, dropdowns, etc.).
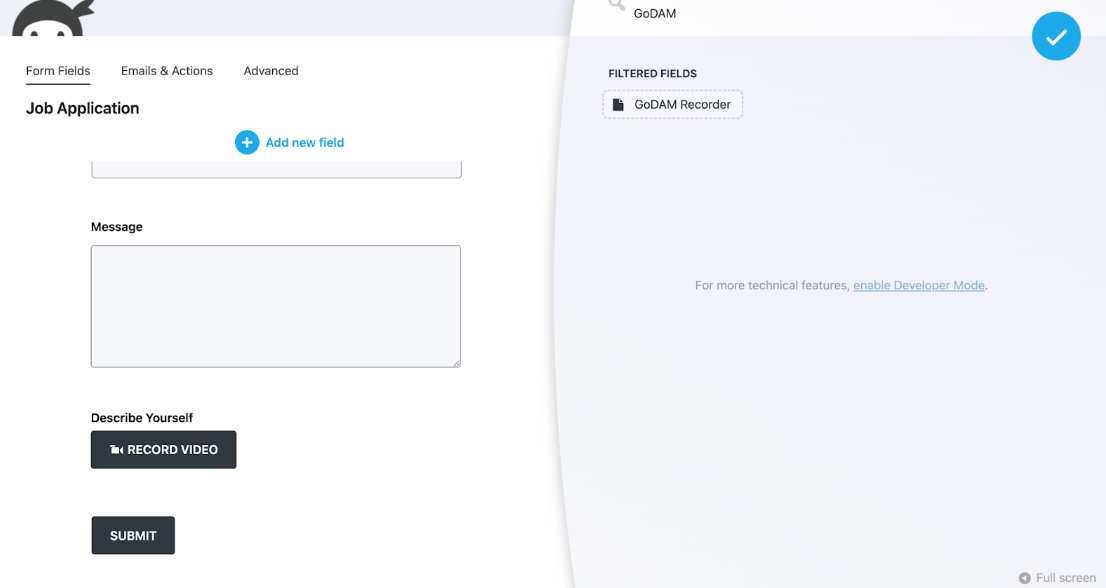
Step 2: Add the GoDAM Recorder Field
From the available field types, locate the GoDAM Recorder field and add it to your form. This custom field enables users to record webcam videos, capture screen recordings, or upload video files directly through the form interface. Configure any specific settings for the recorder if needed, then save your form.
Step 3: Embed the Form on Your Site
Once your form is ready, embed it into posts or pages. Ninja Forms provides both a shortcode and a block for easy placement.
Step 4: Test the Recording and Submission Workflow
Before going live, perform a test submission, record a short video (webcam or screen capture), fill out other required fields and submit the form. Confirm that the video uploads successfully and can be played back in the Ninja Forms Submissions dashboard.