
The GoDAM Image widget places an interactive image, complete with the hotspot and product layers you authored in the GoDAM Media Editor, anywhere on an Elementor page. It’s the Elementor counterpart of the GoDAM Image block, and it renders through the same GoDAM front end, so the same image looks and behaves identically wherever you place it.
The widget picks the image and decides whether the overlay shows; the hotspots themselves are created in the Media Editor, not inside Elementor. Author them there first, then place the image here. Because the layers live on the image attachment, every widget using that image shows the same hotspots. The GoDAM Image widget is available in GoDAM 2.1 and later.
What you’ll need
- You’re on GoDAM 2.1 or later, installed and connected to your account.
- Elementor is active.
- You have an image in your media library, with hotspots already authored in the GoDAM Media Editor. A widget pointed at an image with no layers simply shows the image.
- For product hotspots: the GoDAM for Woo add-on active, with WooCommerce and a valid GoDAM API key.
How to add the widget
Step 1: Open the page or post you want to edit in Elementor, or create a new one.
Step 2: In the widget panel, search for GoDAM Image. You’ll find Image under the GoDAM widget category — hotspot and shoppable find it too.
Step 3: Drag the widget into the section or column where you want the image. Before you choose an image it shows an Add Image Here placeholder, prompting you to select one in the Image Selection panel.
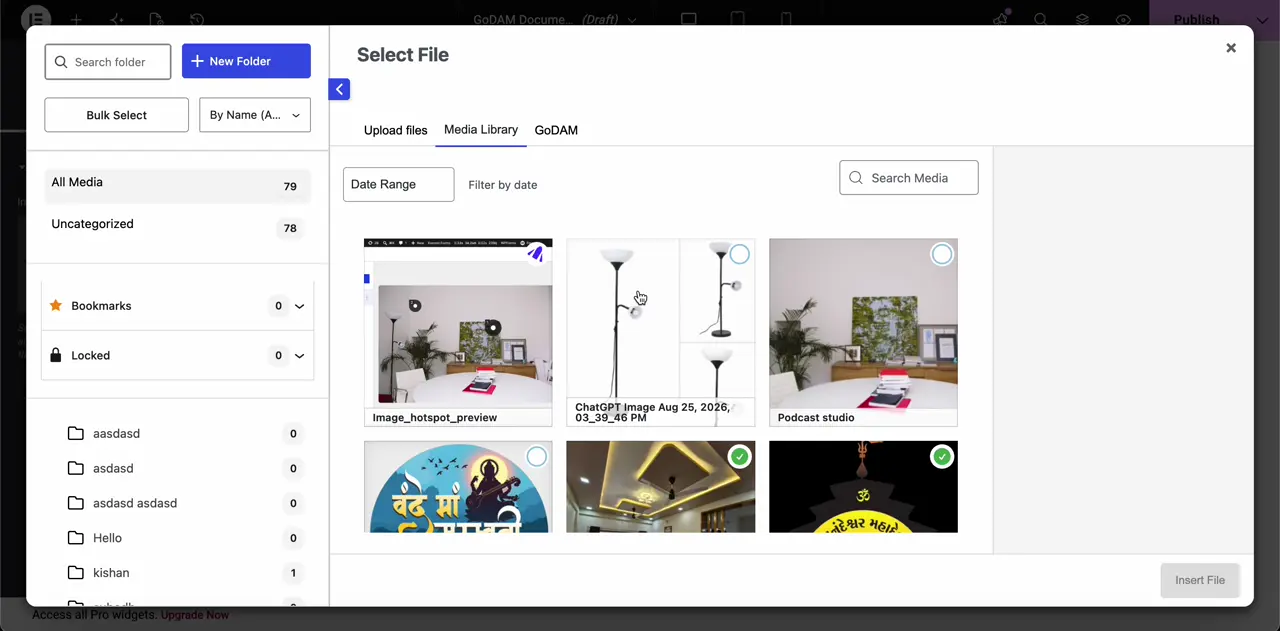
Step 4: In the Image Selection panel on the left, use the Image control to choose an image from your media library or upload a new one. Only image files are supported.
Step 5: Leave Show image layers on to overlay the authored hotspots. The toggle appears once an image is selected. Elementor’s preview renders the real front end, so the markers show up in the canvas as they will on the live page.
Step 6: Update or publish the page.
Widget settings
Image Selection section
- Image — the image to display. Hotspot and product layers authored in the GoDAM Media Editor are overlaid on the front end. Image files only.
- Show image layers — overlays the authored hotspot and product layers. On by default, and only shown once an image is chosen. Turn it off to display the plain image at this one placement; the layers themselves are untouched, so other embeds keep their hotspots.
Alt text is taken from the image attachment’s own alt text, so the widget has no alt control — matching the block. Set it on the attachment in the media library.
Elementor’s own layout, spacing and advanced controls apply as usual.
Troubleshooting
The image shows but the hotspots don’t. Check Show image layers is on, then open the image in the GoDAM Media Editor and confirm the layers are there and saved. An image with no authored layers renders as a plain image.
I can’t find hotspot controls in Elementor. There aren’t any — the widget only selects the image and toggles the overlay. Open the image in the GoDAM Media Editor (from the media library, or GoDAM → Media Editor) to add or edit hotspots, then select that same image here.
The widget shows “Add Image Here” on the canvas. No image is selected yet. Pick one in the Image Selection panel. That placeholder is editor-only and never renders on the live page.
The hotspots I just added aren’t showing. The widget reads the layers from the attachment, so save in the Media Editor first, then reload the Elementor editor.
Product hotspots render as plain hotspots. The GoDAM for Woo add-on is inactive or its API key is missing or expired. Check GoDAM → Settings.